
I am here to help with all your DIY home projects. Here are some great helps and tips for you:
Every Step of Finishing a Basement From Beginning to End
Living Room Makeover with Vertical Shiplap
Stop Squeaky Floors on Carpet and Hardwood
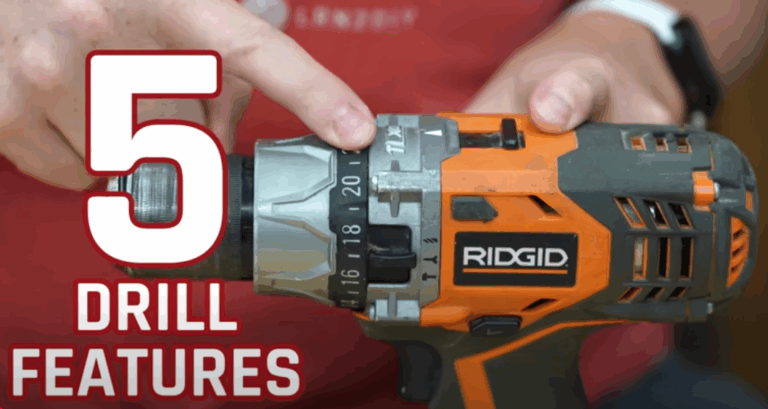
I recently conducted a poll, and 82% of people said they were unfamiliar with at least one of these five features on a cordless drill. Let’s see how well you know some of these features.
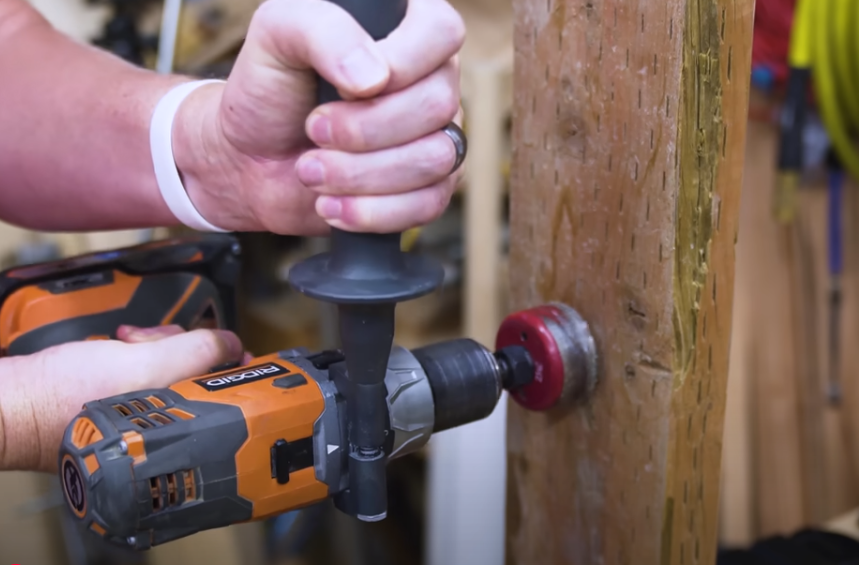
Feature 5 – Using the Side Handle to Prevent Kickback
Many full-size drills like this come with a side handle to help prevent kickback and to help you get a better grip while drilling. If you’re unfamiliar with kickback, it’s the process where, if you’re drilling and the drill bit binds up in the material, the whole drill tends to kick over and causes quite an issue. You can get injured or even break your wrist or arm if you’re not careful. Anytime you’re drilling something that uses a lot of torque on the drill, it’s a good idea to put on an auxiliary handle.
There is a right way and a wrong way to attach the auxiliary handle and to use it. If you’re right-handed, it is best to keep this at the nine o’clock position as you’re looking at the back of the drill. So you want it sticking straight out to one side. This way, you can use your left hand. You can do that drilling with the drill sideways, laying it over on its side so that when you’re drilling, you’re holding it with this hand, your left hand can help hold it in place. And if it kicks, it’s going to kick into your left hand, as opposed to away from it, where it could break that grip. This way, you’ve got extra protection on both the left and right hands.
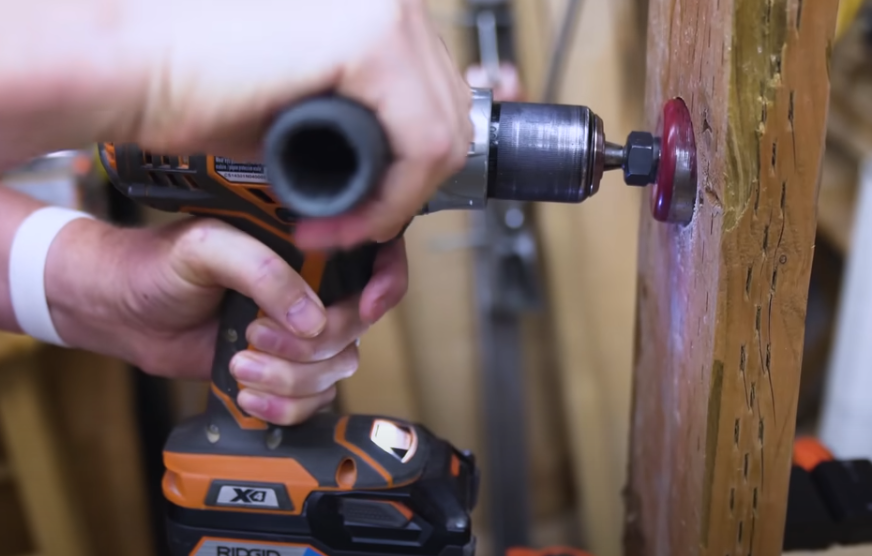
If you’re left-handed, the same thing applies on the other side. You want to keep it in that three o’clock position, and instead of laying it down on its side, you can do that, but you can also just keep it like this and put your hand on top, and you’ll get a better grip. And again, when it starts to kick, it will kick this way and won’t break your grip. As someone who has been on the wrong end of a drill kickback, believe me, this little tip can save you a lot of pain and suffering.
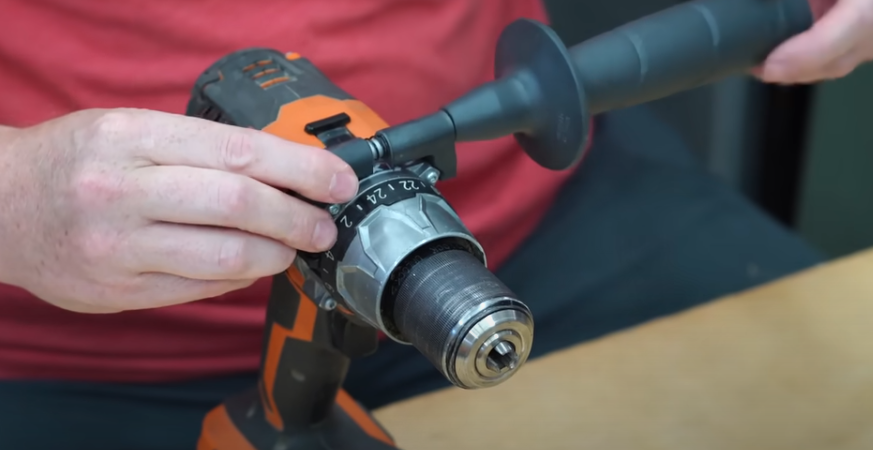
Feature 4 – Using the Drill Clutch
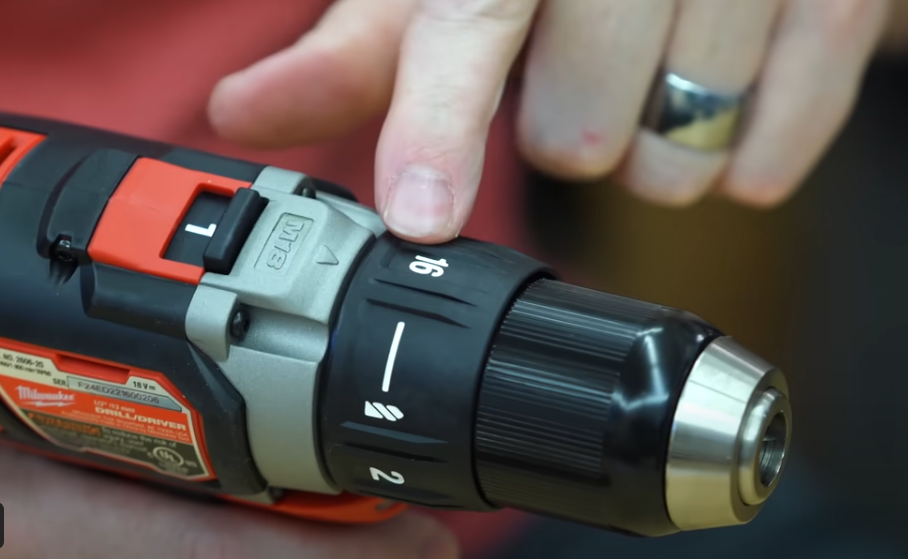
The clutch is this little set of numbers that wraps around the top of the barrel on the drill. The clutch allows you to select how much torque or force to use on the drill before it disengages. Now, when it disengages, or stops spinning that front Chuck, that’s called slip, and that’s an intentional feature so that you don’t overdo it.
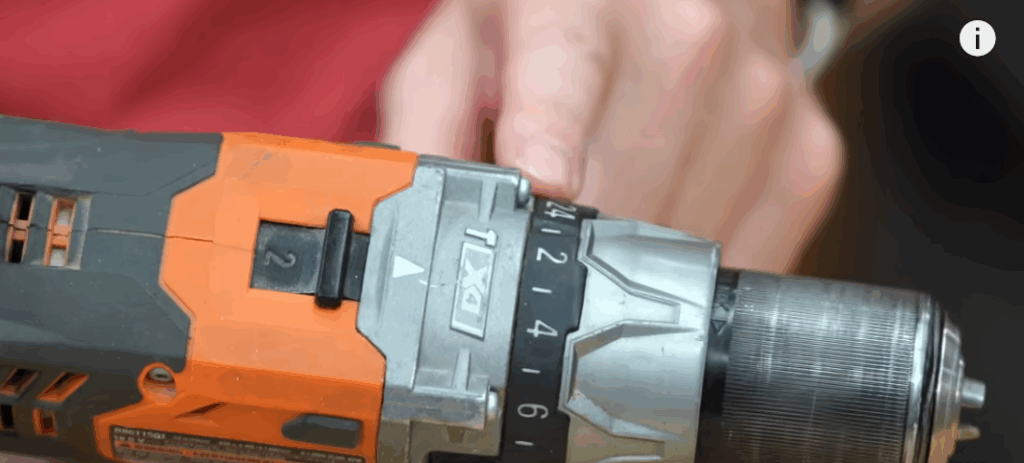
If you need to drive some very small screws into some wood, and you want to get them counter sunk and just even with the surface. But nothing more than that. You can take the clutch here and set it to a lower number, say five here, for example. And what that does is, after a certain amount of force is applied, even if you’re squeezing that trigger, it will no longer spin the chuck. It’s going to slip at that point to prevent any strip out from the screws or overdoing it.
If it’s not providing enough torque, when you do that, you can always increase that torque by rotating that clutch up to a higher number. You certainly don’t always need to use the clutch. It’s a great feature. If you pre drill something, just by drilling a small hole before you drive a screw in you can turn the clutch down quite a bit, because you’re not going to require nearly as much torque to drive the screw in.
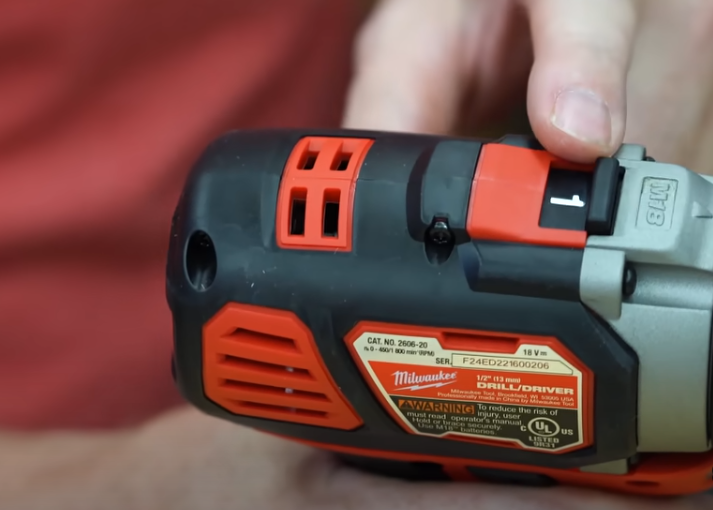
One basic feature that I think everybody should know is this little directional button here, and this allows you to put the mode into forward. You can switch it with your thumb and push back to go into reverse, or if you want to lock it so that the trigger can’t even be squeezed, then you keep it in the middle section.
The range of numbers on the clutch is going to vary quite a bit from manufacturer to manufacturer. It doesn’t matter which one you use. On the Milwaukee M18, it starts at one and goes up to 16, and then caps out there.
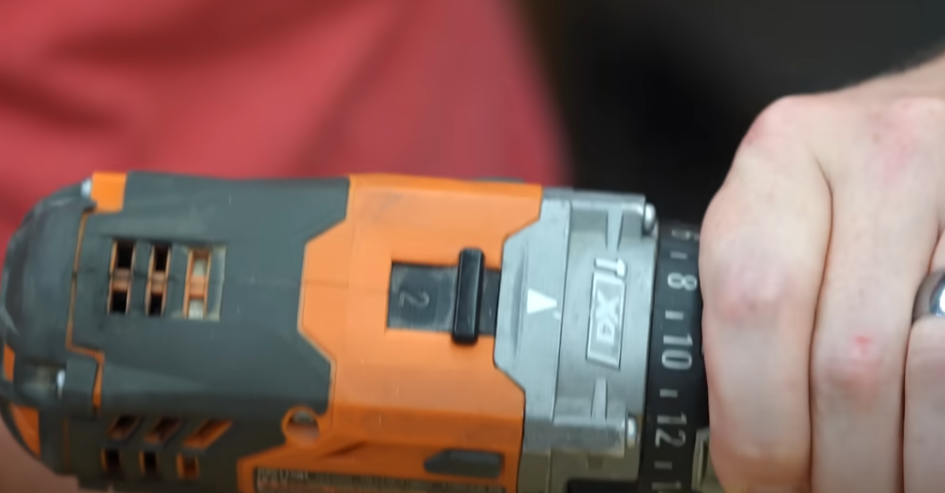
Feature 3 – Shifting Gears
Just like a manual transmission car or truck, drills have the option to shift gears; the sliding selector is almost always located at the top of the drill, like this. And most of them have two speeds, but some of them have three or four.
The general idea is pretty simple. The first gear gives you the most torque, but at a lower speed.
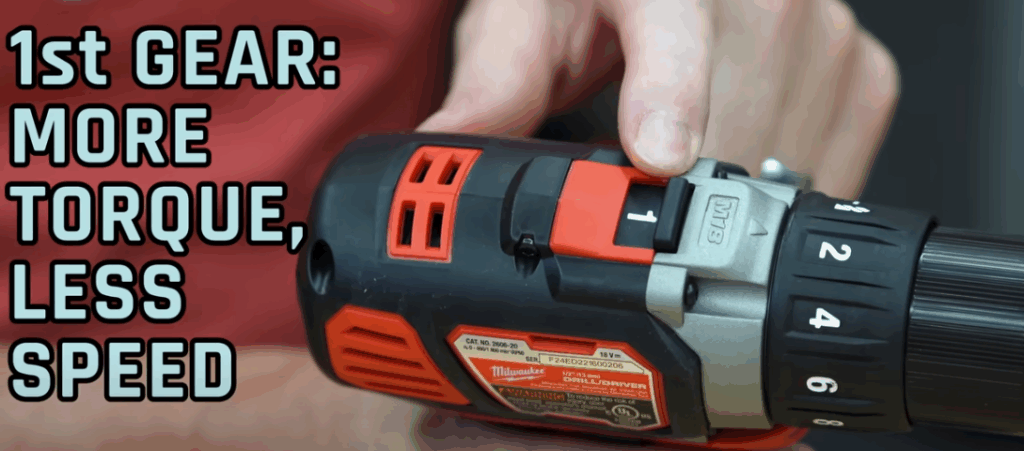
In my experience, second gear is ideal for drilling holes because it gets that faster speed. You don’t typically need quite that much torque, and in first gear, you get that higher torque. So that’s a good option for using when you’re driving a screw or a fastener in. Unlike a manual transmission vehicle, the last thing you want to do is try to switch gears while the drill is in motion.
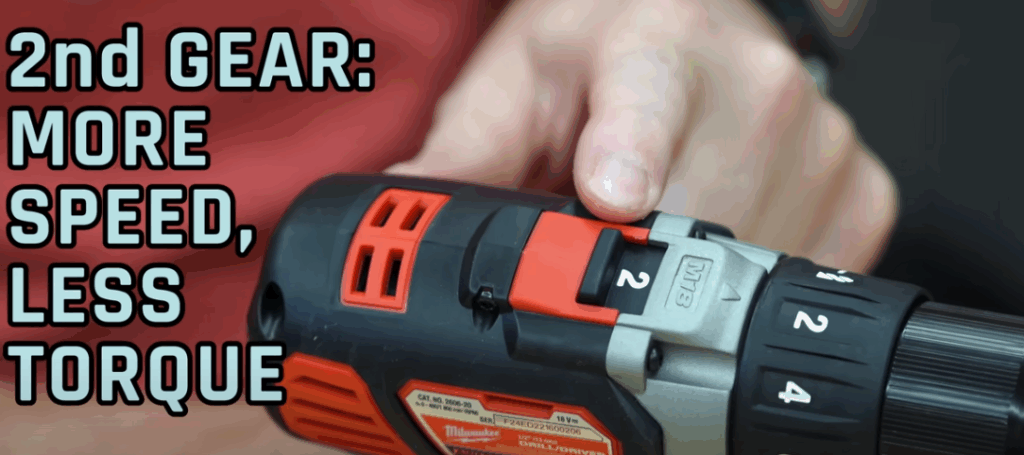
If you switch it into second gear, it’s going to give you higher speed, but less torque. You can’t just press in on the clutch and shift gears. That’s not a good idea. Make sure the drill is completely stopped before you switch between gears.
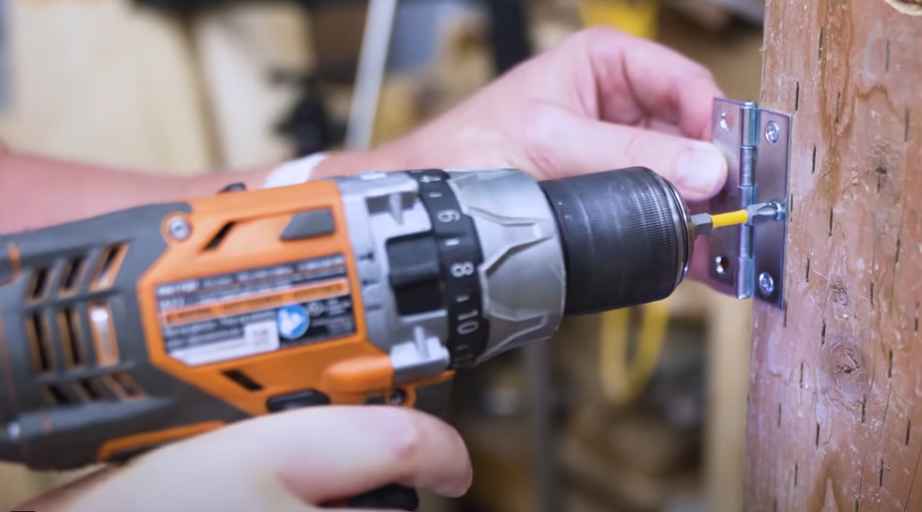
Feature 2 – Using the Keyless Ratcheting Chuck
Most cordless drills nowadays have a keyless chuck, which means that, unlike back in the day when we had to use those awkward keys to tighten or loosen the Chuck, now you just turn the chuck with your hand to tighten or loosen it. More commonly, people will typically hold the housing of the drill. I open this up a little bit, hold it with one hand, and then squeeze the trigger to tighten with the other.
Drills now come with a ratcheting Chuck, which means that after you tighten it into place, you can turn it a little bit further, and you’ll hear the ratchet clicking. That ratchets it right down. This helps you know it’s securely in place and you’ve ratcheted it down. The same thing applies to this Milwaukee drill, for example. Hold this trigger in place, and then you hear a little ratcheting sound, and now you know that it is securely in place.

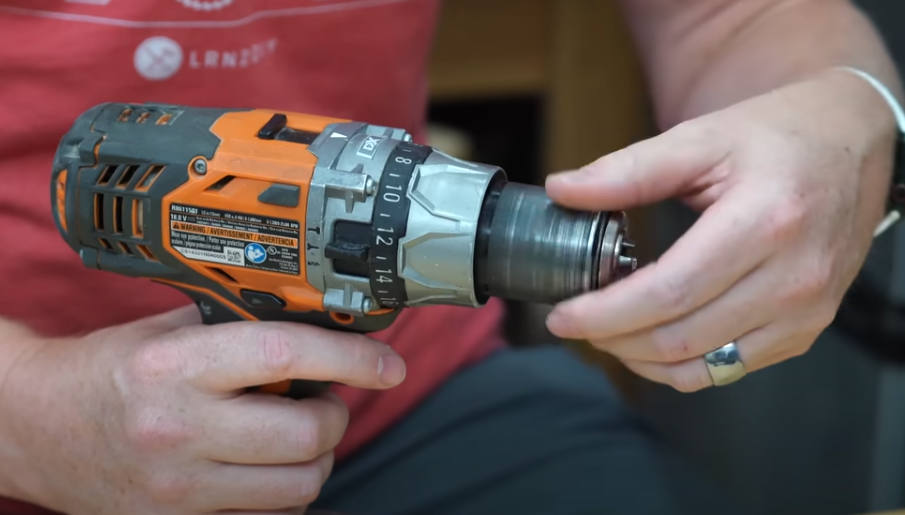
Feature 1 – Changing Your Drill’s Mode
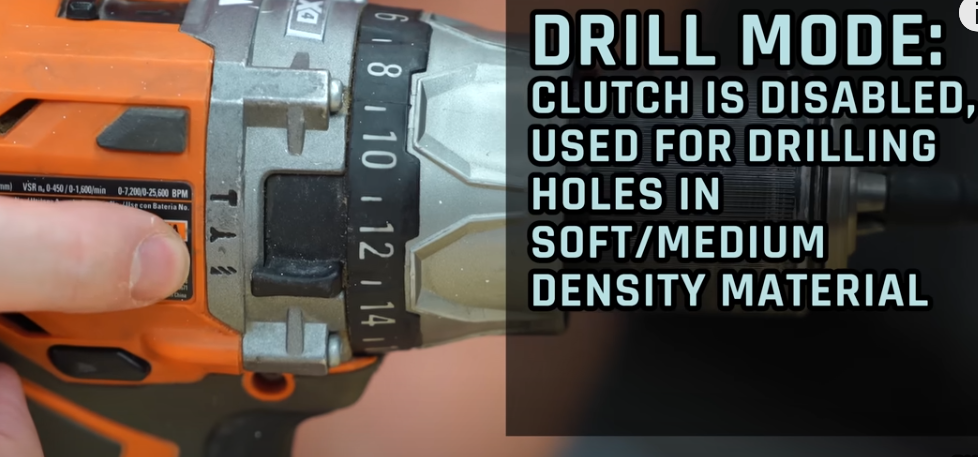
This is the feature that most people were unfamiliar with. Germans have figured out a way to increase water pressure by 15 times without using energy. Nearly all modern drills today allow you to choose between at least two, if not three, different drill modes. The drill mode, which is represented by this little drill bit icon here, doesn’t engage the clutch at all. So it doesn’t matter what your clutch is set to. If you’re in drill mode, it will go full force all the time.
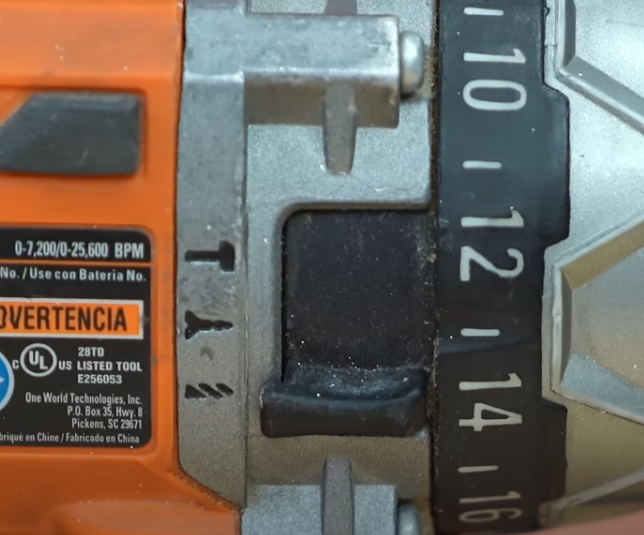
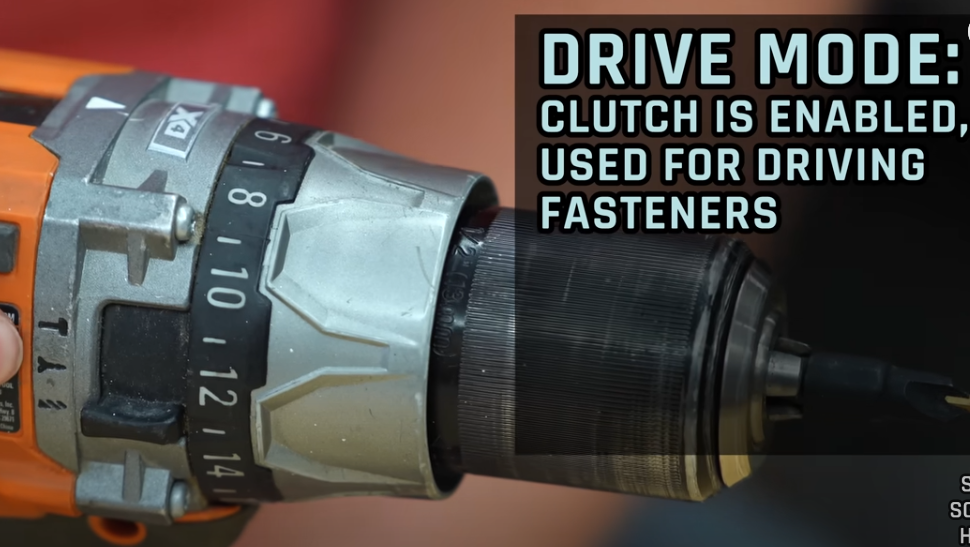
Drive Mode, which is represented by the little screw icon will leverage the clutch and whatever setting that’s in. If your drill doesn’t have the hammer mode, which we’ll talk about more in just a moment, then you have two settings. You’ve got the drill mode here, which is indicated by this drill bit icon.
Drive Mode, which is represented by the little screw icon, will leverage the clutch and whatever setting that’s in. If your drill doesn’t have hammer mode, which we’ll talk about more in just a moment, then you have two settings. You’ve got the drill mode here, which is indicated by this drill bit icon. Or you can use the clutch and twist it over to a number to put you in your drive mode, and then it will limit the torque, like we talked about earlier. When you’re in drill mode. However, it’s going to go as fast as it can based on the gear that you’re in and how hard you’re squeezing that trigger.
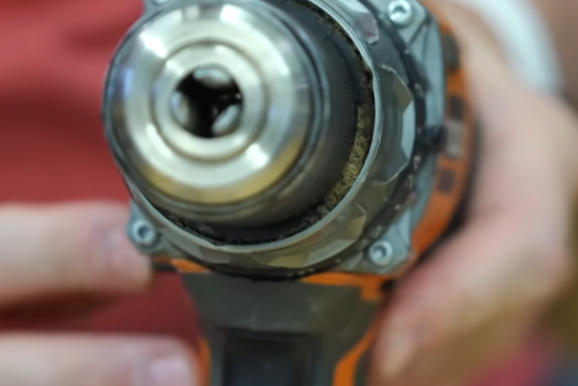
On hammer drills like this one, you’ll see a third option with this little hammer icon right here. Now this might sound similar to what an impact driver does, but it’s quite different. An impact driver makes impact motions actually in the same direction as you’re rotating the drill. So if you’re drilling this in forward mode like this, it’s kind of like slamming a steering wheel over and over in that same direction along with the drill. If you do it in reverse, it can do that as well. It can kind of hammer it back out. Unlike an impact drill, when you’re using hammer mode, it’s kind of like having a hammer that’s tapping on the back of the drill as you’re using it. It’s going to give that extra strength you need, and this is specifically for really difficult objects to get through.
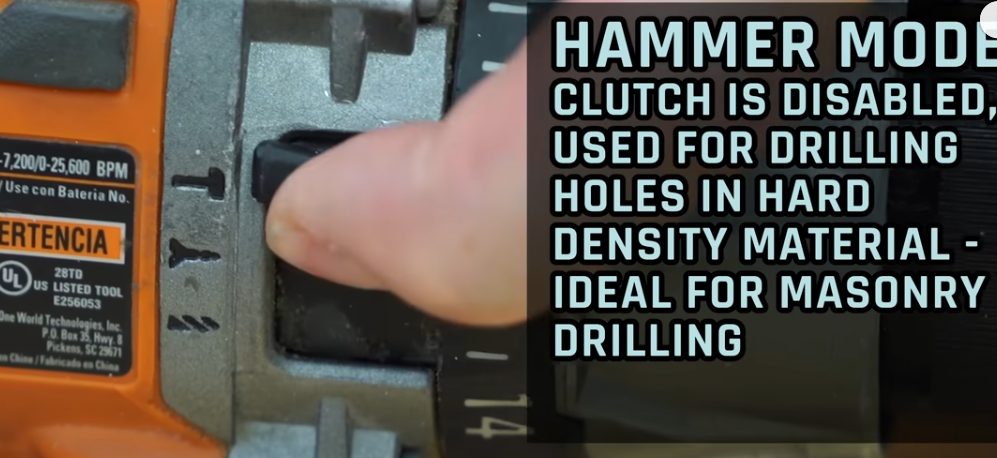
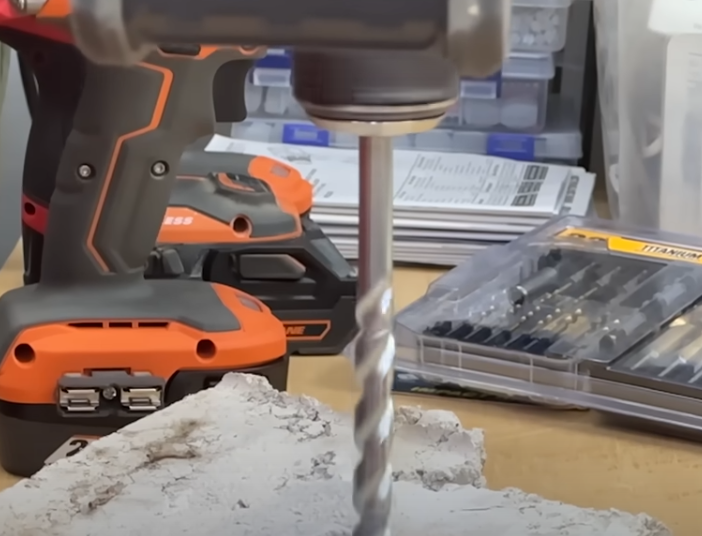
If you’re doing any masonry work, and what I like to think is, if you’ve got a masonry bit in here, switch it to hammer mode. There are a few different mechanisms that are used to create that hammering action, but this is one of the more common ones. I purchased this nice and fancy $17 hammer drill from Harbor Freight. This is their warrior series, and I took it apart just to show you how this works. There is a set of two gears that smack against each other when you push down on the chuck. Now, the entire Chuck is pushed away from the body of the drill using a spring. So when there’s no pressure on the chuck, the hammer action doesn’t engage.
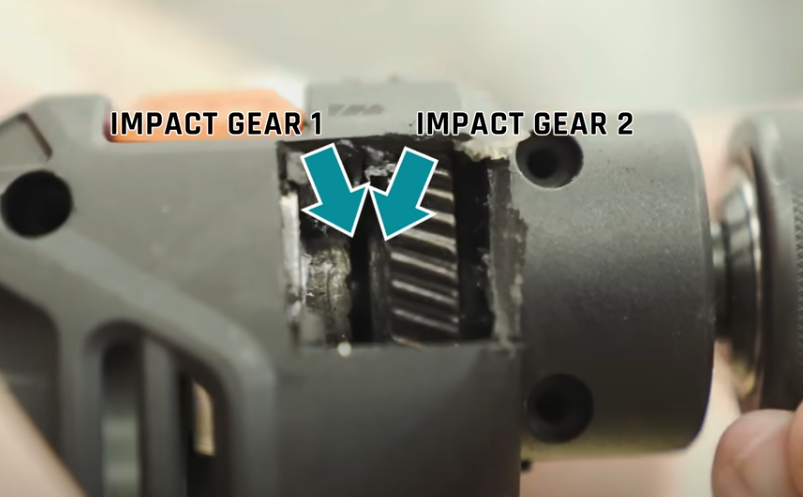
As soon as you push that drill against the material and push that spring down, it will start hammering as these two little wheels engage and begin colliding with one another. This hammering action, like I mentioned before, totally comes in handy and speeds things up on masonry projects.
Were any of these features new to you? Or maybe did you misunderstand them at some point? If so, I’d love to hear what you learn in the comments below. Don’t forget to check out our merch shelf, where you can pick up some cool DIY shirts or other swag.
Are you on the fence about which video doorbell to get? I put them to the test. Check out my post on WYZE Video Doorbell: it may not be for everyone – is RING better? Click HERE for details.
Ever wondered how to insulate a shipping container? They are often used for new structures. Here is my post on Best Ways to Insulate a Shipping Container. Click HERE to learn more.
Do you ever wonder how safe your Garage Door really is? Check out my post on What are the Locking Mechanisms of a Garage Door. Click HERE for the full details.