
I’ve got you covered on your home repairs and DIY projects. Check out some of my favorite posts to get you started.
How To Add an Electrical Outlet for a Wall-Mounted TV
Building a Woodshop from Scratch – Drywall, Mud, Tape, Paint, and Epoxy Flooring
DIY Home Projects You Can Do For Little Money
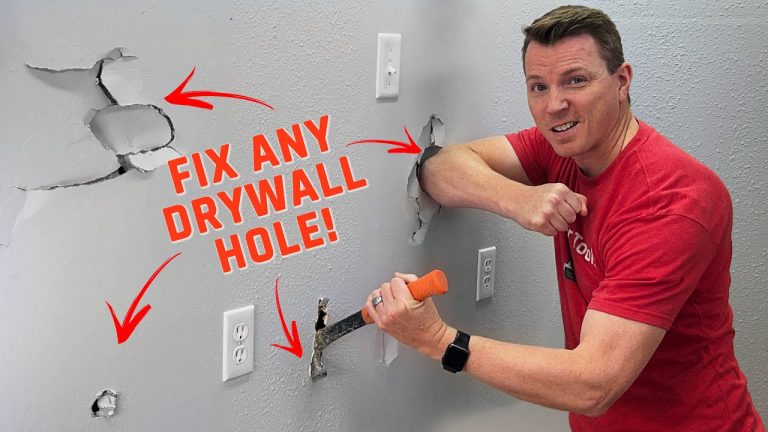
If there’s one thing we’ve learned from doing this video and blog post, it’s that drywall is amazing! It’s easily fixable. If you need to access a pipe or electrical, etc., in a wall, cutting a hole in the drywall is NOT the end of the world. If the kids are being crazy and damage a wall, it can be fixed! We know many people who are terrified of doing anything to their drywall, and we’d like to change that.
We’ll go over 4 types of holes and how to repair them. These methods will vary based on how large an area needs to be repaired, but rest assured, it CAN BE DONE!
After we’ve covered the 4 hole types, we’ll go over sanding, texture, and paint, so make sure to read to the end of the post!
1. Small Hole Repair
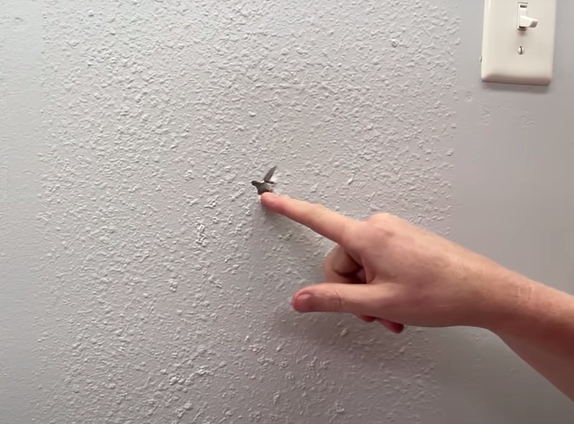
For a hole that is 1-1/2 inches, you can use drywall mud to fix it. This is inexpensive at the hardware store and an easy fix. Use a putty knife to fill in that hole with mud. You want to be generous in pushing the mud into the hole to make it nice and strong when it dries. There may be some bubbling on your first coat, which is fine. Just cover the hole as best you can and let it dry. Once it’s dry, you can sand down any uneven spots.
2. Fist-sized Hole Repair (3 Ways!)
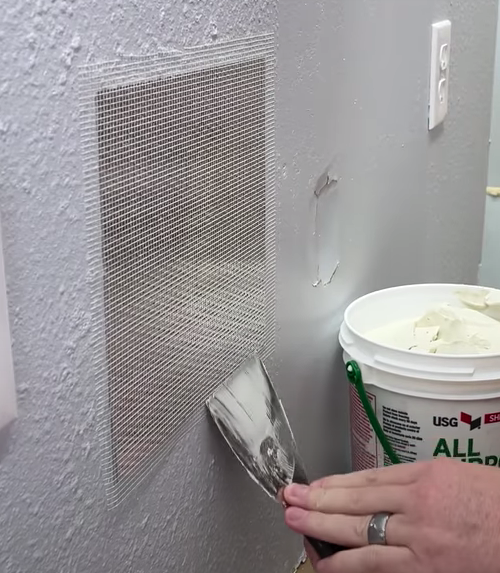
There are a few ways to fix this type of hole. The first one is to use a mesh adhesive patch.
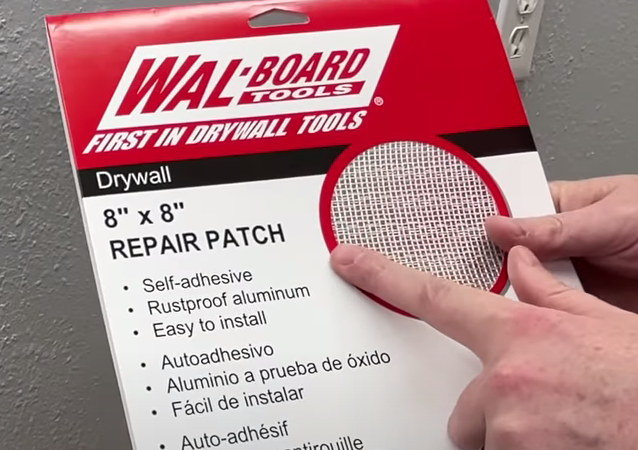
Clean up the edges of the hole using a utility blade- make sure any loose or damaged pieces of drywall are cut away, and then apply the patch.
Smooth out the patch as best you can to ensure there are no creases or wrinkles.
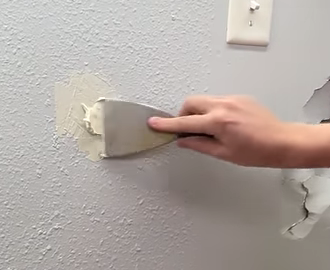
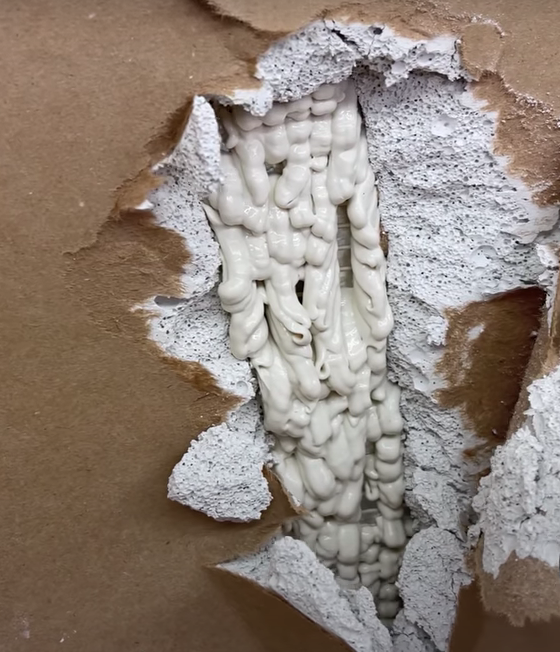
Once the patch is smooth, fill it in with mud. You’re going to be pushing a lot of mud into the area that has the hole. This will rebuild the drywall that’s missing.
This is what it looks like from the back- Play-Doh fun factory!
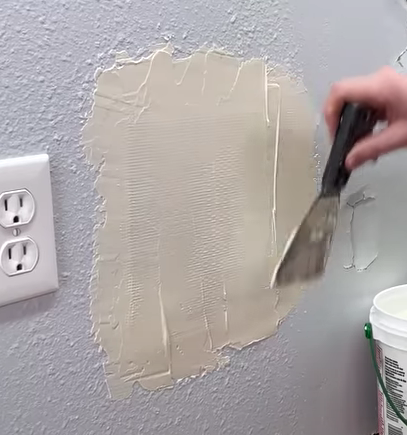
Continue to cover the patch with the mud, trying to get the area as smooth as you can. Let it dry.
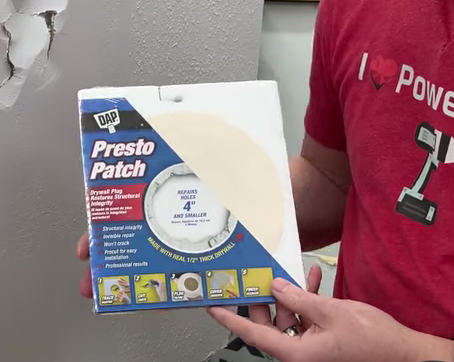
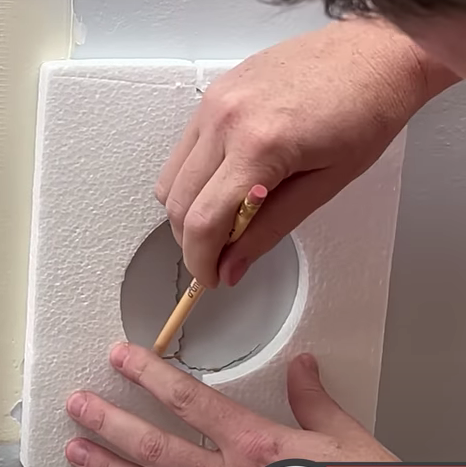
The second option with this size hole is to use a Presto Patch. The Presto Patch is a 4″ circle of 1/2″ drywall, and it’s got a section of paper that is used to blend it into the surrounding drywall.
Use the styrofoam template that comes in the kit. Trace around the template, and cut the hole with your utility blade.
Liberally apply mud all around the circle, outside of the circle where the paper will go, and then on the outside of the plug itself. Pay special attention to the top of the plug, where gravity makes it difficult for the mud to stay in the drywall hole. Make sure to get plenty of mud on the top!
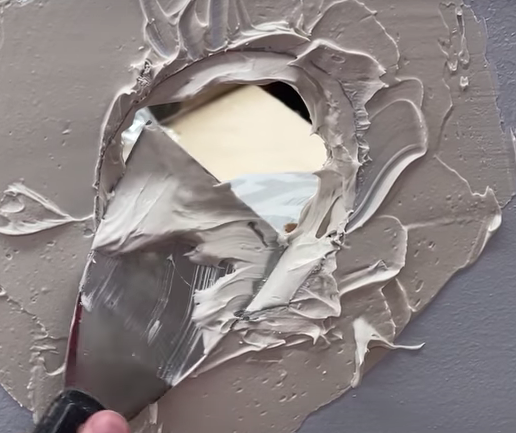
Push the plug in, and then use the putty knife to pull from the center outward to smooth the mud out from under the paper, and spread it back around the top of the paper to make it nice and smooth to match the contour of the wall.
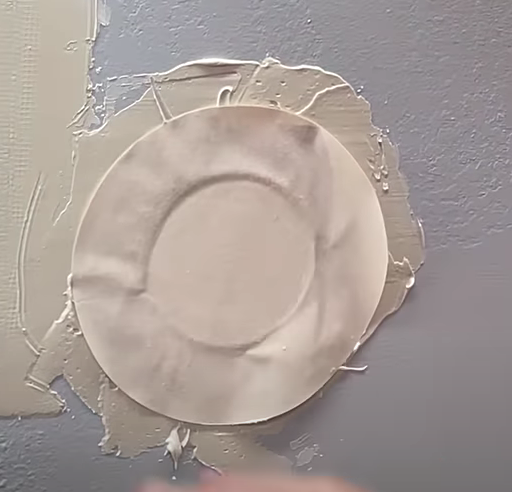
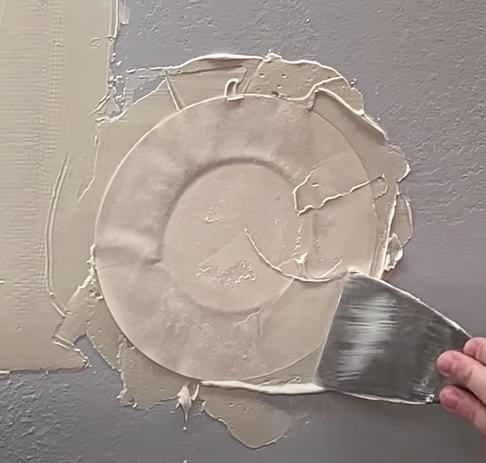
Continue to cover it with more mud. You’ll want to cover it enough that nothing is showing through, but not so much that it takes forever to dry.
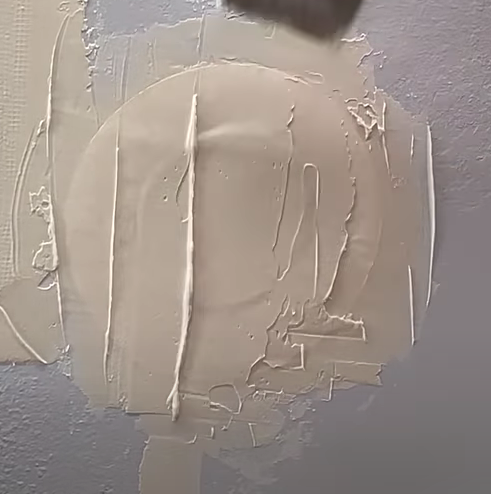
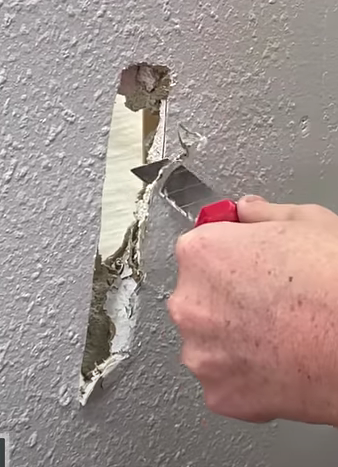
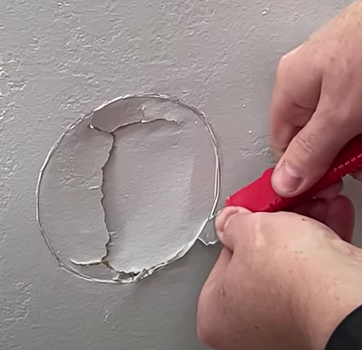
The third option is to make a California patch, which is essentially making your own Presto patch.
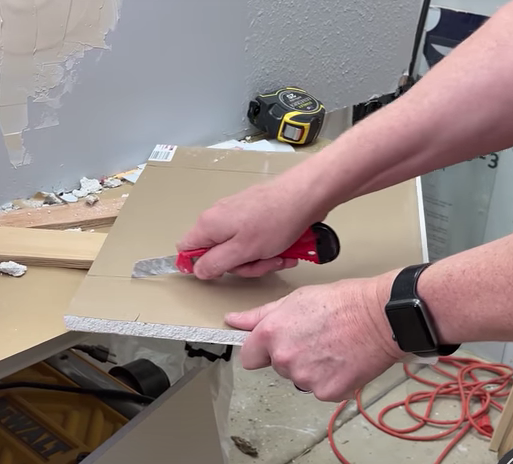
Cut a square or rectangle around the damaged area, making sure to cut away any damaged drywall. We only want good, solid drywall left with nice, clean edges.
Cut a piece of drywall that’s 1 1/2″ bigger on all sides than your square or rectangle. For example, if your hole is 5″x5″, you’ll want to cut a piece of drywall that’s 8″x8″.
Once you have the piece, hold it up to the hole and mark the hole size on the back side. Once it’s marked, score lines down the drywall that are just smaller than the hole.
Flip it around and do the same on the other side (for the height) to make that square. This will end up being the plug.
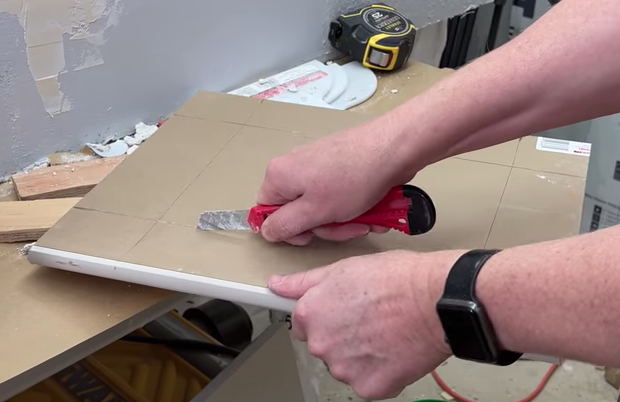
From there, snap off the edge pieces, and peel the drywall from the paper, and you’ll end up with the plug.
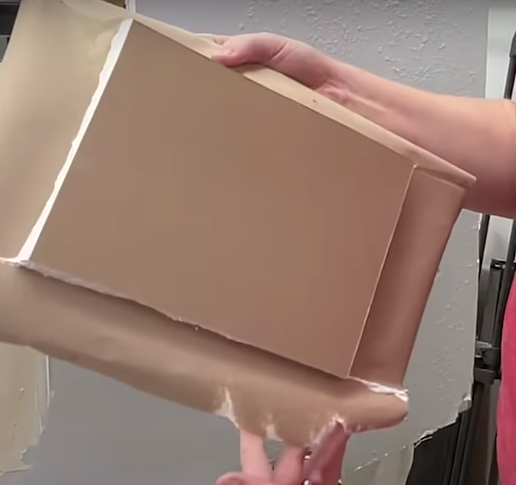
From there, the technique is the same as the Presto Patch as far as mudding goes.
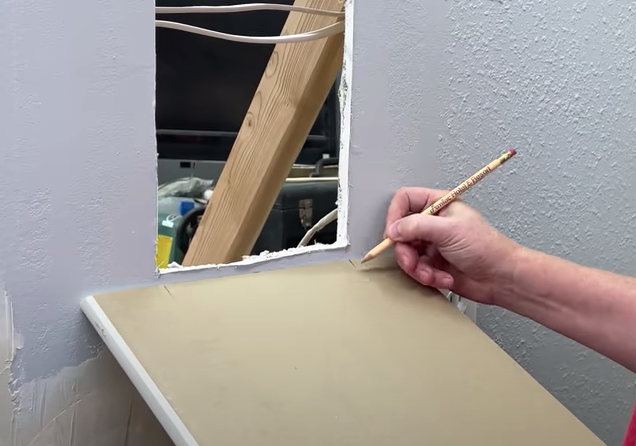
3. Large Hole Repair (Board Backed Repair)
If you have a hole that is bigger than fist size, it’s a good idea to have some backing to make it stronger. You can use any scraps of wood you have lying around, like trim or 1x pine.
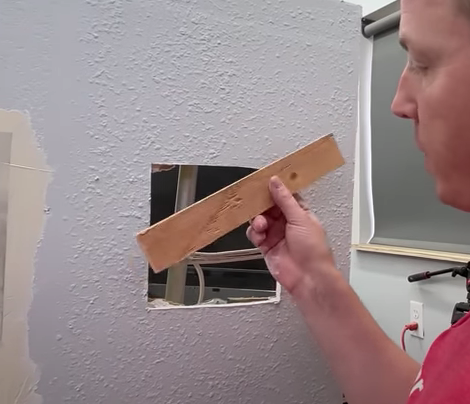
Cut it so it extends a couple of inches past the hole on either side. The goal is to create four corners to support the drywall plug. Use screws to secure the wood into the drywall.
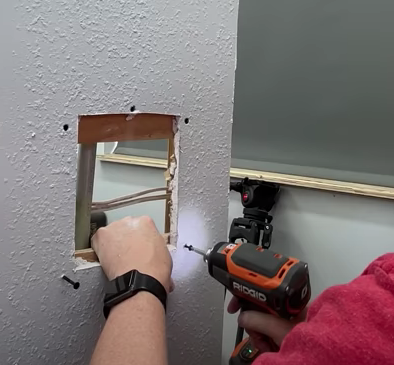
This provides a secure backing for the drywall to attach to.
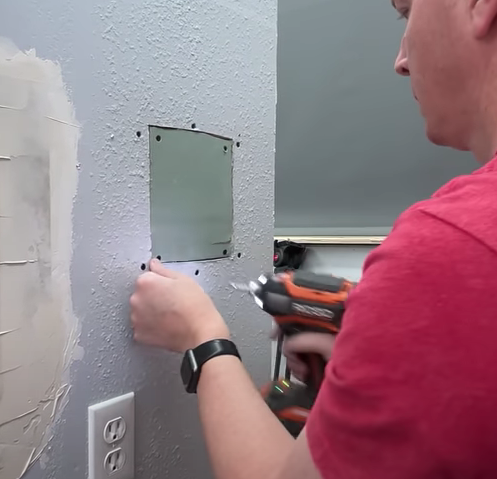
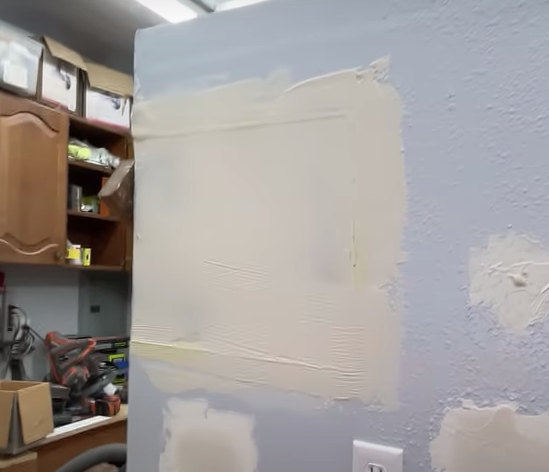
Cut a piece of drywall to fit your hole and screw it in. This method can be used on fairly large holes- up to about 10″. The key is having the support in back, and cutting out all of the damaged drywall. This depends on the drywall around your hole being in good condition.
We’ll go over mudding and taping this in the next section.
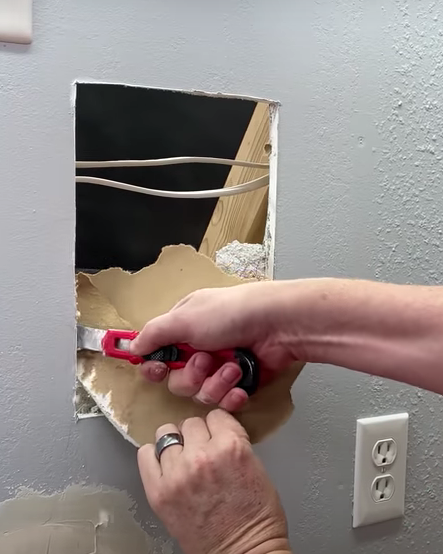
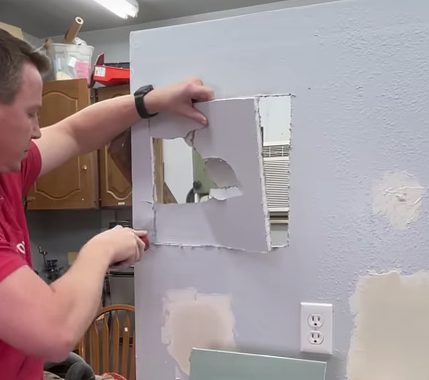
4. Massive Drywall Repair
This is for really large areas that have been damaged- maybe someone was body checked into the wall or something like that.
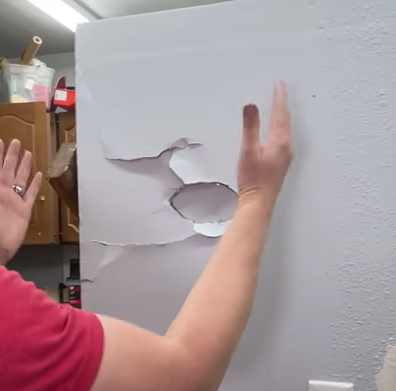
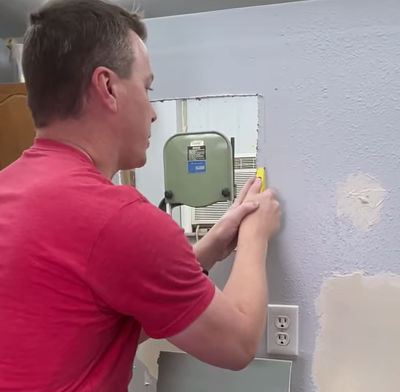
The best way to repair this is to cut out the piece from stud to stud. You’ll need a stud finder to find exactly where the studs are. Mark those on the wall, and use a jab saw, drywall saw, or a utility knife to cut out the damaged piece from stud to stud, as well as to the inside of the two studs where you’ll be working.
Come over about 3/4″ from the inside of the stud and remove the drywall. You want to have a room on the stud for the new drywall to fasten onto.
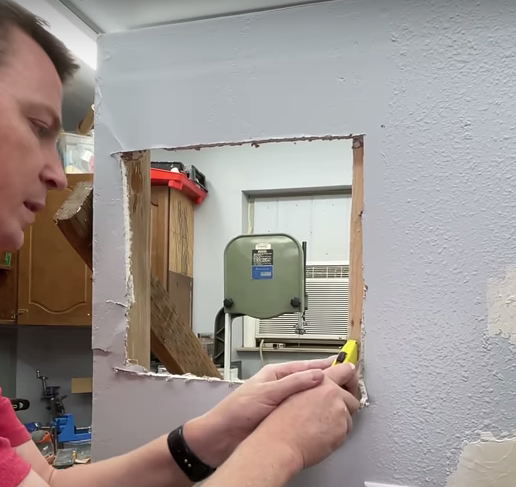
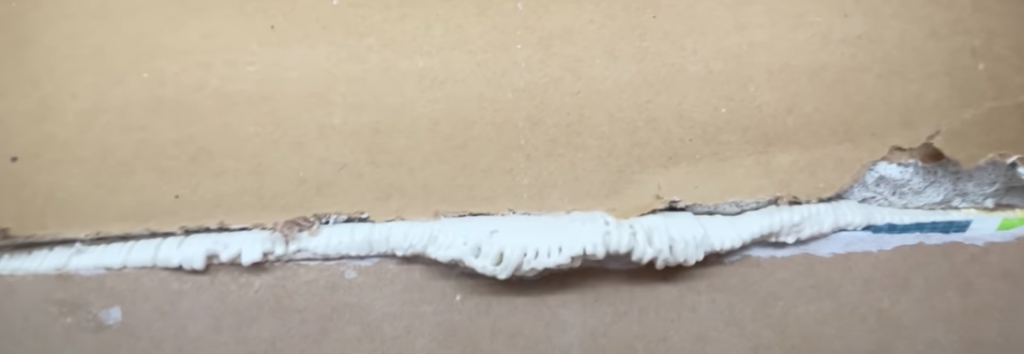
From there, cut a piece of drywall to fit inside the hole, drive it in with screws into the studs, and then you can either do the California patch, or you can use mesh tape.
When using tape, apply tape to each side of the drywall, making sure not to overlap them. Use the edge of your putty knife to tear the tape (it’s easy).

Once your tape is on, apply mud to the tape and push it into the seams.

Back view
Cover it all up with mud and let it dry, usually overnight.
Now that we’ve gone over the methods of patching, it’s time to finish this thing up! Here are the final steps: Sanding, a second/third coat, texture, and paint.
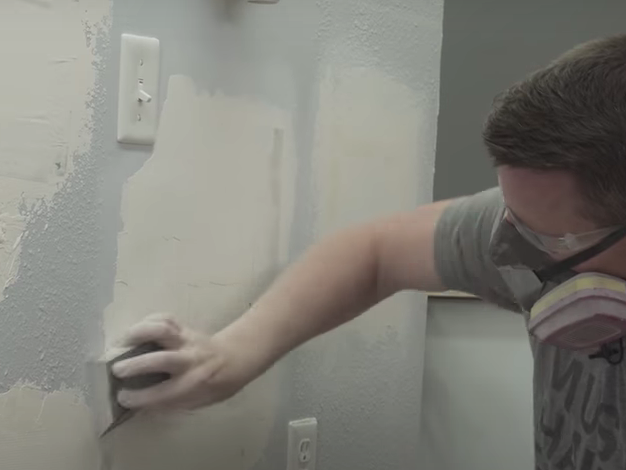
Sanding
Once your mud is dry, come back the next day and sand it down using a sanding sponge or an orbital sander. Be sure to wear a mask or respirator to protect your lungs from all of the fine dust this will kick up. Also, wear eye protection.
Second Coat
For the second coat or skim coat, use a larger knife to make a nice smooth surface. Having a good blade here makes all the difference.
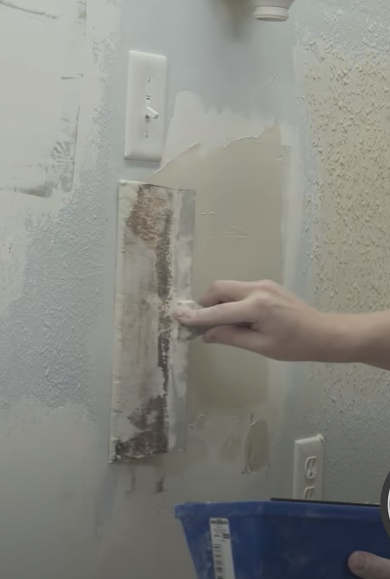
Mix some water in with the mud to make it a bit thinner and easier to spread. It’s a good idea to use a mud pan for this. The goal is to get that coat as smooth as you can. You can also feather the mud (apply greater pressure) from the outside-in to make a smoother transition from the old wall to the patch.
If you’re happy with how it’s looking after the second coat, let it dry and you’re ready for texture. If it looks like it needs a third coat, let it dry, sand it again, and apply a third layer.
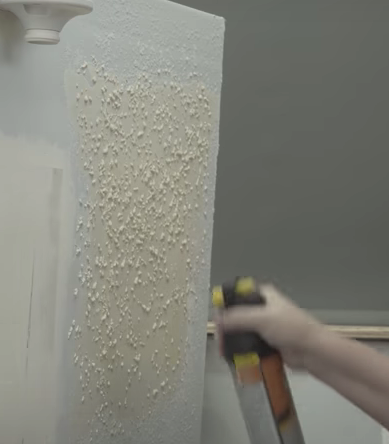
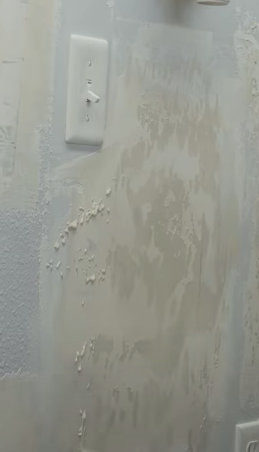
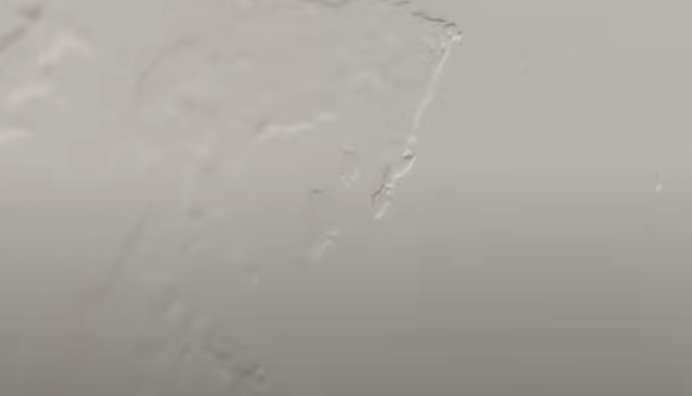
Texture
Depending on what texture is on your walls, you need to match it on your patch. You can purchase orange peel texture that sprays on, or you can do the knock down texture with the blade.
This is an example of orange peel in a can, but the can we bought was faulty and it looks really bad. It should be much more subtle than this! Thank goodness this is a sample wall.
With knockdown texture, you’ll spray it on, and pull down with the blade to make a finish, making it look like this:
You can also do this with regular mud by applying it and smoothing it out. It should look like this when you’re done.
Paint
Make sure to remove all the dust from your wall before you paint. You can blow it off or wipe it with a damp cloth, but congratulations! Once you’ve got it painted, you’re all done. Check you out, you DIYer, you! Let us know if you have any questions, and we’ll do our best to help you out.
Also, check out the video tutorial below if you need more clarification.
*This post contains affiliate links, which means we get a small commission, but you pay the same. This helps us to continue creating content, so thank you for supporting us!
We are all trying to save money where we can. Check out these great posts that can save money and stretch your dollar further.
Has your couch been loved to death? Maybe not. How To Make Your Old Couch Feel New Again. Click HERE for all of the details.
You can build your dining table that will look high-end without the high-end price tag. DIY Kitchen/Dining Table – Pottery Barn Inspired. Click HERE to see the instructions on how to make it.
These tips and tricks with Painters’ Tape are life-changing. I’ve got 7 Clever Painter’s Tape Tips/Tricks Everyone Should Know. Click HERE for these great tips.