
Are you looking for more DIY Home Improvement Ideas to save you money? Check out some of my most popular posts-
$23 DIY Planter Box
DIY Weight Rack for Dumbbells
DIY Mini Split Installation A Complete A to Z Guide
Have you been considering adding an electrical subpanel? The process can feel overwhelming, but I’m going to walk you through all of the steps and all of the considerations for doing this yourself. To be clear, a subpanel is just a circuit breaker box or an electrical panel used in conjunction with an existing main panel. It is important that you work with a certified and licensed electrician on a couple of housekeeping items during this entire process.
If you live in the U.S., you will need to pull a permit, so check with your city for local codes and ordinances to ensure that you’re doing everything up to code and properly. In my case, I’ve been working with an electrician to make sure that we have all of the correct information here. I highly encourage you to do the same. You can even look up an electrical contractor. Even if you feel like you have a good handle on everything, an electrician near you can guide you, check your work, take care of any parts you’re unsure of, and make sure that everything is NEC (National Electric Code) compliant.
This guide is intended to help, so definitely do your homework first. Don’t just rely exclusively on what you see here. Let’s start with the space requirements for installing a sub-panel.
SPACING REQUIREMENTS
There are three measurements you need to be aware of. Number one is that you need 36 inches or three feet of space in front of the panel to work with. Number two, you need to be able to have 30 inches across the panel. There needs to be plenty of room for the door to open for you to access it, or do whatever needs to be done here.
And then finally, you need up to 78 inches of height. This is the analogy I saw that I like: If there’s a telephone booth put up against the wall, you need to make sure that this sits somewhere within that wall of the telephone booth.
Ensuring Proper Space In the Source Panel
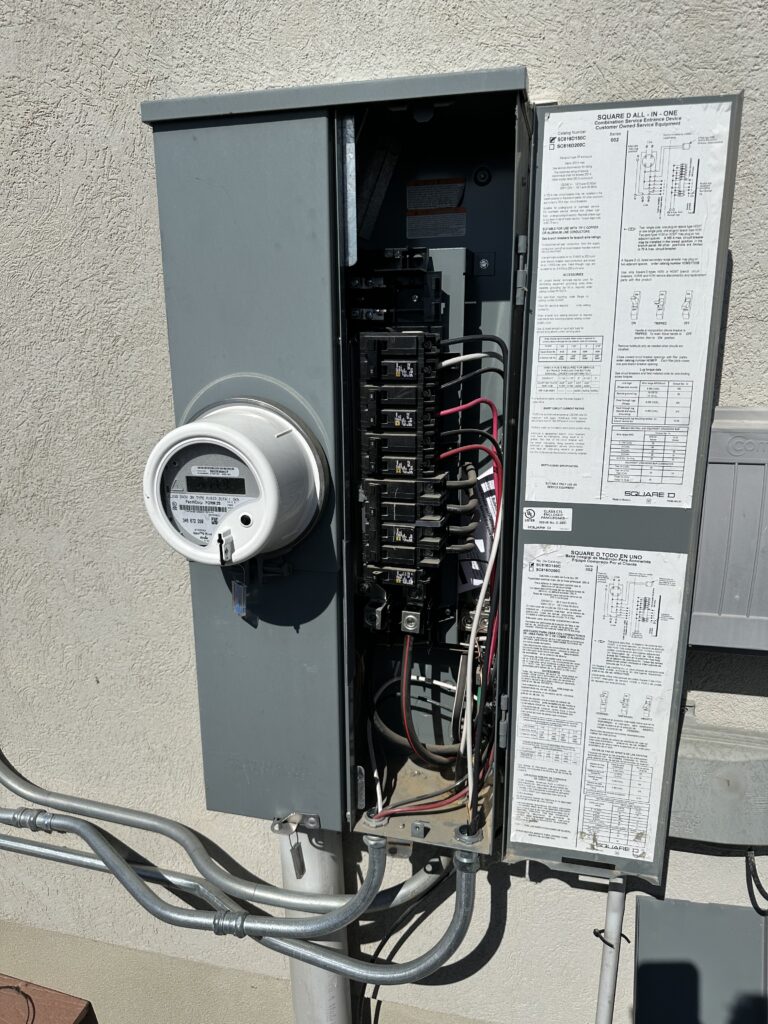
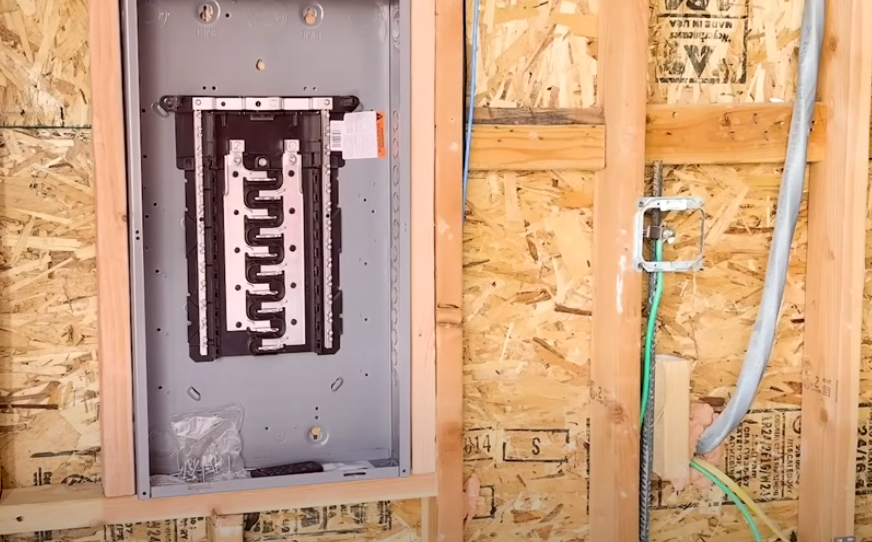
The next part you have to make sure of is that you have sufficient power to pull from the main panel that you’re connecting to. In my case, the main that I’ve got is actually right next to where the new panel will go and I’ll just be pulling from that, just a couple of feet away. Not everyone will be so close, and I fully understand that, but you do need to make sure that there’s enough panel space for you to put a new circuit breaker to run your new sub-panel. This is basically just going to be connected to that via a simple set of wires, kind of like this gray one.

And then we’ll make sure that everything goes to the right place when it comes time to select the actual panel that you’ll be using.
There are several things to consider. The first one is what brand you want to use. My house uses Square D home line. It’s a common setup here in the United States. But there are other options too, like Levitan, Siemens, Eaton, and more. If you already have one in your home, you might want to use the same one.
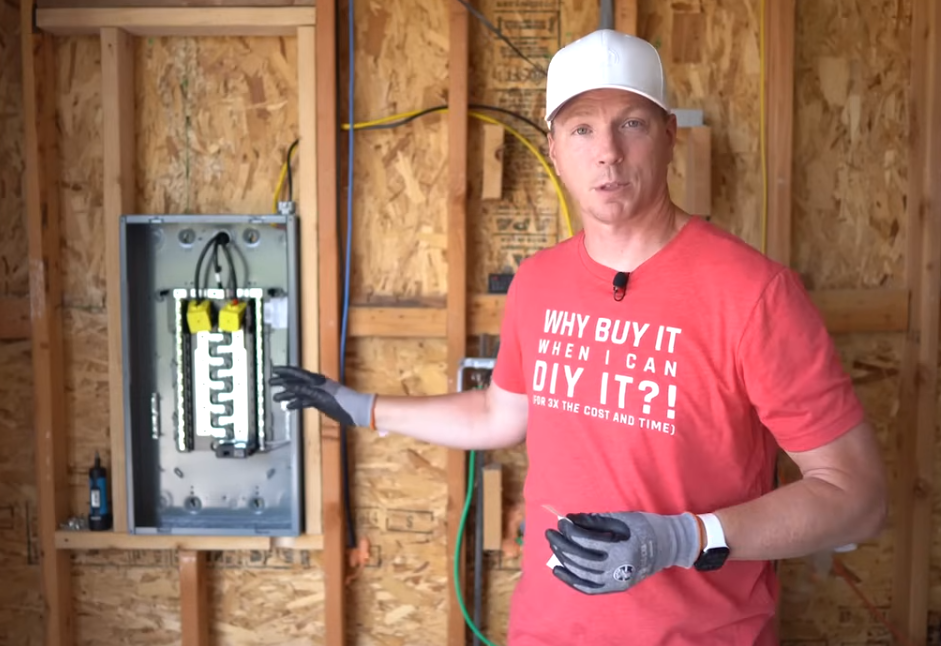
Maybe update to something like the Square D home line. I’ve chosen a 20/40 panel. That means I’ve got 20 slots here to work with, which means I should be able to install up to 40 circuit breakers (only if I use tandem circuit breakers, which you’d typically only use a handful of).
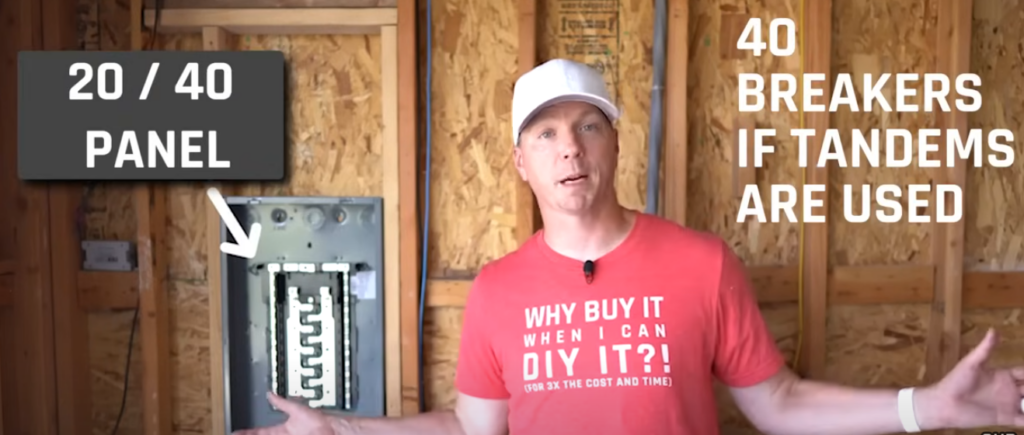
I’m actually converting my garage into a shop and this is part of that process and I’m going to be installing a 70 amp box here.
This box is rated for up to 125 amps and I’m only going to be feeding 70. I’m wiring it so that it can handle at least 90 or 100 amps, just in case I need to upgrade it down the line. If you’re somewhere in a detached space from the panel that you’re feeding from, then you’re probably going to need a main breaker.
This box, for example, doesn’t come with a main breaker and I don’t need one. The next thing to consider in the planning phase of this is what gauge of cable and what type of cable you’re going to be running from the main source to the panel itself. But as I mentioned before, I just have a few feet to run. You have a few different options. We have an all-in-one cable. There is a SER cable, and there is a tray cable. Both of those have a jacket that encloses all of the cables within them. They come in multiple sizes, multiple gauges, and multiple counts of wiring.
For a sub-panel, you’re going to need four wires altogether. First, you’re going to need your set of hots. You need two 120-volt lines coming into your bars.
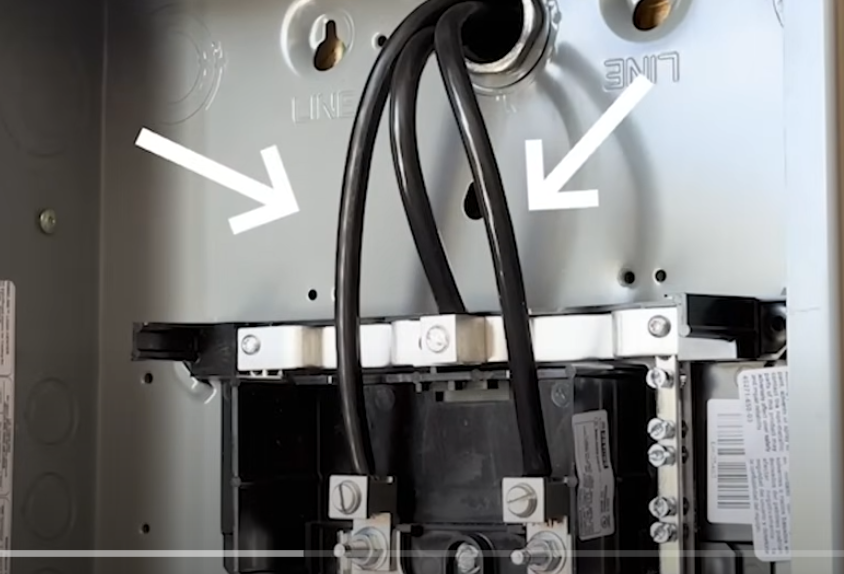
The third one you’re going to need is a neutral.
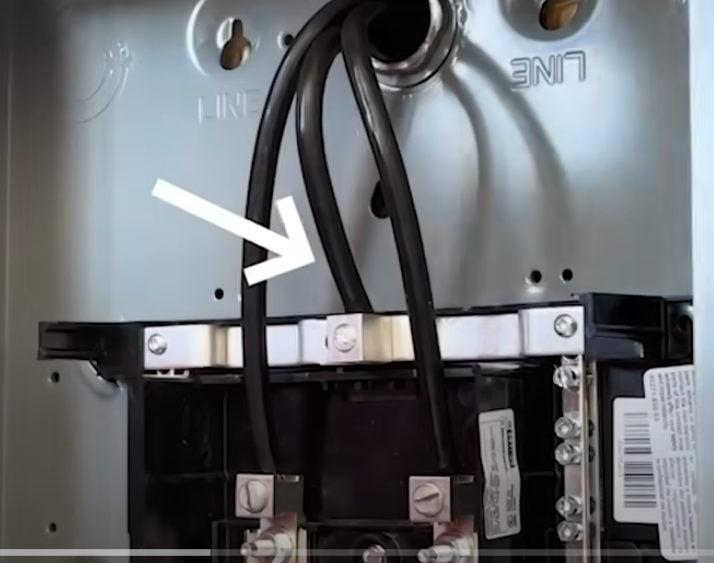
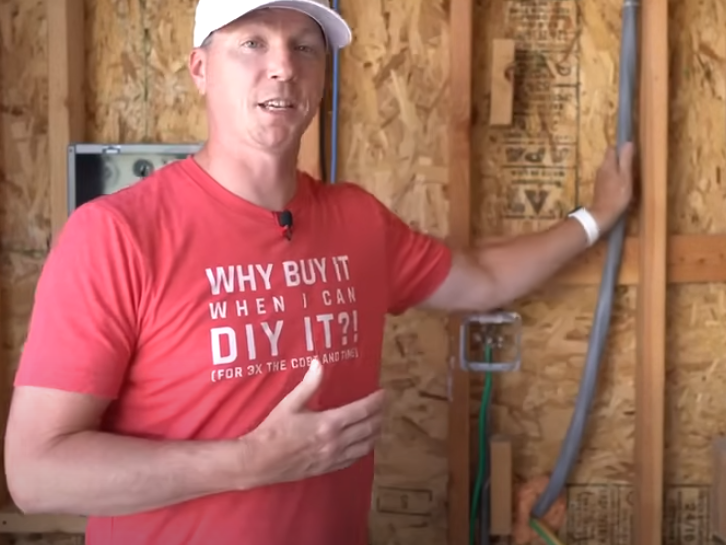
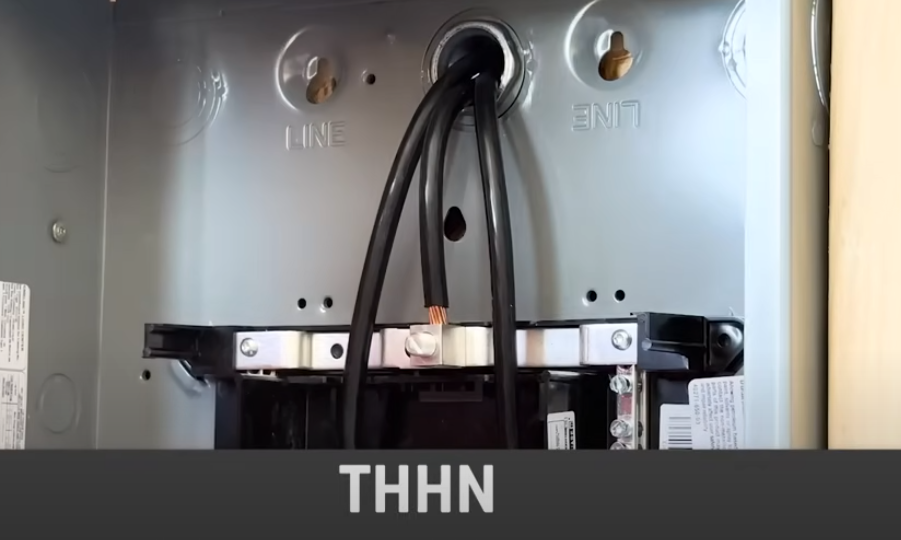
The last one is a ground, so it’s a four-wire setup. Now, what gets a little interesting here is that you don’t typically actually have to have the same gauge for your ground as you do the other three. Be sure to check with the National Electrical Code to verify your situation, but I’m running two hots and a neutral and then a 4-gauge ground. That should give me all the power and bandwidth I need now and in the future. So you want to consider whether you do an all-in-one cable like the SER or the tray cable. And in my case, I’m opting to go with what’s called THHN, which allows me to feed it through conduit, which I’m going to do entirely on the outside of the structure here.
Be sure to consider if you’re going to have to run any of this through the studs as well. I have 2×4 framing here so I can’t just run one of these guys through it by code. Since this is a load-bearing wall, I can only cut a hole up to 40% of the depth of these, which isn’t enough space for me to run a thick cable like an SER.
The other factor that you need to look at is if you are using a conduit like I am, you need to make sure that you have a conduit that’s thick enough to account for the amount of wire going in it. Typically, you can only fill it up to about 40%, which leaves room for some flexibility and maneuverability in there.
There is a cool app that you can get that’s totally free. It’s called the Southwire Conduit Fill Calc. You can put in what size conduit you’re using, what type of conduit you’re using and then what kinds of wires and how many you’re putting in of each.
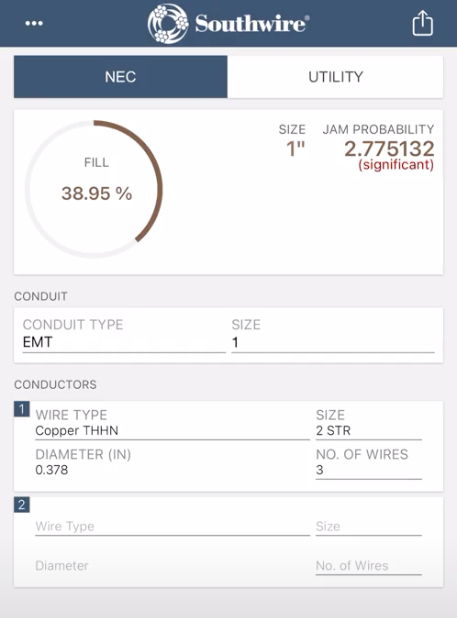
It will give you a rating on that. In my case, I’m going to end up using one inch. AM-T and I’m going to run that, and it’s going to be almost completely up to the 40%. I usually like to give it more space, but I’m having a hard time sourcing one and a quarter or one and a half inches, and the one inch is still sufficient.
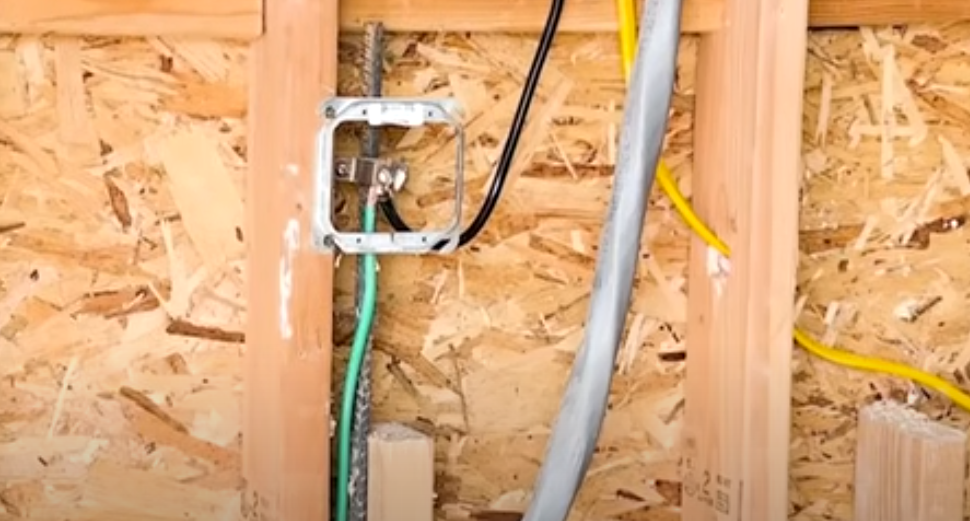
There are a couple of things that are specific to my situation, and I want you to know what those are so that you can calculate them if you need to. The first one, I have my ground and I have my ground rod going down. This is called a roofer and it’s going into the concrete. And this is the ground for my entire house. So I’m going to tap off of this rather than feed my ground from the panel in the back, since this is right here and it’s on this side of the wall, I may as well use it. And again, that’s what allows me to put the three, two-gauge wires into a one-inch pipe because I don’t have to add that forth and ground wire in my specific case.
The other thing that’s a little bit different, you may notice some of these studs are very close to one another. Typically, studs are going to be 16 inches on center, in some cases 24, and in some cases like this, 12 or maybe even a little bit less. That’s because whoever built this house, decided to do it that way.
But that creates some problems when most panels are about 14 and a quarter wide. So that makes it tough to install. So what I’ve done is I’ve reframed all of this and this is load bearing. So I had to put in Jack studs headers.
A lot of you will have just 16-inch on-center studs, and you can slide that panel right in.
Keep in mind, if that’s not an option, you can surface mount a sub-panel. If you do so, you will want to put some plywood on the back of it and then fasten that plywood to the studs. Then fasten your panel to the plywood. Keep in mind, all situations are going to be a little bit different.
That’s what I’m working with. And that’s why you might see things here look a little different from what they are at your house or your business.
There is a lot that you need to consider and research, and understand before you jump into this. Now, at this point, I’m going to start working on the project itself, and I’ll just walk you through the entire thing as we go.
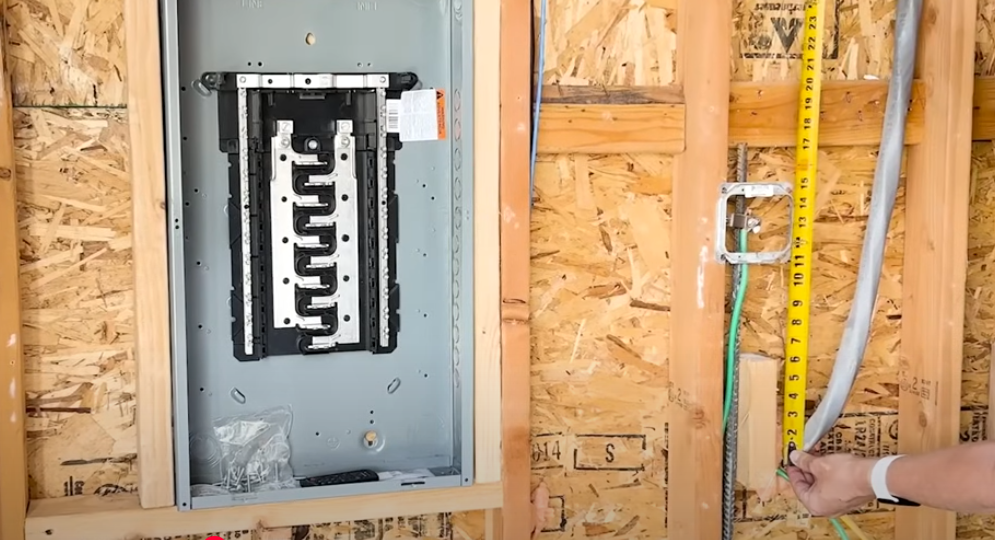
Now let’s get cutting, installing, and getting this thing put in. The first thing I do here is use the tape measure to find out exactly where this box needs to be placed. I’ve got some framing in place to consider, but I want to make sure that I’m meeting code.
There are space requirements that we talked about earlier. I’m also looking at how far away the panel is from the existing outside panel. I’m using the main feed as a reference point to figure out exactly where this new one will go so that I can line up the exterior conduit that I’m going to be installing.
Something to keep in mind with each of these projects is that you want to leave at least some open space, either on the sides or the top or bottom. The more open space you have on the sides of the panel, top or bottom sides, any of those sides, the more it’s going to allow you to use the knockouts.
If you don’t do that, if you frame the whole thing incompletely, you’re going to leave yourself in a bit of a bind. And one thing I wish I had done a little differently here is to actually frame this out a little bit lower so that I could leave the bottom open and the top open. But as you can see right here, it’s just the top that I’m going to be working with.
I wanted to have everything flowing through the central knockout as far as the source wires, my two hots, and my neutral. So to do that, I used to drill a hole right through from where this was placed, right through to the exterior. And then I was able to line that up. Once I have that lined up, I could use a drill bit to cut a hole to the right size, and I made sure to check the hole, saw size against the connectors that I would be using, and then was able to drill all the way through.
In my case, you could see I had to drill through stucco, some exterior boarding, and some OSB. And in the middle there, there’s some chicken wire, basically some wire mesh that I had to cut through. And that did a number on my drill bit because of that. This whole dozer bit, this whole side was pretty much destroyed with a hole in place.

I was able to put my LBE conduit body inside the hole from the outside and that gives me access to basically a 90-degree turn in here. Then, heading back inside, I needed to figure out how best to mount this based on the thickness of the wall. So I had some couplers, I had some nipples, and then I finally, at this early stage, and then I finished off with what’s called a chase nipple later on.

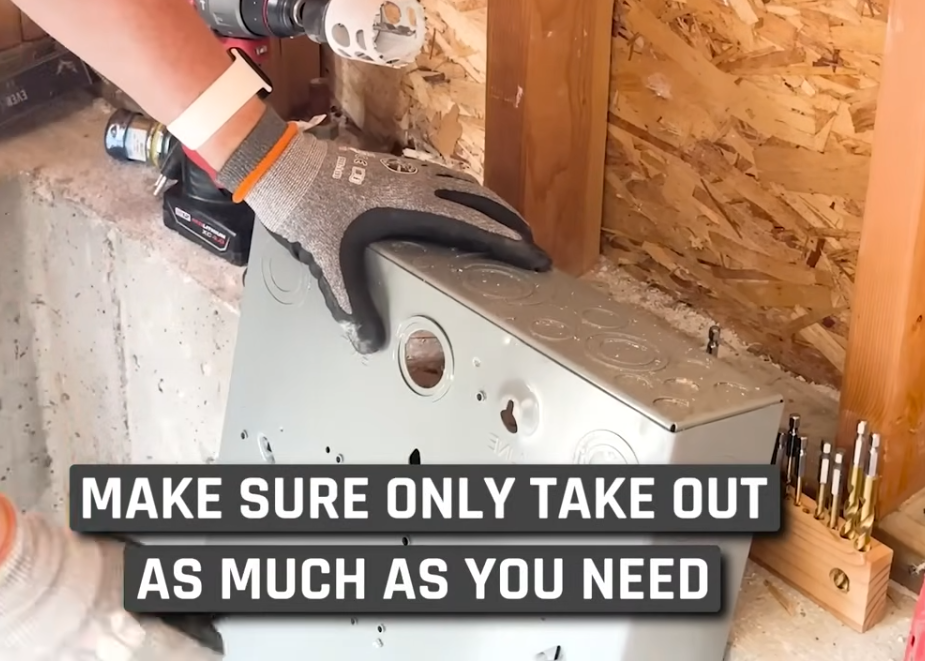
And that allows me to be able to pull all of the wiring through without any sharp edges or anything to rub on. When you’re working with the knockouts in the box, just make sure to only take out as much as you need. They’re pretty easy to remove. You can just use any hard surface to tap them off a little bit and then just use some pliers to shake them free.
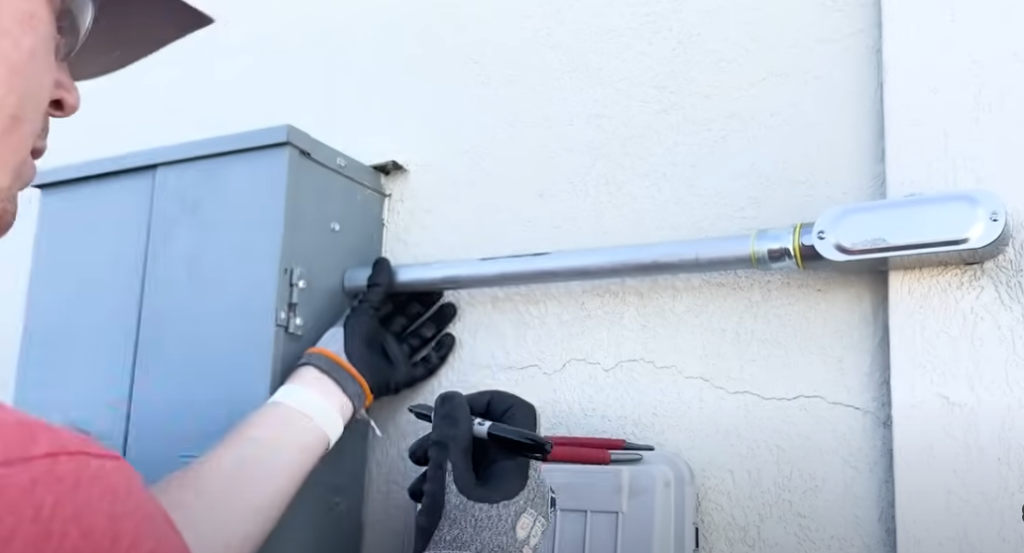
Next, I needed to cut the one-inch conduit to size and I wasn’t sure exactly what that length would be until I got everything test measured. So I put everything in place. I’m using rain-tight connectors here to make sure that I don’t have any precipitation getting inside the run.
And then I got my 17-inch measurement and then I decided to use just a metal blade on a hacksaw to be able to cut that to size. You always want to cut a little long. I know I wear shirts sometimes that say I only measure once, but I usually do matter twice. It’s kind of a joke. But then I wanted to make sure I had a little length in case I needed to cut it shorter later, make sure to remount the ends so that you don’t have any sharp bits of metal inside your conduit.
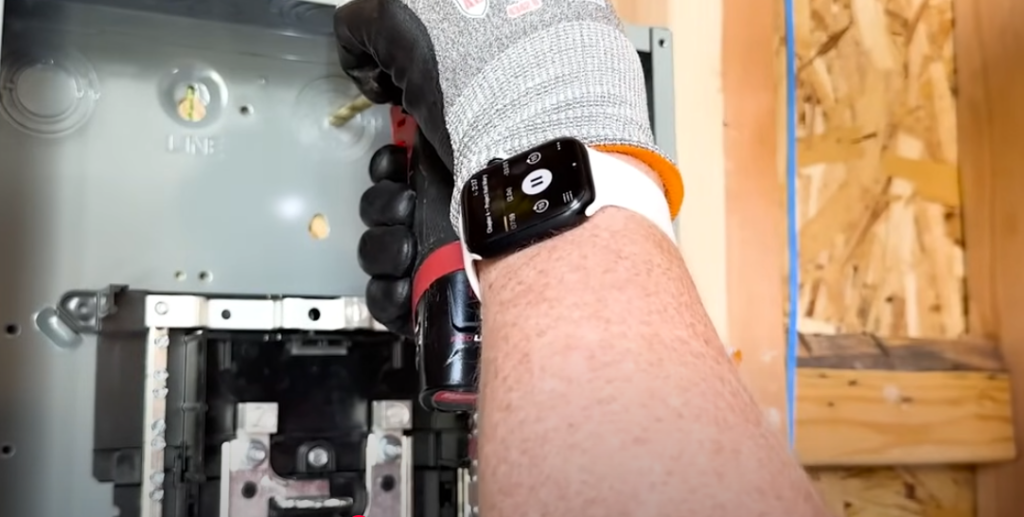
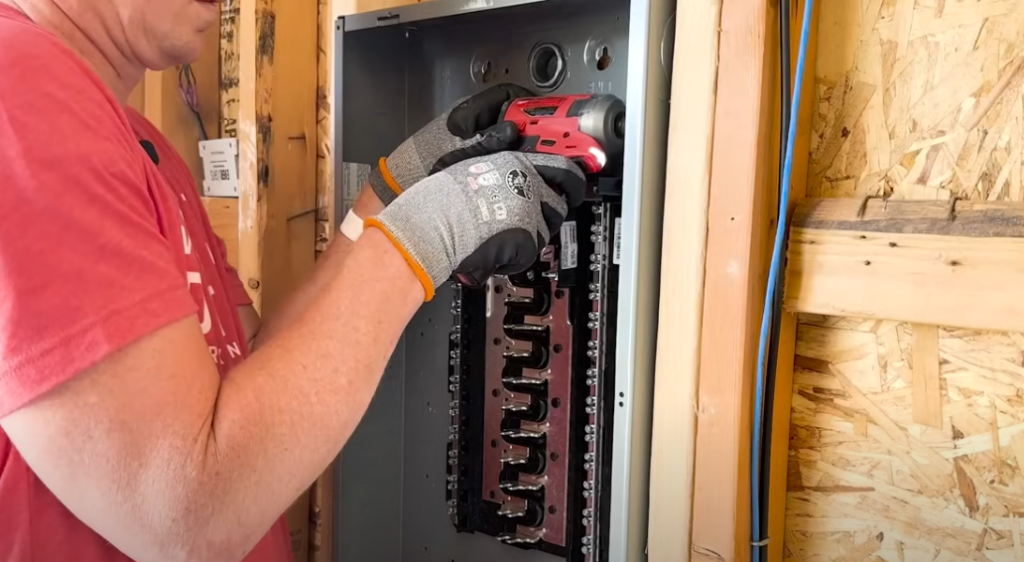
As far as connecting to my main panel, I opened it up just to ensure that everything was looking good and that there was an area I could drill a hole into without disturbing anything. The last thing we want to do is drill a hole into some of the wires because that could wreak havoc.
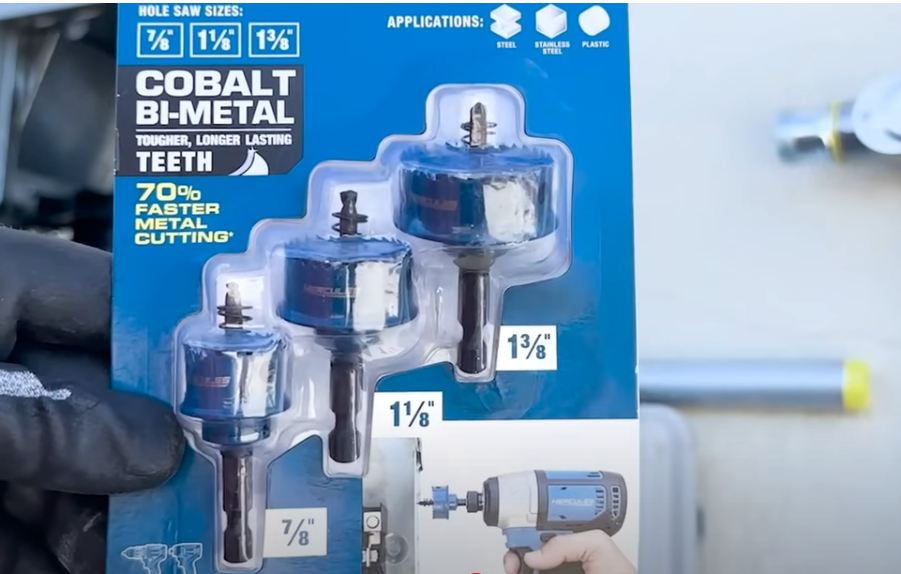
As for drilling the hole itself, I picked up a set of these fairly inexpensive hole saws that are meant for drilling through steel, stainless steel, or plastic. And they’re just perfectly made for drilling into an electrical panel. You can see the image on the bottom right of the packaging that shows exactly that. And this worked out well. There are other brands of hole saws, too.
With the hole in place, I was able to do a proper test fit to see how this would work out. It turns out my 17-inch measurement was a bit long, so I did need to take about an inch off. And then with that I was able to snug everything into place and then tighten all my rain-tight fittings down. I love using this set of Klein offset locks, not wrench tools, to make it really easy to tighten those rings because otherwise, you have to use a screwdriver and tap it, or find some other way. But these just grab right onto it and make light work of it. I then used my channel locks to tighten everything down a little bit more, just to make sure it was completely snug, and this conduit was ready to go.

Next up, I installed that chase nipple that I referred to earlier, which has the nice soft edge on it, and then started getting my measurements for exactly how far I needed this to stick out. Now I’m going to have my panel sticking out quite a bit further than most other people because in this shop, I’m actually going to layer the entire walls with both OSB and 5/8 inch drywall. So it’s going to be a little over an inch in depth. So I needed to get that measurement just right on all four corners before installing it.

As a result of that, I couldn’t use the knockouts that are supplied in the box for mounting it on the sides. I had to drill my own and install it that way, but that worked out just fine. And now I’ve got a nice even stand out all the way around.
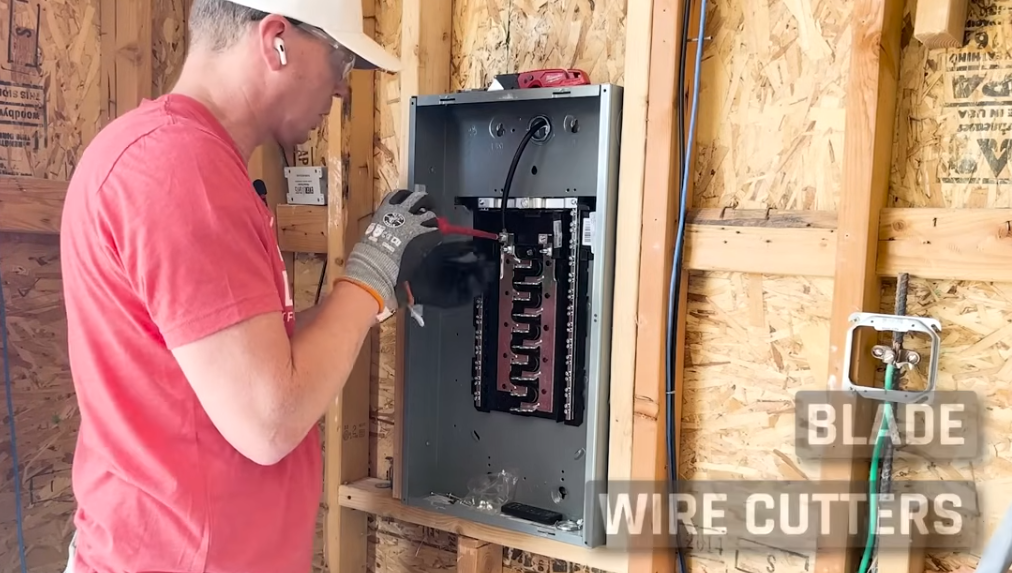
Next up is the fun part and that is feeding the wires through. These two gauge wires are pretty rigid. They’re kind of hard to move into position, but I wanted to get everything ready. I stripped off about half an inch of wire at the end of each one. There are a couple of ways to do this. You can use a blade and very carefully and lightly score that and then pull the end off. Or you can use the wire cutters themselves, which I have built into my strippers, and then just score around that way and pull it off. Either way should work. But what we want to avoid here is cutting too deep and fracturing any of the wires inside the cable. Carefully measure out exactly how much wire you’re going to need for everything.
And always give yourself a little extra room to play with. So this is really just a matter of fitting three separate wires through here. And again, I’m kind of maxing out this one-inch conduit here, but I was able, with a lot of finagling and back and forth to get this done. I found it helpful to connect everything on the sub panel but not connect anything on the source panel just yet.
I don’t want to bring any power into here yet. I just want to get it ready with everything at the right length. Once I had my length approximately cut in place, and the ends stripped, I would connect them up to the 70 amp breaker that would be feeding the indoor subpanel.
I did not connect the breaker, I just got the wires connected into it so that when I was ready, I could connect that to my source panel and flip on the power with my two-gauge wires in place inside the box. I use some electrical tape to mark the neutral and the second heart with white and red, respectively.
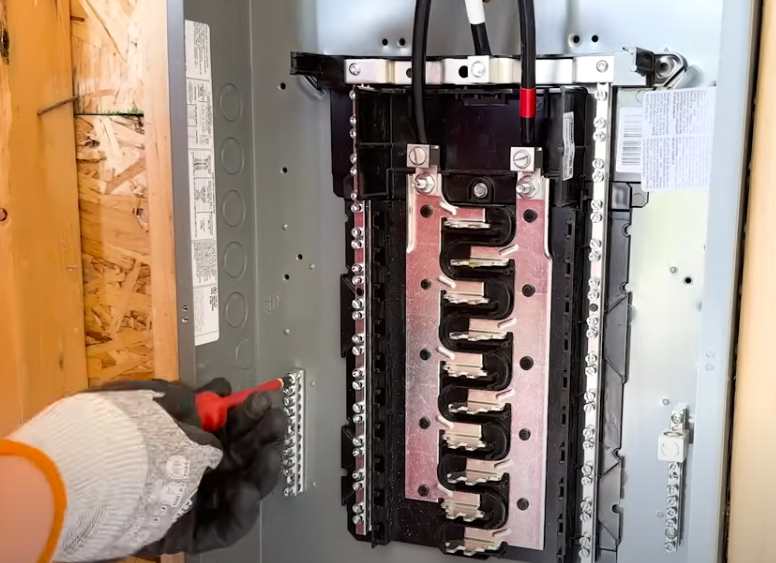
Now you’ll need to install the busbars that come with your panel. These are for the grounds. You can place these anywhere you want in the panel as long as the holes line up, and you will see that there are some little studs that protrude from the back of the box that you can use to line them up. Or you can use the two holes inside there. I prefer to do that so that there are two screws fastening each busbar to the panel.
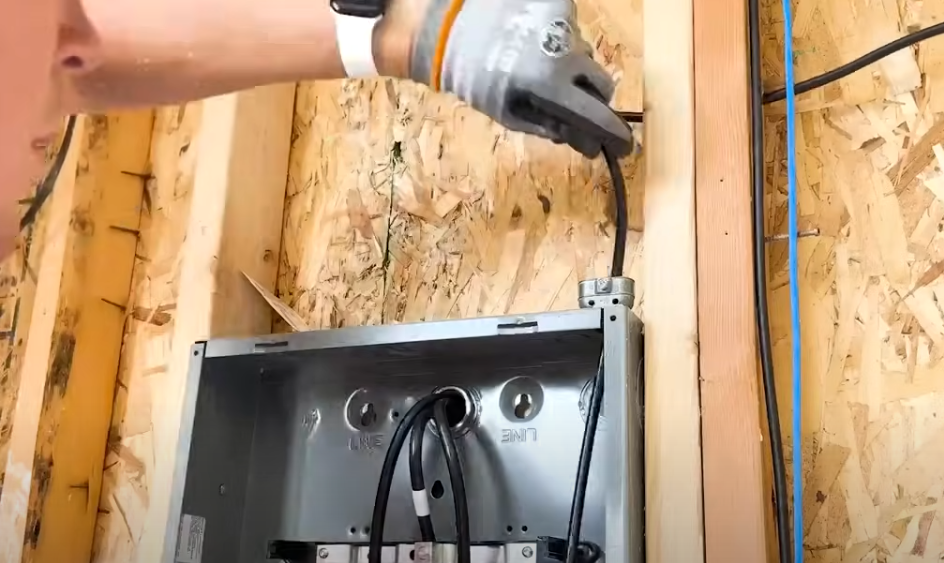
The two hearts and the neutral were already connected, but I didn’t have the ground connected, so I connected that to the rod that was right next to it. The ufer we talked about earlier. Then I was ready to connect it to the panel itself, so I made sure to use a metal connector inside a knock-out on the top and then brought that ground in before turning the power on to any of this or connecting it to the source.
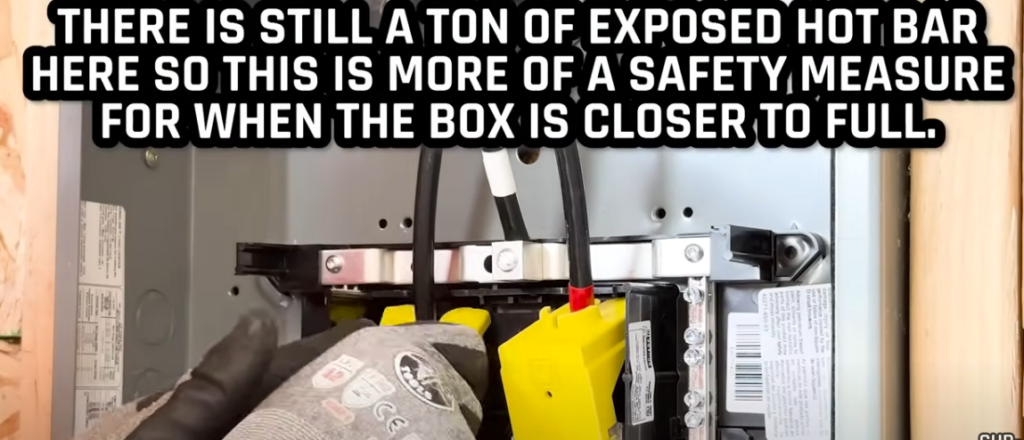
I decided to install these service entrance covers over the two hots and that just make sure that I have everything covered up because right now everything is very exposed. So this keeps me protected, and I’m going to leave them in there permanently and that will help me or anybody who works on this in the future to not have those exposed.
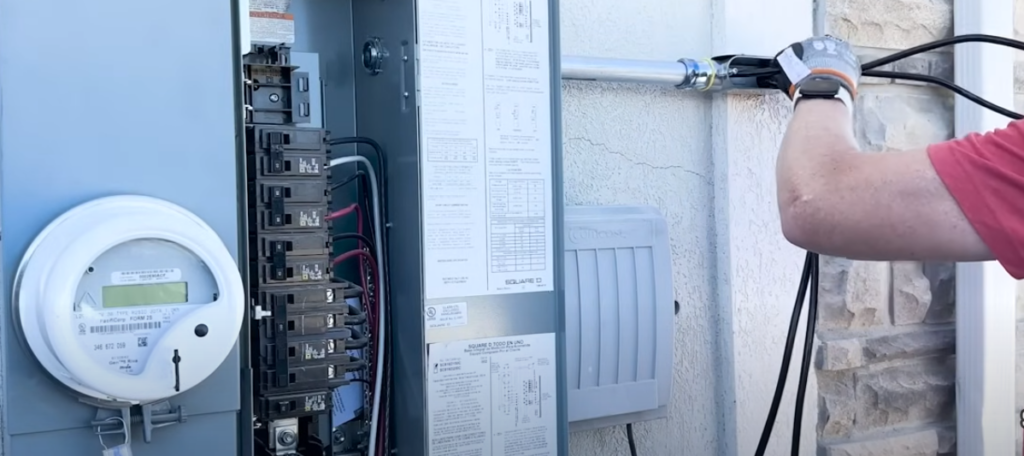
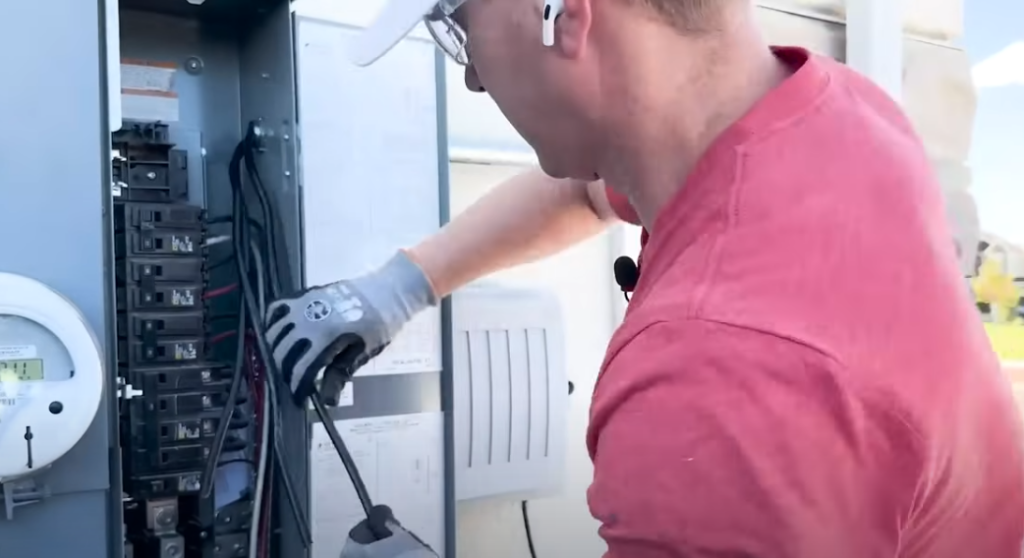
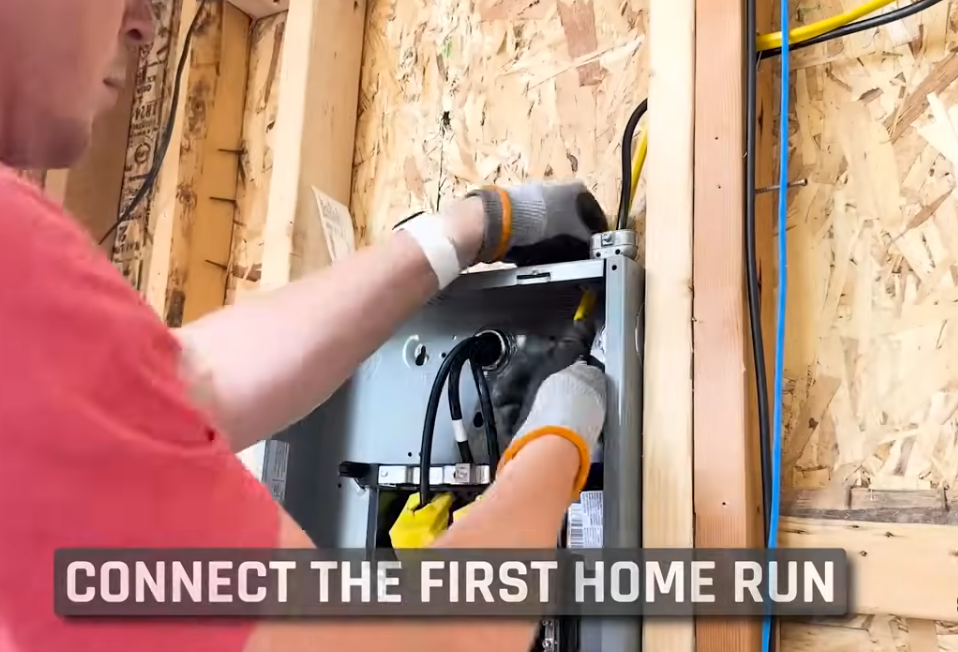
Now for the moment of Truth, outside on my source panel, I’m uninstalling the 20 amp circuit breaker that was powering the single line that goes into my garage, and I’m replacing that with a new 70 amp circuit breaker. You’ll notice I’m leaving it in the off position right now while I check everything while that 70 amp circuit breaker is still off and no power is coming into the sub-panel, it’s time for me to run my first home run or my first line from the new sub-panel out to where I’m going to connect it to, which is just the old line of the garage. This will power a couple of outlets and then the garage door opener itself.
For this video, I won’t be getting into all the details for how to connect this up because this is more of a separate topic. But generally speaking, I’m going to strip the sheathing off the wires, separate everything, measure it, and then mark them all down to where they need to be.
I’m going to connect my ground to my ground busbar, my neutral to my neutral busbar, and then the black, in this case, which is the heart. I’ll connect that directly to a 20-amp circuit breaker. I also have a secondary one because this is 12 three-row max. I’m letting that second one hang out in the box for now because I may run a 240-volt on that one later.

Now I’m also installing this circuit breaker on the bottom right, which is a little bit unusual because this is a temporary one. So I’m just kind of leaving this separate just to indicate that this will be functional, but it’s temporary.
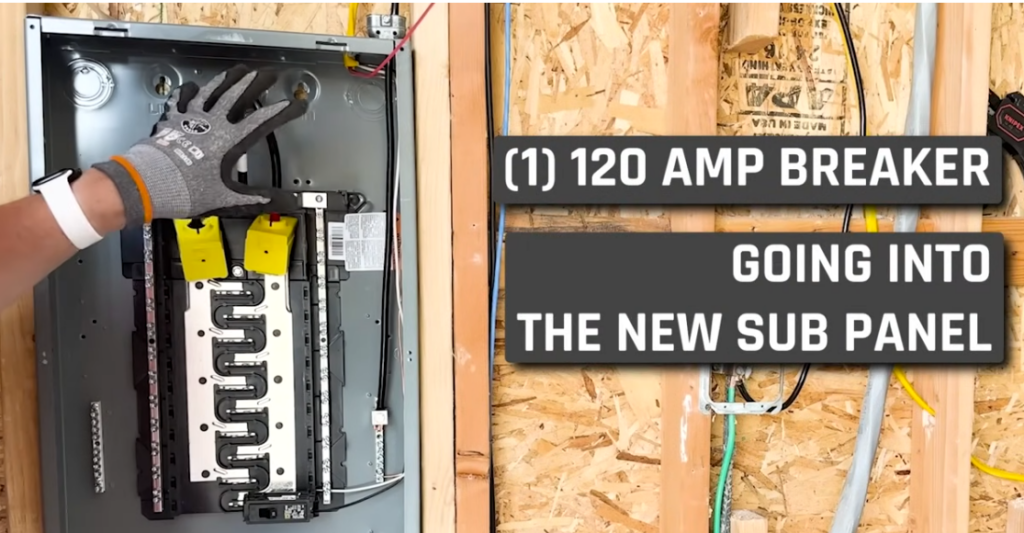
So at this point, I have connected the 120-amp breaker to the new subpanel. We have everything here going into the main panel, the source panel, but it’s not flipped on.
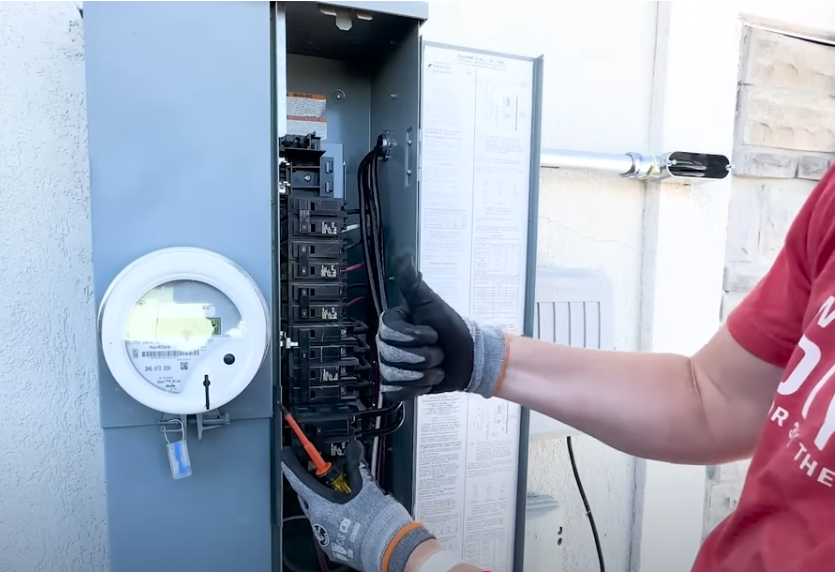
I have a 70 amp breaker outside, so if I flip that one on and then flip this one on, this connects to the outlet over here the receptacle and this is a GFCI that should be ready to go and will power everything else in the garage that used to be powered on the old panel. So, for the outside panel by itself, fingers crossed.
Let’s see how this goes. Okay, we now have power to the box. So now I’m going to switch this on. We now have power to the line and can check it out. We also now have a green light and 124-volt AC coming through. So that was a success. We now have a dialed-in and ready-to-go subpanel that’s fully functional. The hard part is over, and we have power. Everything is wired up just as it should be. It’s working perfectly.

And that, again, is kind of the turning point of this entire installation. We just have a few steps left to finish up. We’re not done at this point. So the next thing we want to do is to install our sticker that comes with this, which talks about the torque ratings for each of the lugs and screws inside the panel. I will apply this inside the box on one of the sides where it’s not likely to get covered up. I’ll go through and we’re going to torque down each of these lugs. I only have a few to handle here, which is pretty nice.
I’ll be using this guy right here. This is a torque screwdriver. These can be purchased pretty inexpensively. I’ll put links in the description where you can get one of these on Amazon. They are about 40 to 45 bucks. That may change by the time you see this video. Klein makes some, and those are like 300 bucks. They can get pretty pricey. I found that the Neiko does a pretty great job for me.

So I’ll be talking to each of these down to the right specifics. And then after that, we’ll be ready to put the panel on just after we do a final inspection to make sure everything looks clean and ready to cover up.
As per the specifications directly on the squared home line circuit breaker, this requires 36-inch lbs of torque when using the torque screwdriver. Basically, you just turn this thing until it gives out. And when it gives out, it’ll just loosen up, and you know, it’ll click as well. And that means, you know, you’ve got it to the appropriate torque rating.
I can pretty quickly adjust the torque that it’s going to exert just by turning the handle, pulling down and turning, getting it to the right setting, and then using it. The busbars inside this panel require 20 inch pounds of torque, so I’m going to fasten each of those down as required. And finally, the larger slotted screws, which would be the neutral and the two hots plus the ground, each require 50 pounds of torque.
With everything wired up and talked down appropriately, I wanted to make sure that the entire panel was totally clean. You cannot have anything else in this panel. You don’t want to have any flammable items or anything else. I’ve cleaned out the bottom of it.
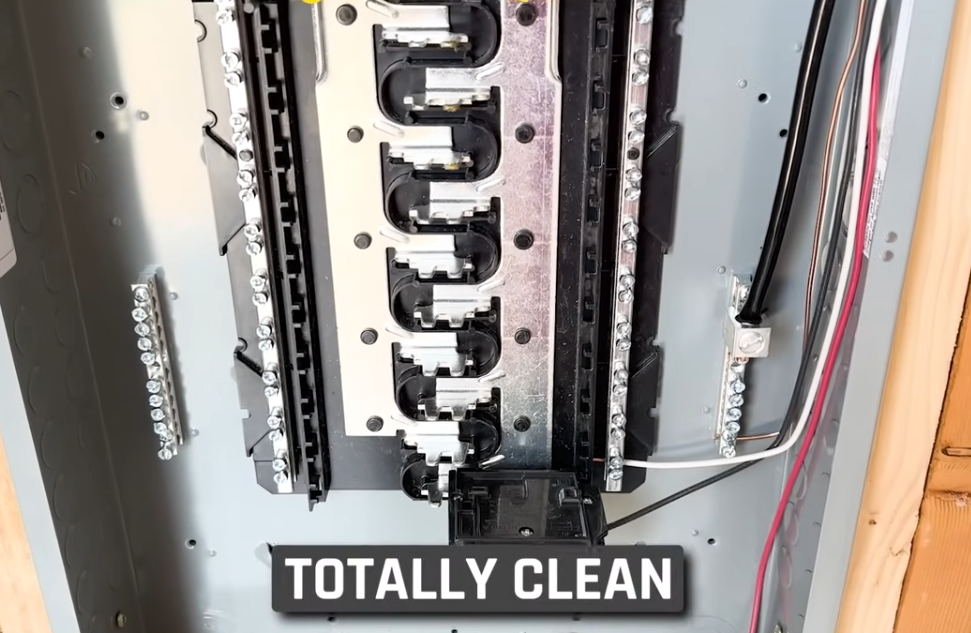
And then that extra second hot, the red wire that you see over on the right, I’ve got a wall go on there to terminate that. It’s not connected to anything on the panel or the other end. It’s just there for when I want to use it later. And so it’s okay to have those terminated inside the panel so long as they’re not connected to anything.
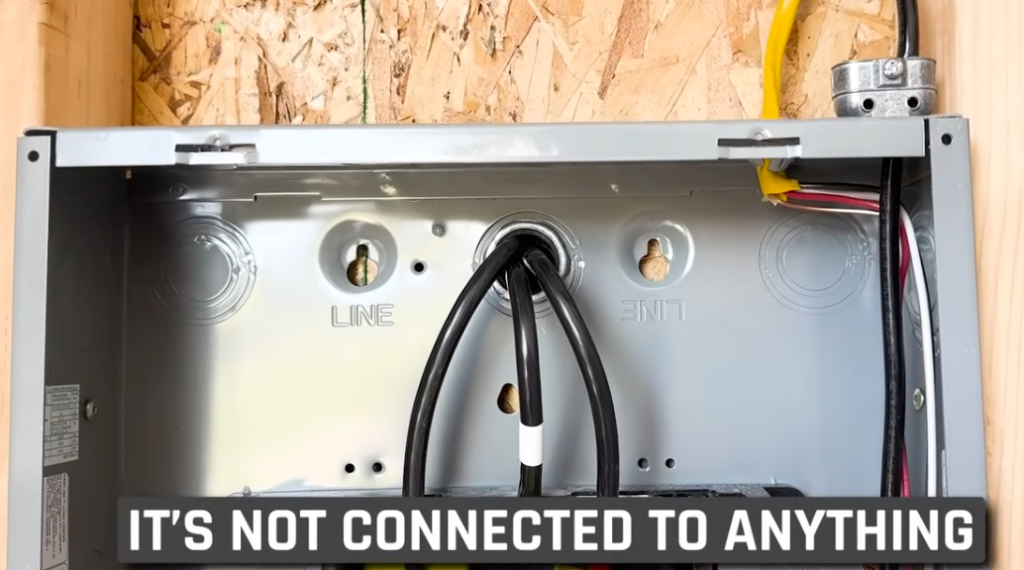
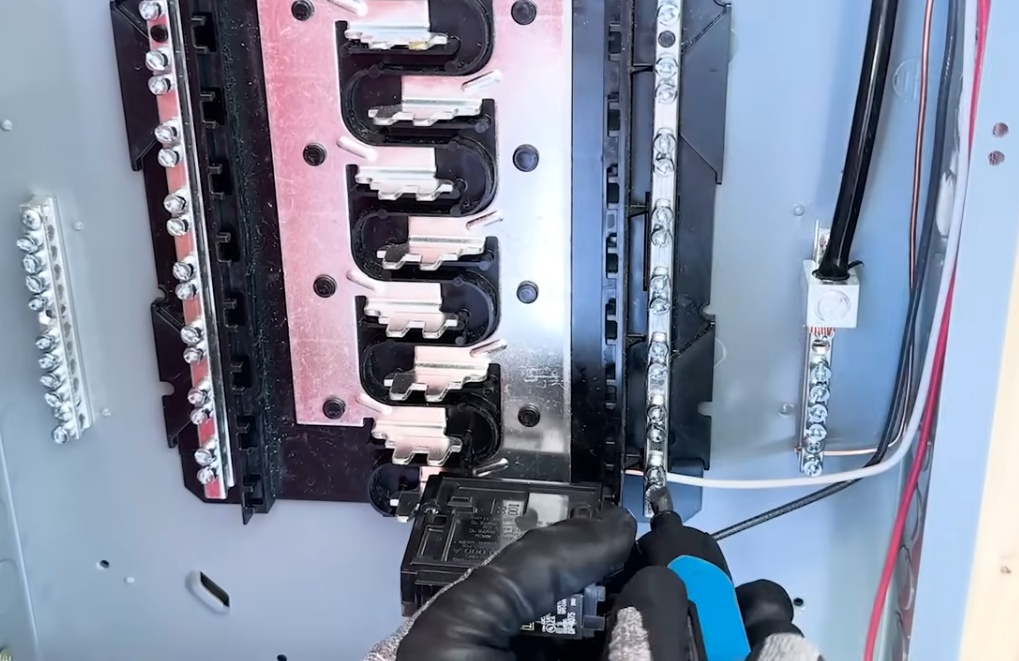
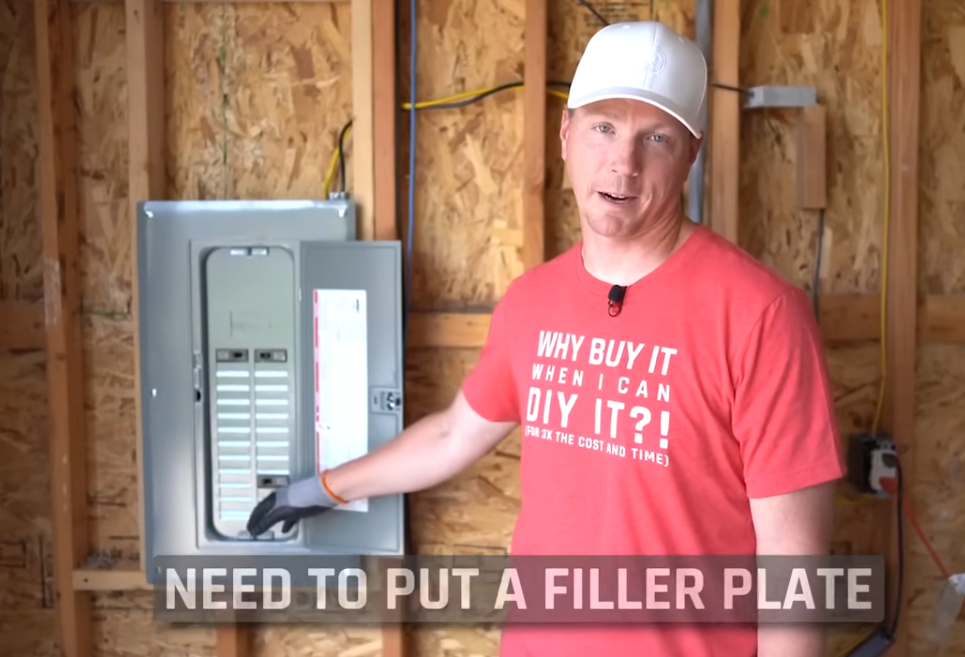
Before putting on the cover, I decided to put just a couple of open circuit breakers because the panel comes with the top two slots knocked out already. Rather than leave those open, I just put these in as temporary placeholders so no one can put their fingers inside those open slots. Speaking of open slots, I had to knock out the bottom right one, which I was using, and that’s pretty easy to do. You just put a little pressure on the panel and then grab it from the back, then rock it free. This panel is now complete, The sub-panel is installed. There is one last thing to do, and this is kind of annoying, but the manufacturer made this with four extra slots down here. Even though there’s no place on the board beneath it for those to accommodate a circuit breaker.
So thinking it was the bottom line, I knocked that one out, and now that’s not up to code. I need to put a filler plate in there, which I’ll have to go purchase and do. But other than that, this thing is ready to go. I actually have a couple of empty ones in here, just for the moment. I’ll be filling these in later today because now that I’ve got this panel ready, I can start running all of the electrical wires I need for my garage shop here.
I’m going to run lots of wires in here. I’ve got my connectors going in here, and I’ll be using all metal ones everywhere in this box just to make it easier to work with in the future. Everything I’m doing in here is going to be as future-proof as possible.
This post has covered a lot. There’s a lot that you want to check out, not only with the National Electrical Code but also with your local code. Check out your city, county, or state, depending on where you are. Be sure to check that out as well. If I missed anything or you saw a better way to do something again, help us out with the comments below and that will help everybody to do a little bit of a better job.
Are you a Homeowner? Check out my post on 5 Monthly Maintenance Tasks New Homeowners Should Do. Click HERE for details.
You’ll like this one on Home Renovation Ideas to Consider As You Head Into Spring. Click HERE to learn more.
Here is the LINK for the Torque Screwdriver.