
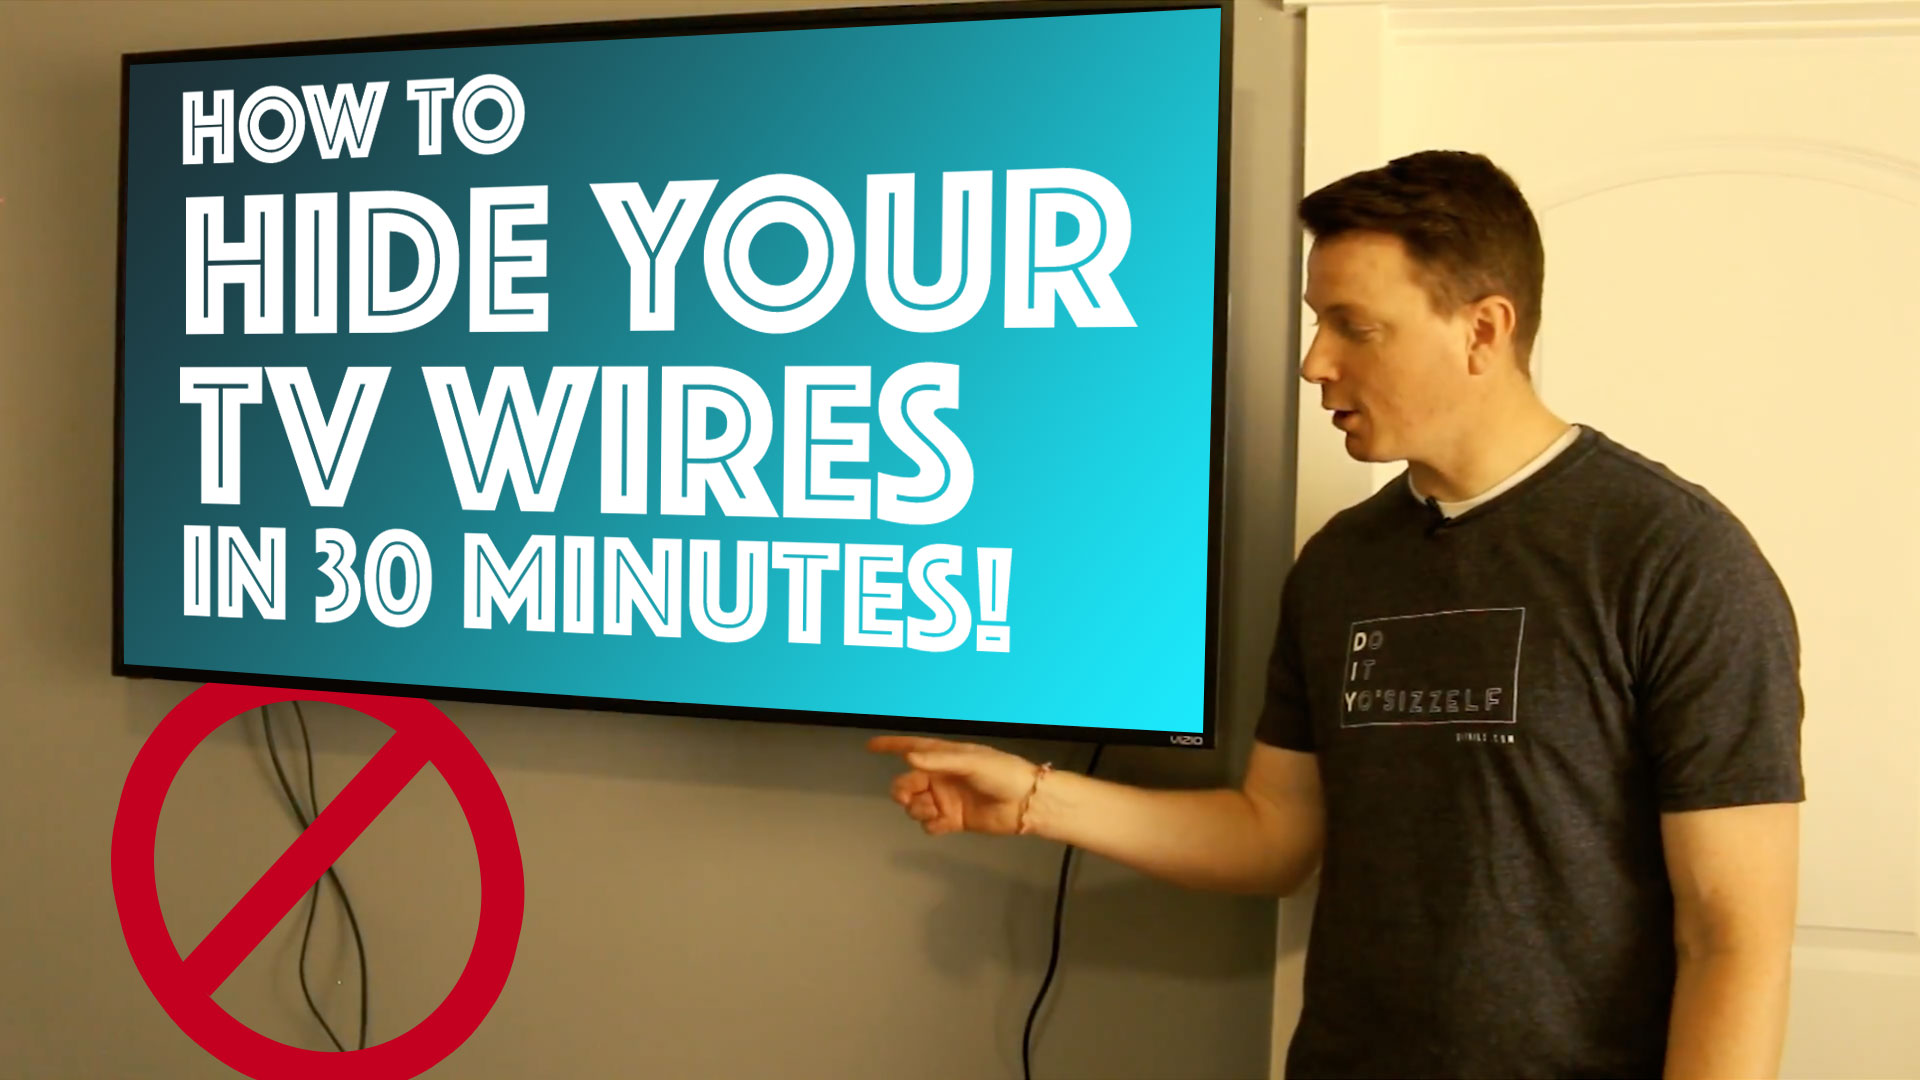
We all love our flat screen TV’s, don’t we? Such a nice, low profile up on the wall! What we don’t love, however, are those ugly wires that hang down and create an eye sore. Hiding those ugly wires is easy, so fear not.
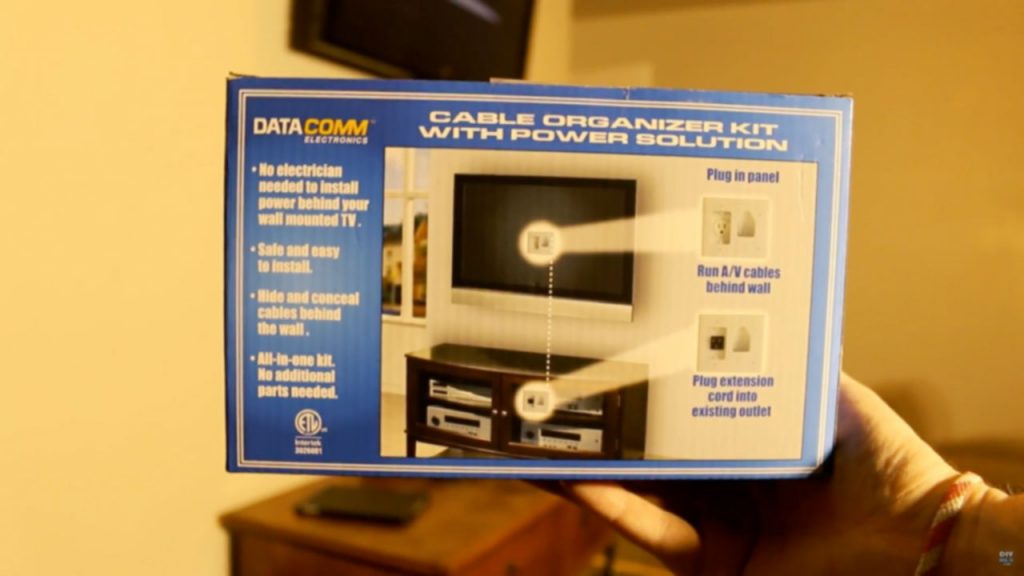
This post is sponsored by DataComm Electronics. They provided me with a professional installation kit, all other equipment is my own.
DISCLAIMER: This installation process is for drywall only. If you have brick, concrete, or otherwise solid walls, this process will not work. I suggest using a piece of cable channeling instead to hide those wires.
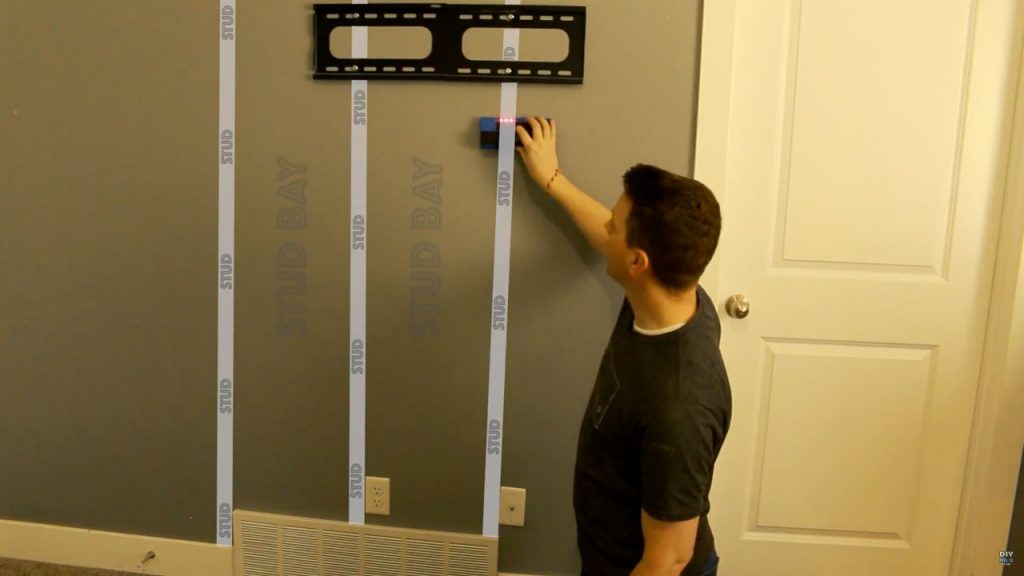
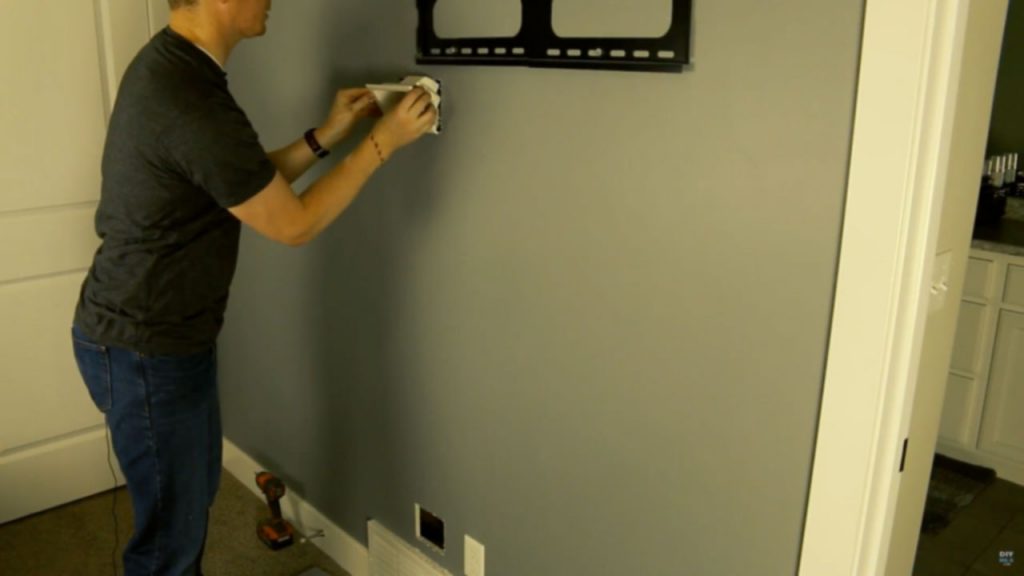
The first thing you need to do is remove your TV from the wall, as well as any wires or plugs. Make sure you have a clean space to work with. Figure out where your studs are using a stud finder. Typically, studs are 16” apart, and you’ll want to work within the empty space (called a bay) between studs.
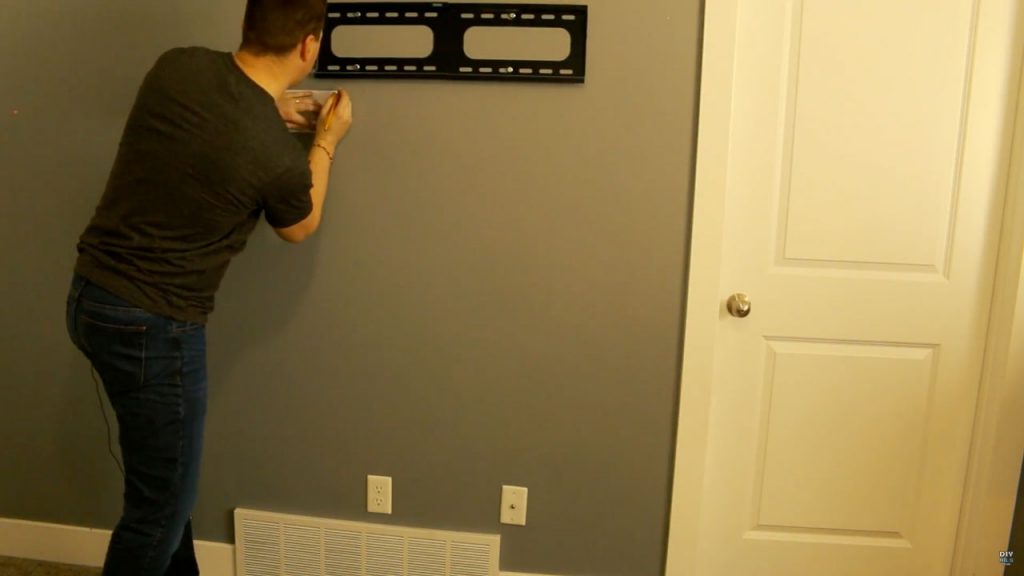
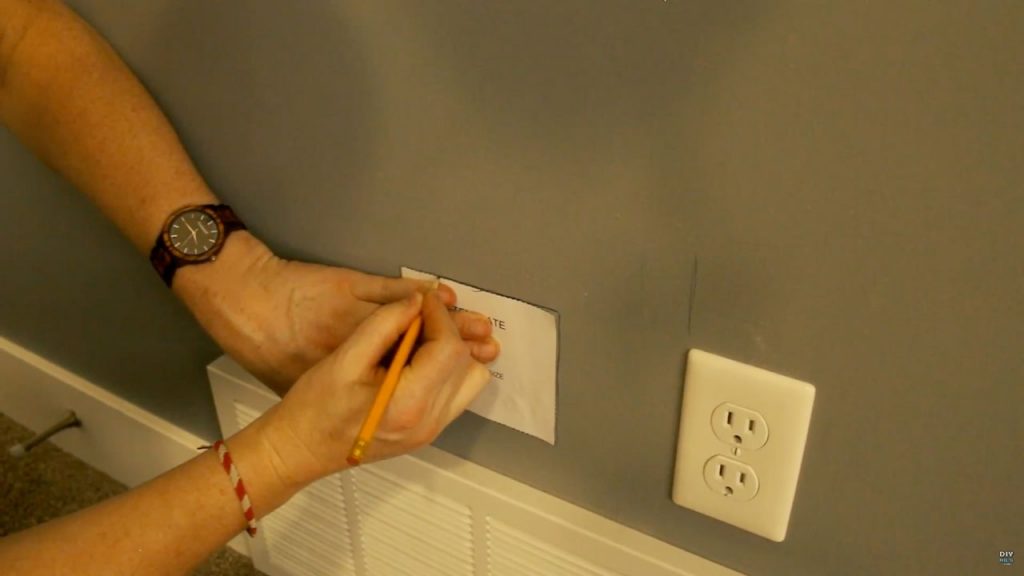
After you’ve marked where your studs are, mark with the template included in the kit where you want your top and bottom receptacles to go. The receptacles need to be in the open bay between studs, because the wings/tabs on them attach to the drywall, and the stud will get in the way of them. Also, the top and bottom receptacle should be in the same bay as one another. Use a level to make sure the template is straight.
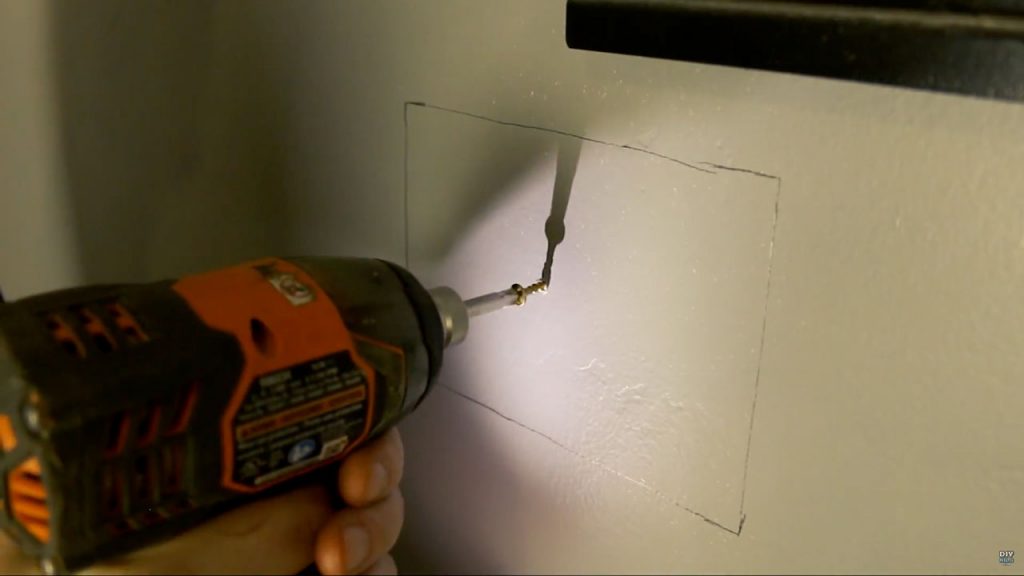
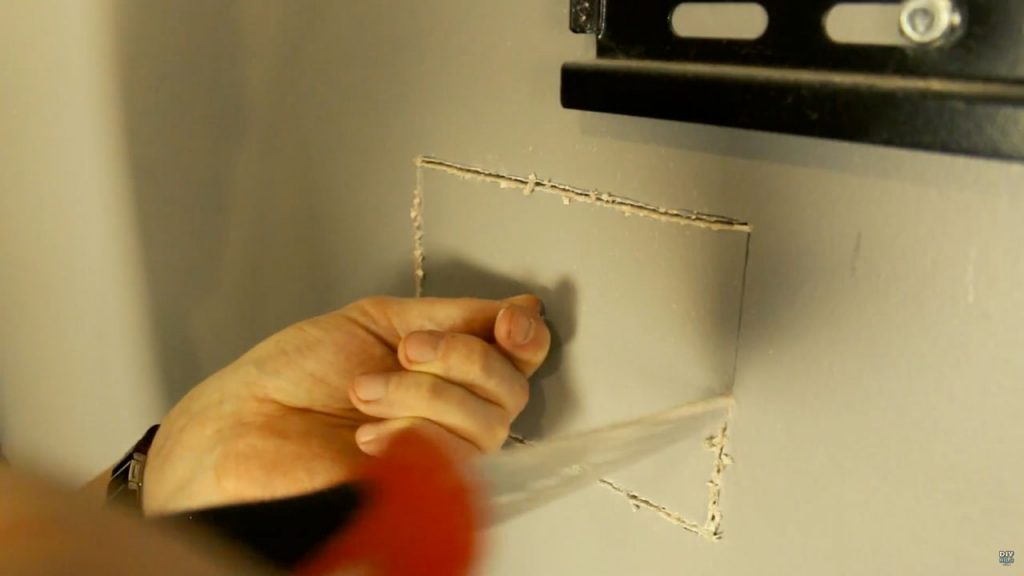
In the middle of the piece you have marked to cut out, attach a screw and use it as a handle, so when you’ve cut all the way around the piece, it doesn’t fall into the wall. Use a jab saw to cut out the square. You can also use a utility knife; score around the square until you get all the way through. Make sure to hold onto the handle as you cut the last side of drywall!
Optional: Some people are concerned about critters getting in the walls and chewing through the wires, or you may want to just make it easier to pass new wires between the top and bottom receptacles later on. I used a 6 ft bilge and pump discharge hose for this. It’s sealed all the way around, and has sections to cut it to size with regular scissors. You can run the low voltage wires through the hose. Connect the hose to the top receptacle using white electrical tape if you’d like.

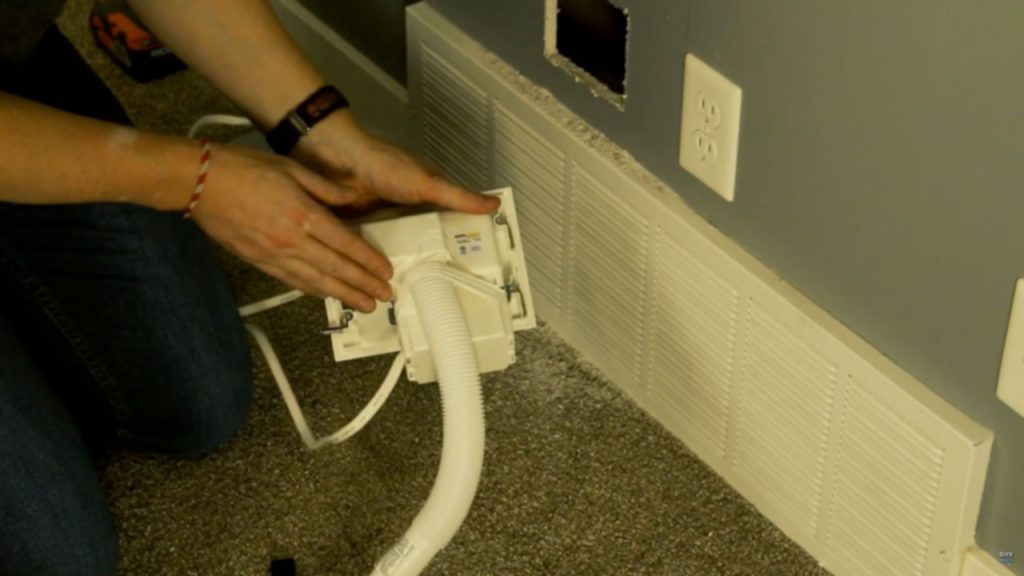
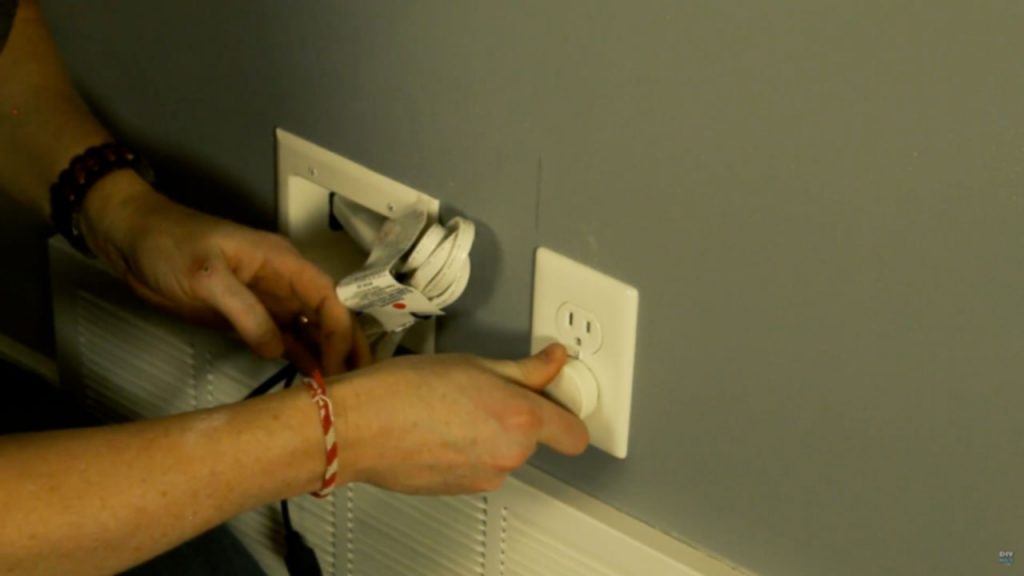
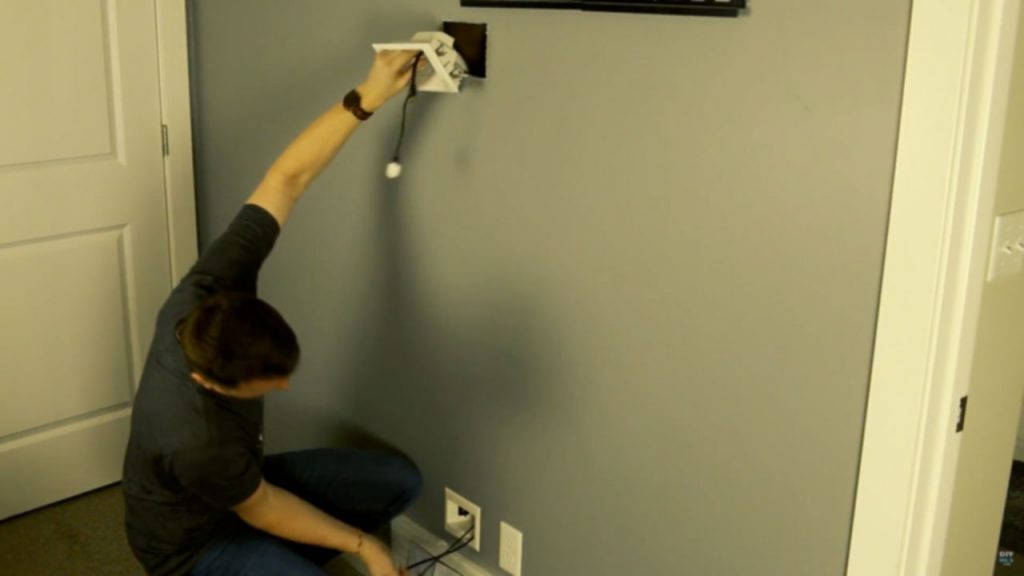
Make sure the tabs/wings are in first so the receptacle fits in the hold. Drop the electrical wire down as well as the AV tube.I would recommend feeding your A/V wires through the tube at this point. Put the bottom portion of the receptacle in first. It may be a little tight, but will swing in. Once it’s in, use a screwdriver to tighten the wings and attach to the drywall. Pull everything through the bottom hole.


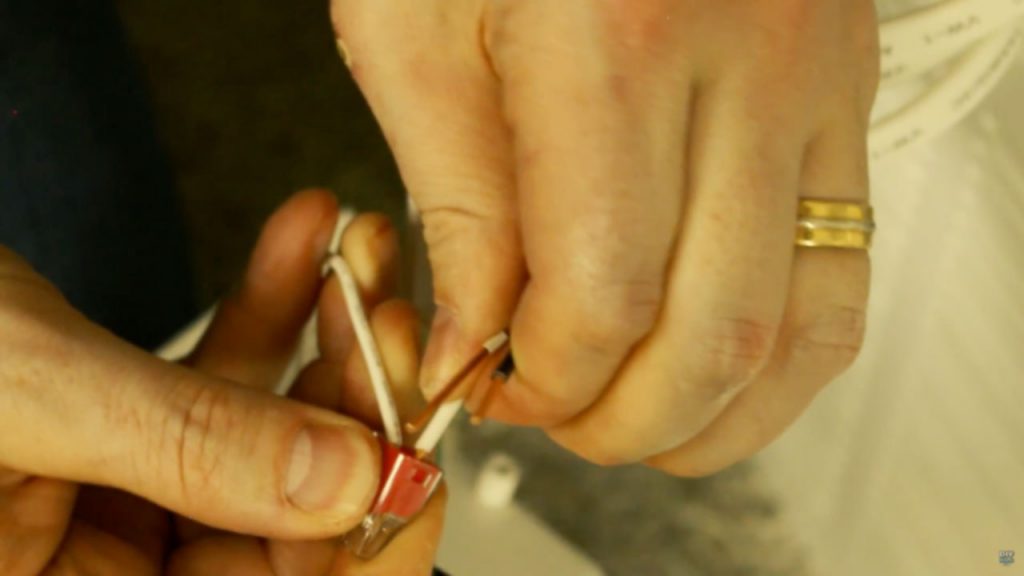
Bottom receptacle: Coil the wires, and push them through the box to keep them contained; then push them with push in connectors, matching each wire with its counterpart (white/white, black/black, green/ground). Push the wires into the box, and use screws to fasten the box to the bottom receptacle. Attach pipe onto the bottom piece with tape.

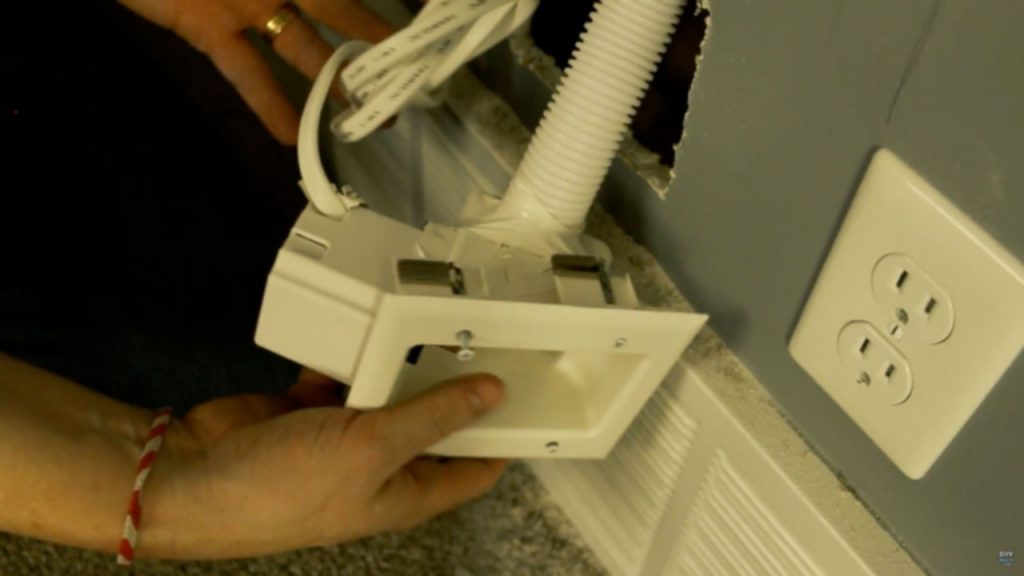
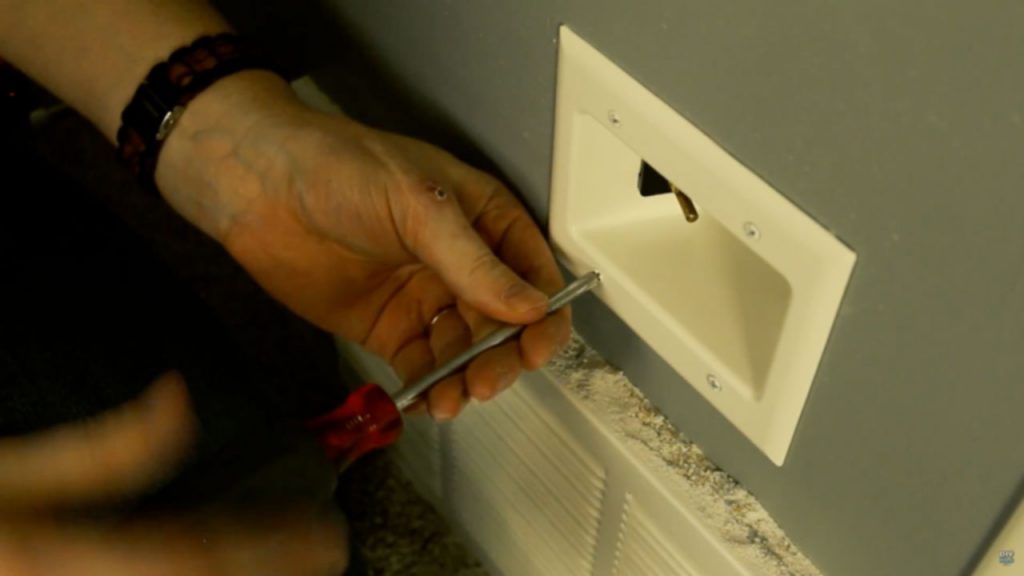
To install into the wall, put the electrical side of the box into the wall first. Make sure the wings/tabs are in. Push the left side in first to make the right side fit nicely. Tighten with a screwdriver. Drop A/V cables down the tube (if you haven’t already), and plug power into outlet.
PRO TIP: The hose may get jammed when trying to fish the wires through. To help with this, just pop out the top receptacle. Even a flimsy wire will go through the tube.
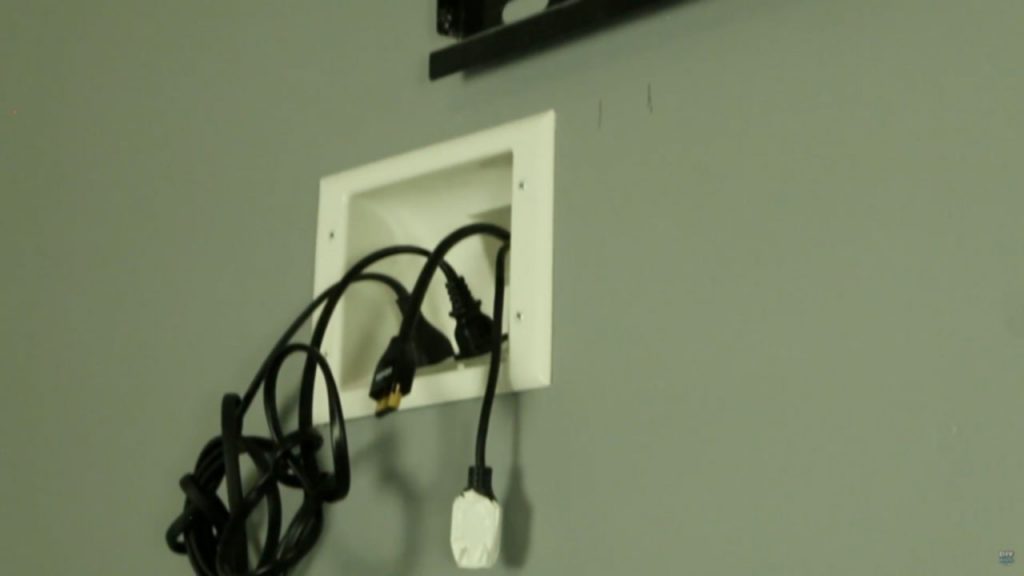
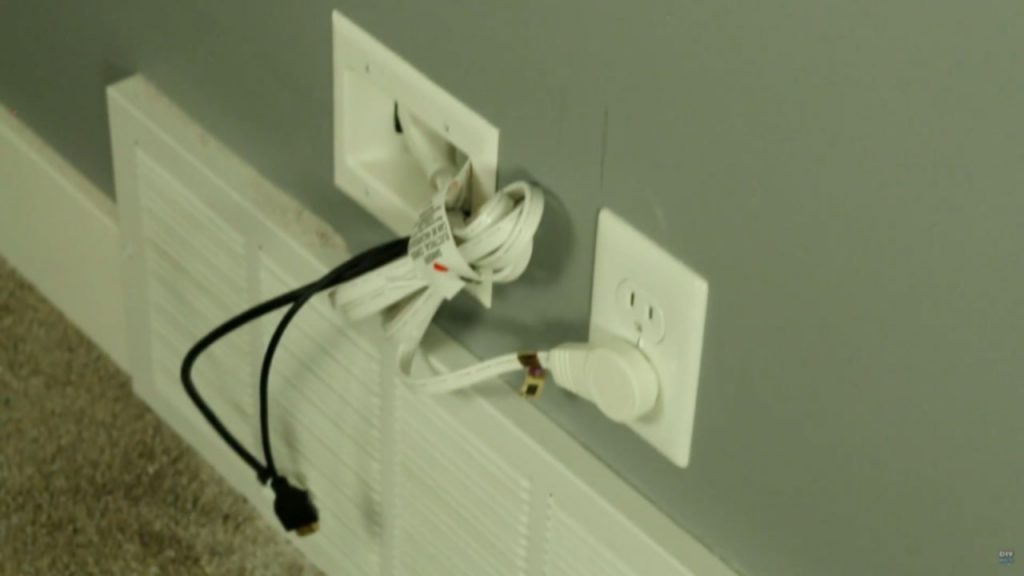
When you’re done, you should end up with an outlet up top (behind the TV) and you A/V cables spanning between the top and bottom receptacles, ready to plug into the TV and you components!
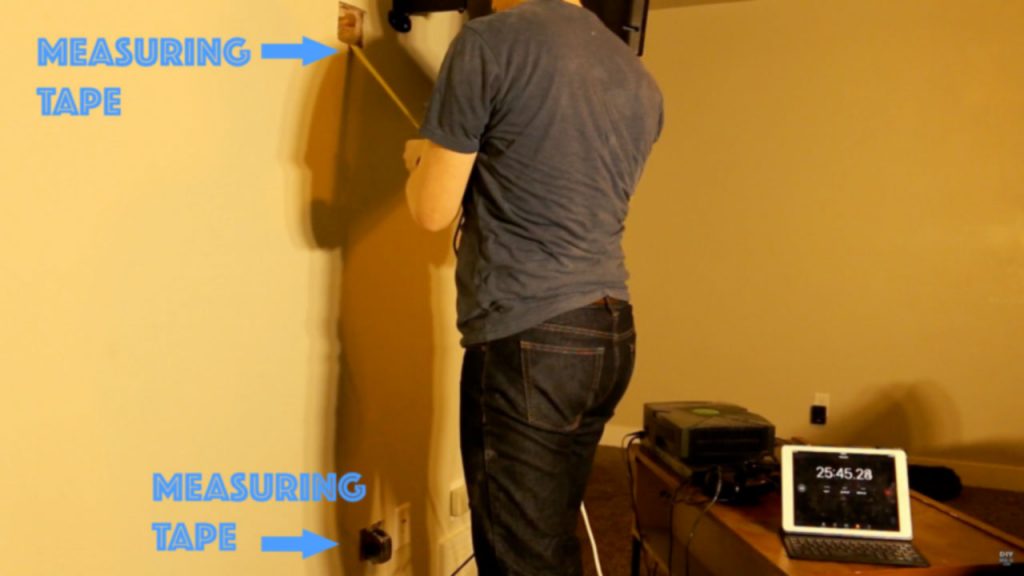
It should be noted that you can perform this install in an insulated wall as well, just as easily. At a friend’s house, I used the single outlet installation kit from DataComm to do their install in an insulated wall.
The trick to pulling your wires through the insulated wall is to use a measuring tape and feed it from the bottom opening through to the top. Once it’s through, you can either tape your wires to the end of it and pull it back through or tape a hose/pipe to it and pull that through, which will make future wire pulling much easier.
When you’re done, you should have a sweet, clutter-free wall under your TV. W00t W00t!

I’ve done a similar install in another room in my house using simple open ended face plates and then manually installing an additional outlet. I have to say, using the kit was way easier and faster. The installation at my friend’s house took 30 minutes, including the time it took to shove one of those humungoid original XBOX A/V plugs through the receptacle (it barely fit).
Got any questions, comments or suggestions? Leave a comment below and let us know what you think.
Check out the video of the install here:
How do you do this with spray foam insulation? I followed your video for another walk but it had no insulation and the next one I want to do is upstairs but for an exterior wall. How do you suggest I go about it with spray foam in the wall?
Spray foam makes this really tough. You’d essentially have to create a tunnel through the foam. Some suggestions would be to use a long, wide drill bit, or maybe to drop a heated metal object (not so hot that it could start a fire, but hot enough to melt through the insulation) down the top cutout or to try to cram some stiff wires down there to loosen things up enough to fit your wires down. I haven’t tried any of this before so let us know if you find something that works well. Good luck!
Hello Nils,
Would two of those bilge pump tubes fit side-by-side in the cabling junction boxes?
It would be a tight fit, but yes – I think they would both fit.
I am interested in becoming an installer, do I need to be to a an electrician?
I’m not sure what you mean by becoming an installer but I would think you would just need to be familiar with the electrical code in your area and, if you’re outside the U.S., the laws may be completely different from here in the U.S.
Do you have a video showing how to install 50-3323-wh-kit if there’s a fire block?
Thanks
John
In order to wire the outlet boxes many holes would be needed and so they should be drilled and this is to be done when your log erection crew is installing the logs and not later than that. The construction crew will want to mark the location of the holes when they drill these holes on the sub floor. You need to make sure the drilled holes go all the way through the sub floor. The outlet box holes are to be cut then.
Good morning Nils. What was the brand and model number of the stud finder you used in your TV wires in the wall video. I am looking to purchase a good and reliable stud finder.
Thanks,
Sam
Hey Sam, I actually have two TV wire videos but I’m guessing you’re referring to the blue horizontal stud finder. It’s called a Franklin and here’s the link: https://geni.us/lgVT. I also did a whole video comparing stud finders, which you can check out here: https://youtu.be/IVkNyhmRO1k.
Hi, if you have a tv wall mount that swivels and Extends to allow you to pull the tv away from the wall, how does this work with the installation of the DataComm system to allow enough wire for the TV to be brought out from the wall to view and still hide the wire?
Hi Kathryn, for that you’ll want to use longer cords and cables and then fasten them to the arm itself. That way nothing is dangling or under pressure. Many of the arms have cord tracks or clamps you can use for this but if not, velcro straps work too.