
One of the chores we assign to the kids is unloading the dishwasher. They generally do an okay job of putting things where they actually go, but they do an especially poor job of being careful or thoughtful about putting things away; they shove baking dishes, mixing bowls, and storage containers in the right general region, but there is no careful stacking or care happening. Am I blaming them for the complete lack of organization in our kitchen cabinets? I am, yes.
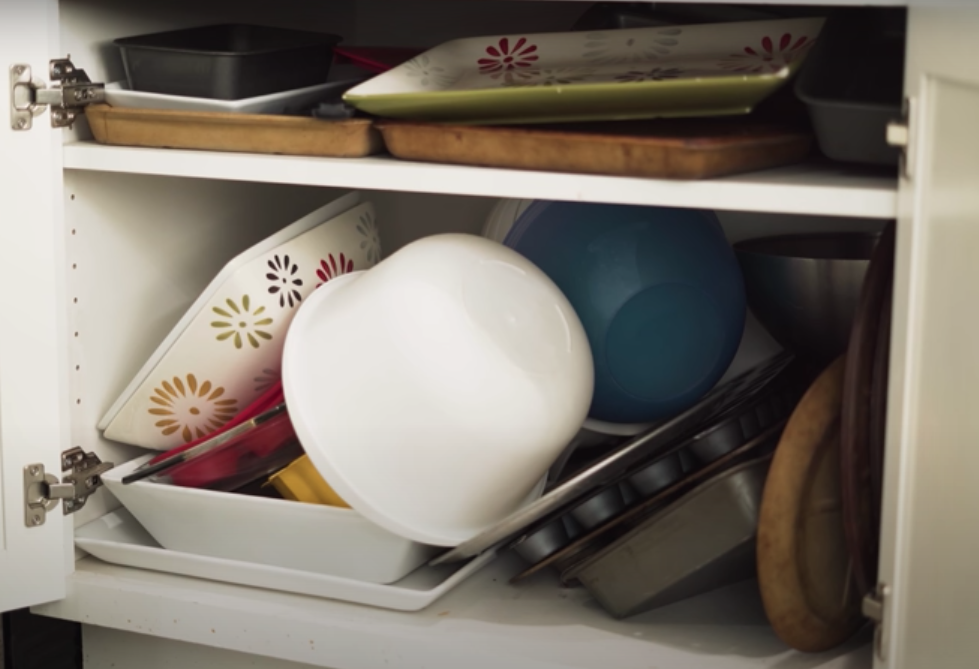
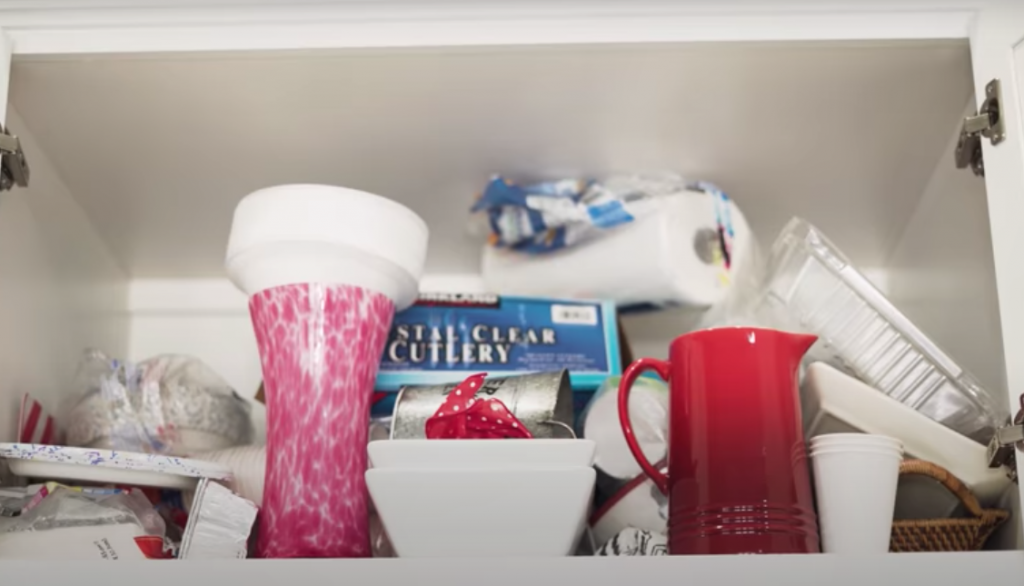
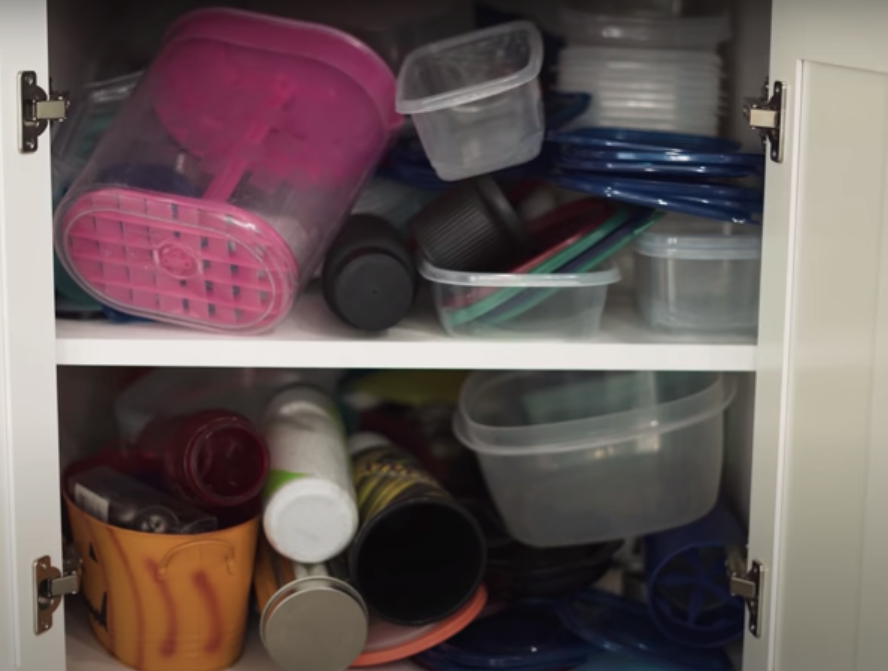
We’ve had enough of things spilling out of the cabinets, cookie sheets not staying upright, and just the general chaos of not being able to find things easily. We decided to do something about it, and maybe, just maybe keep the cabinets organized for more than 5 minutes.
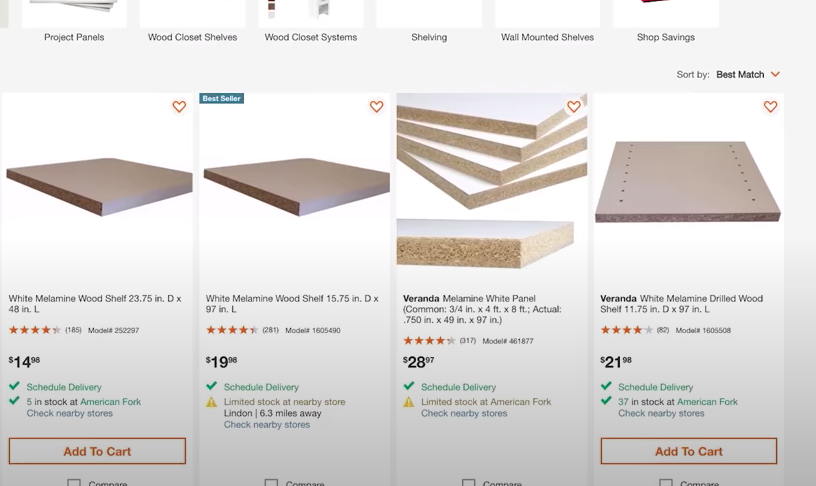
Enter DIY shelving! This is fairly inexpensive and can be done over a weekend. We used melamine panels so that the shelves would match the cabinets and have a professional look to them.
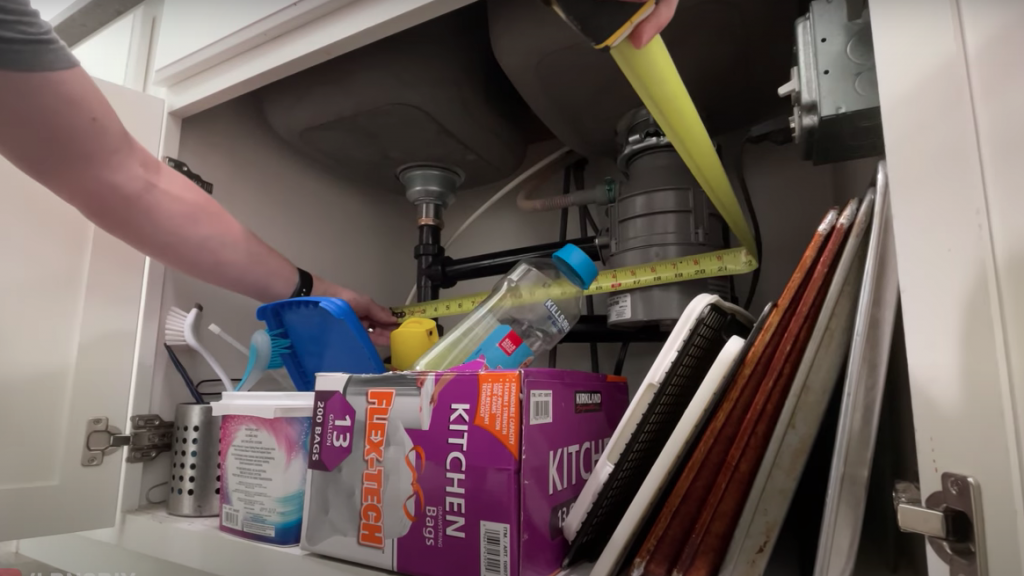
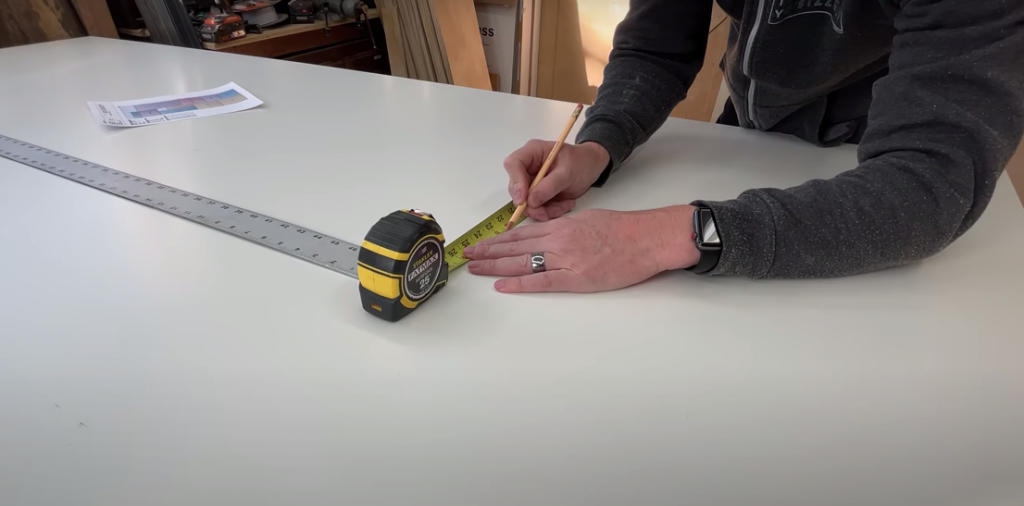
First step is to get the measurements of the cabinets you’d like to build shelving for. Be sure to take into consideration any pipes, garbage disposals, etc. for under-the-sink cabinets.
We wanted shelving units that would be removable when needed. You’ll need the length and depth of the inside of each cabinet, and then think about individual spaces for things like crock pots, pans, lids, etc. so everything has a place to live.
This is what we’re after- a removable shelf that has spaces to make organizing easier.

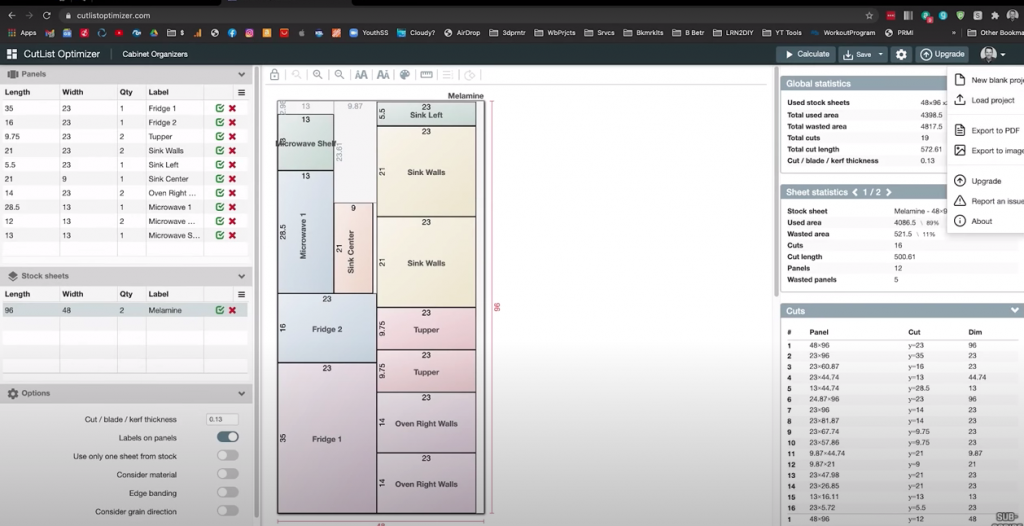
Once we had our measurements, we used cutlistoptimizer.com. This website will lay them out in the best way possible to maximize the space for each individual panel. Once it’s all done, you can render it as a PDF, and print out your cut list that you can use right away. Pretty awesome!
If you don’t want to work with entire sheets of melamine panels, which are large and a little unwieldy, you can purchase melamine shelving that has a pre-finished side, which you just need to cut to length.
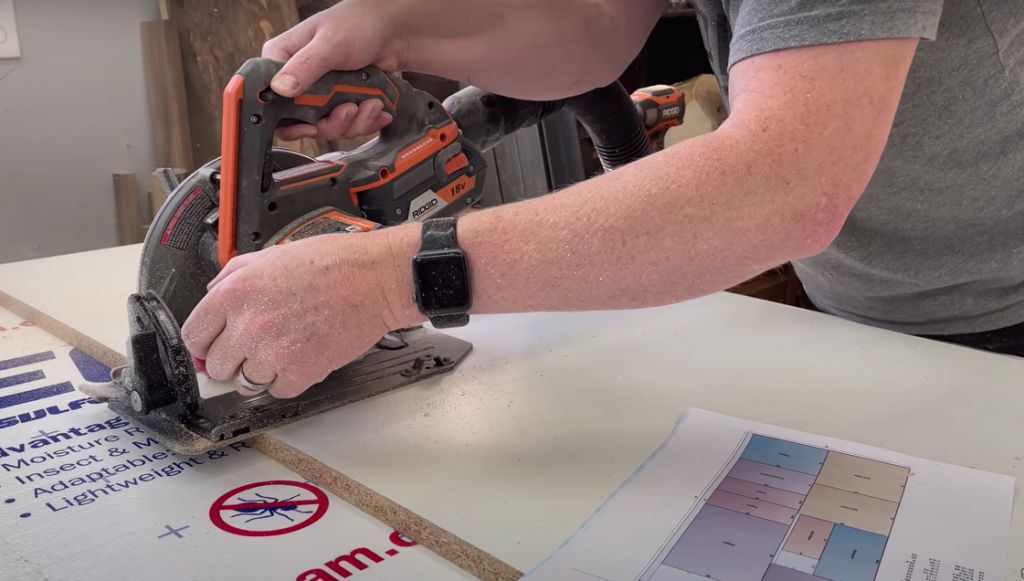
When you’re working with melamine, you want to use a saw blade that has a higher tooth-per-inch count, or TPI count- this helps the melamine not chip as you’re cutting it.
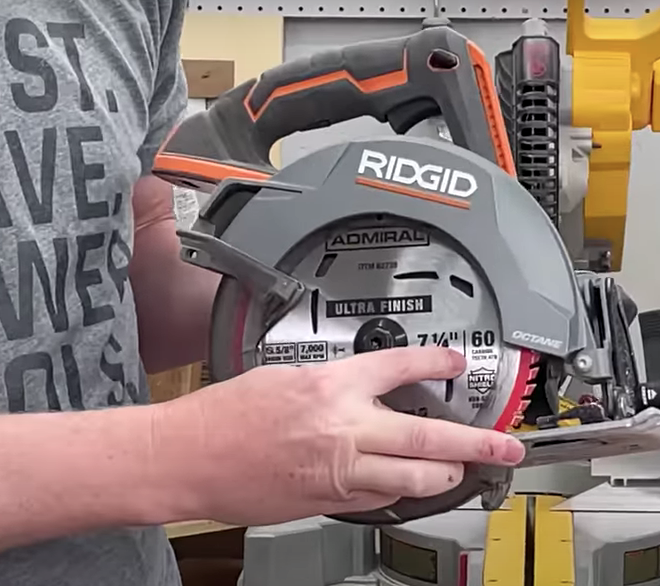
Make your layout marks onto the melamine (if you’re using a sheet of it like we did), rip it down the middle, and then cut each piece to length according to your cut list.
Make sure you check each piece off the cut list once you’ve cut them! Also, be sure to label each piece so you know where they all go.

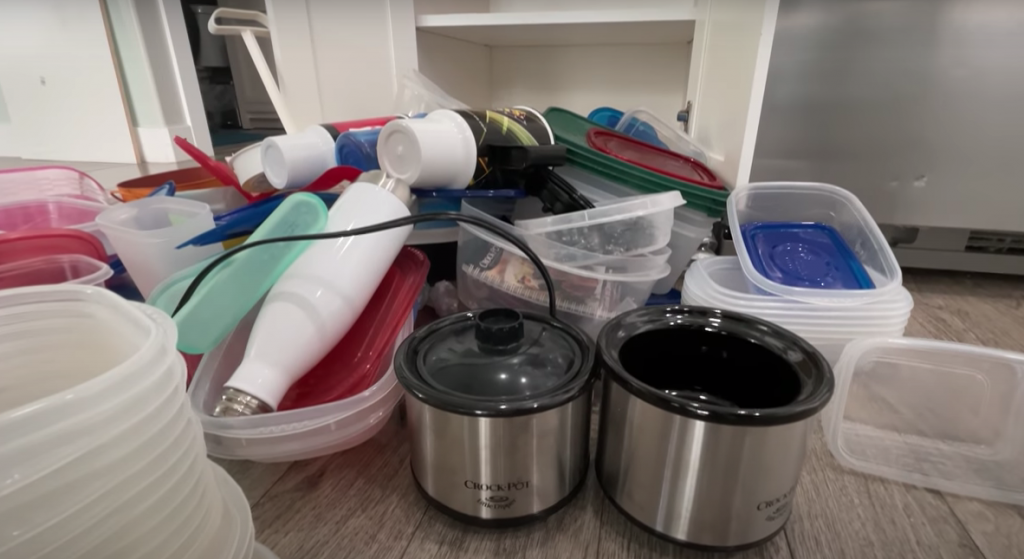
Quick aside, do any of you have cabinets that have crap from your entire life in them? We don’t even know where those tiny crock pots came from. And, why do we have two? How this much stuff can fit in one space is mind boggling.
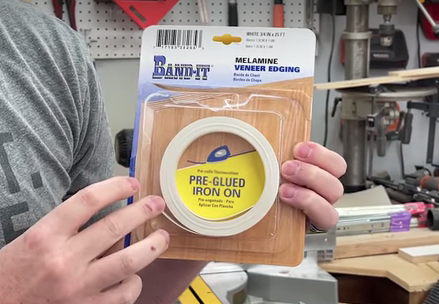
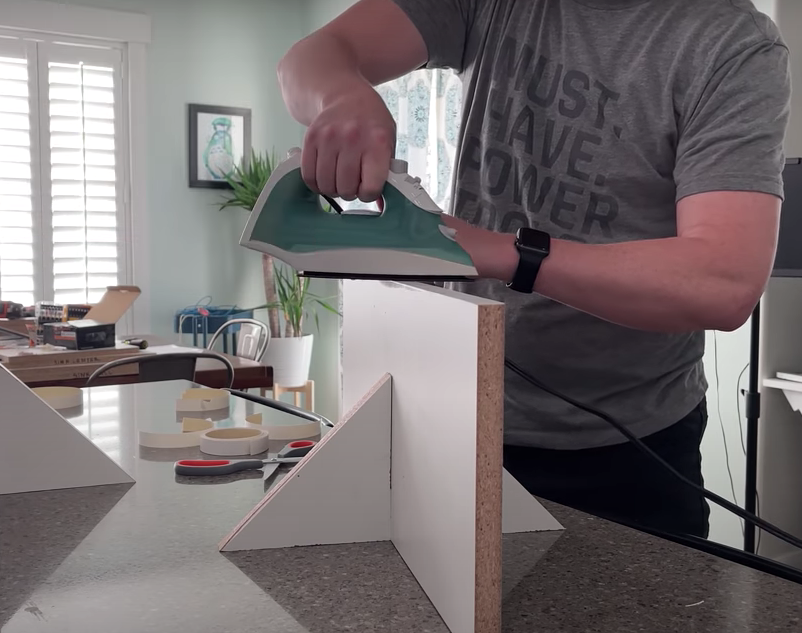
Okay, once you’ve got your shelves cut to size, use some edge banding on the raw edges to make a professional looking finish. It irons right on, and fits the exact dimensions of the edge of the melamine
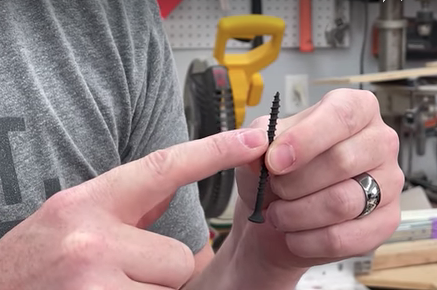
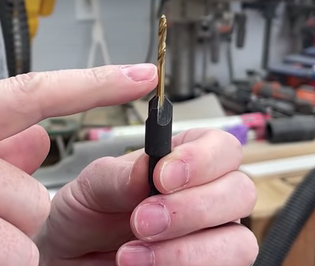
When it comes to assembling melamine, you want to be sure to use a screw with a coarse edge. In this case, we used drywall screws. Another tip: Pre-drill using a countersink bit, so you can sink the head of the screw flush with the surface of the melamine.
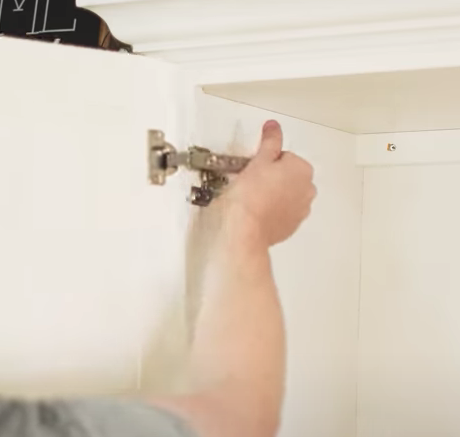
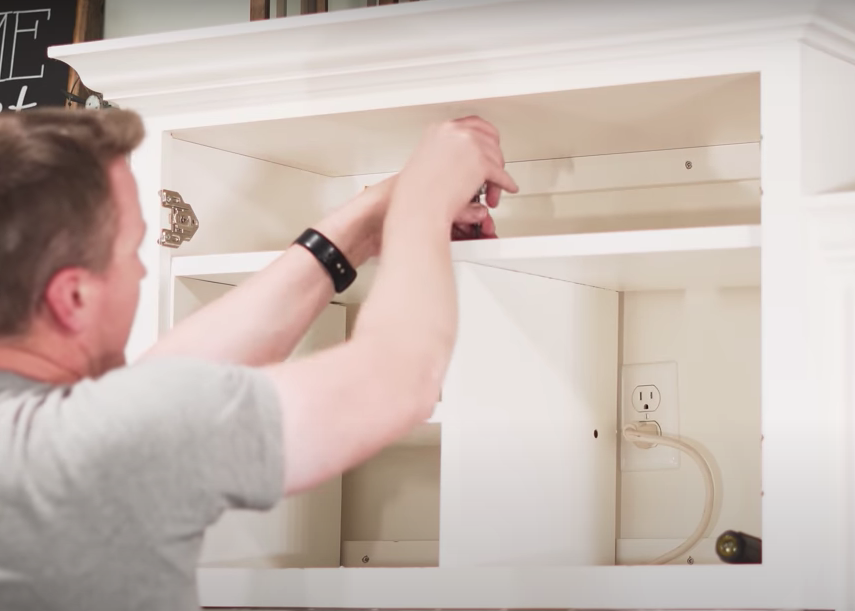
Once your shelves are assembled and ready to install, you may need to remove your cabinet doors to give you more room for sliding the shelf in. Cup hinges or Euro hinges typically have a release lever which allows you to separate the hinge from the mounting plate.
On this cabinet, we weren’t able to assemble the whole shelf outside of the cabinet, and had to do some of it from the inside- Nils had to use a screwdriver by hand, which was a bit of a pain, but made sure to pre-drill and pre-thread the holes to make it easier.
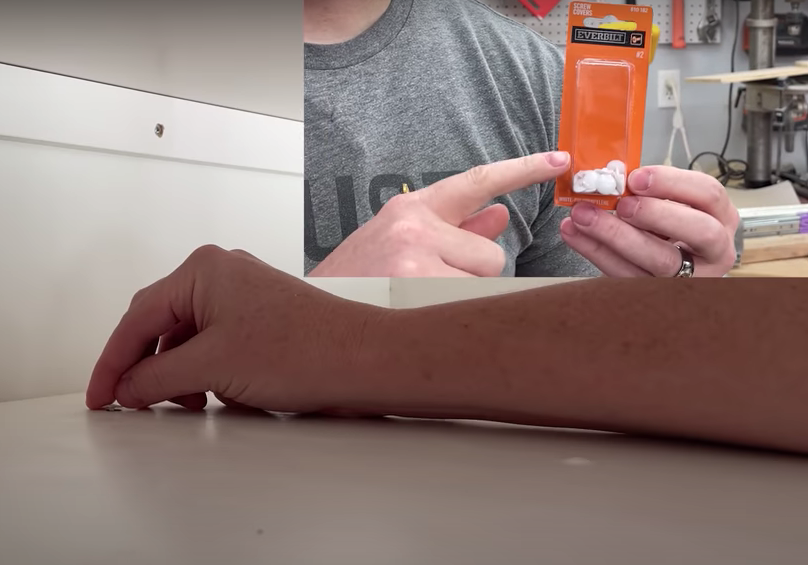
You can also buy screw covers to snap into the screw head to cover everything up, make the surface flush, which will make it easier to slide the shelving in.
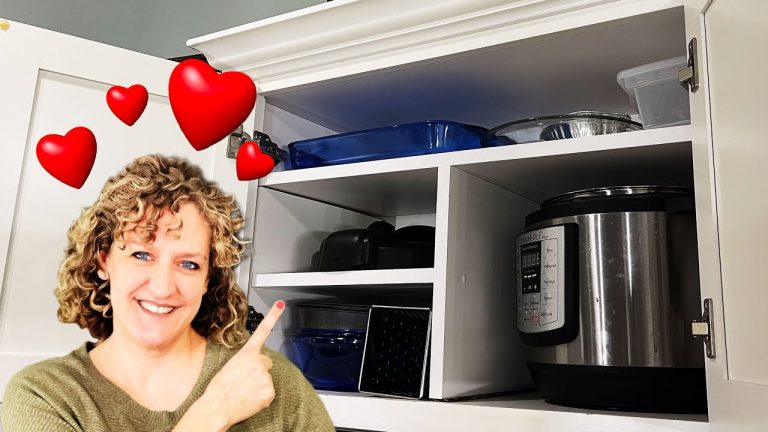
When you’re done, you’ve got a beautiful finished product like these:
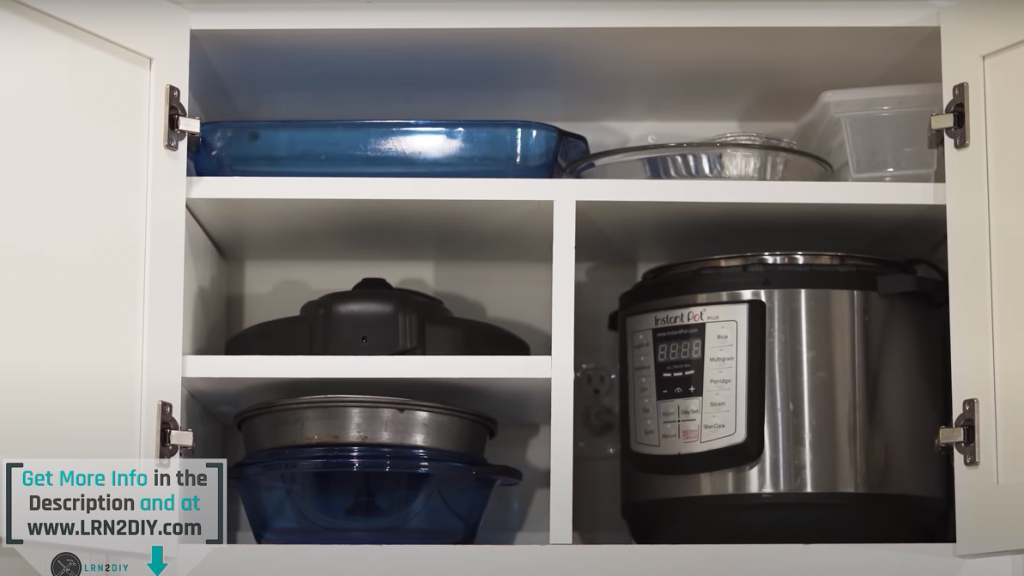
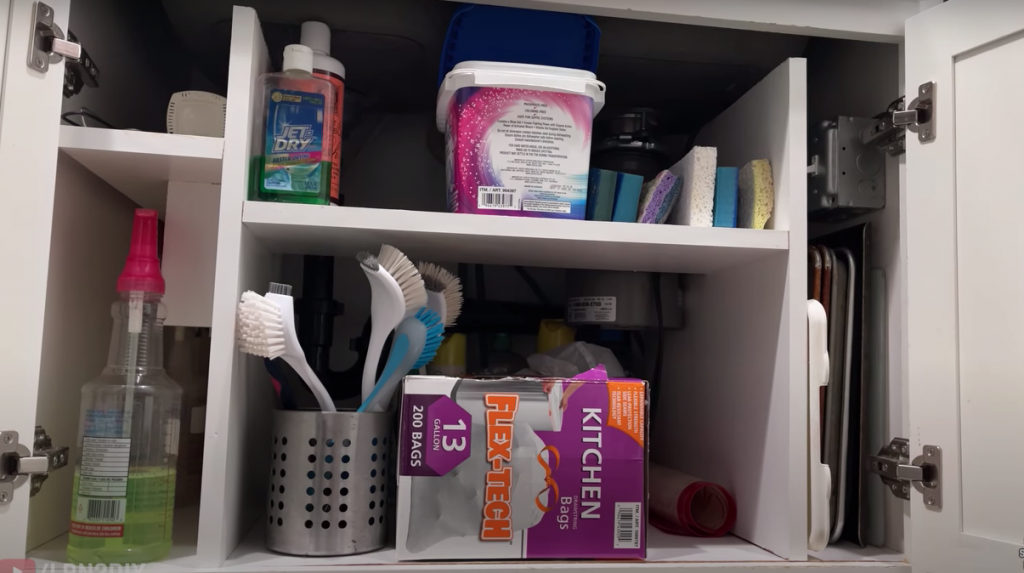
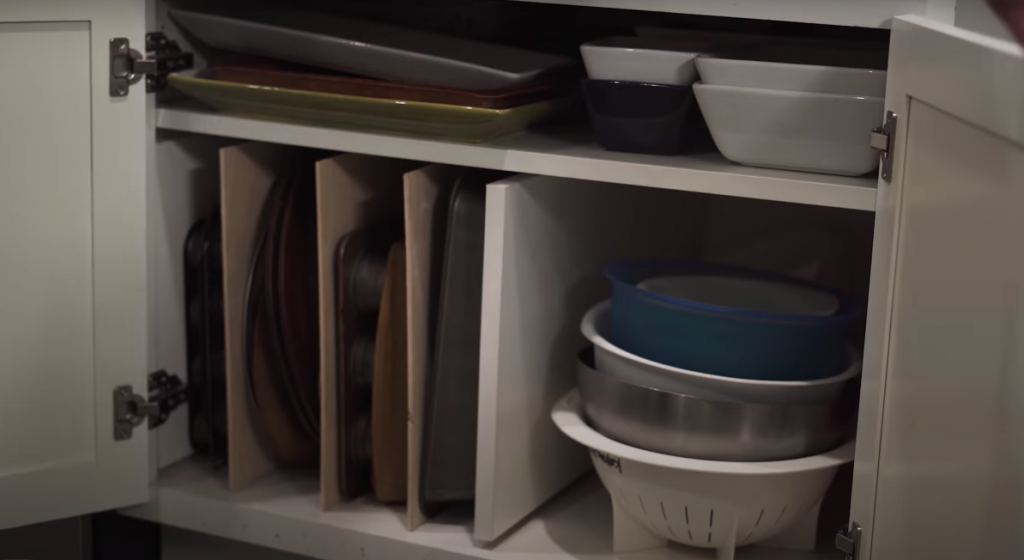
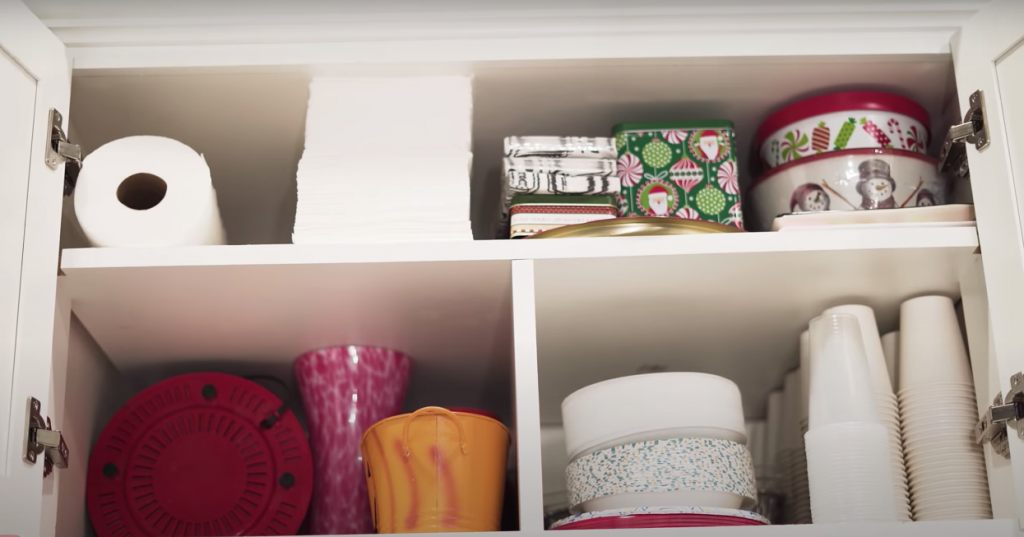
They’re all a million times better than before. This gave us a good opportunity to throw away a lot of junk that we never used. Having separate compartments is helping us maintain the organization. It’s wonderful!
Let us know if you decide to take this on, and if you have any questions along the way!
*This post contains affiliate links, which means you pay the same, but we get a small commission. This helps us to continue creating content, so thanks!*