
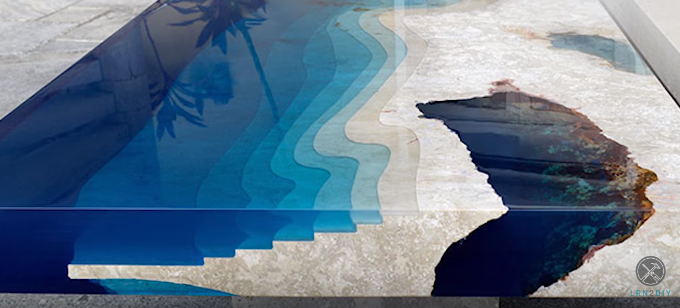
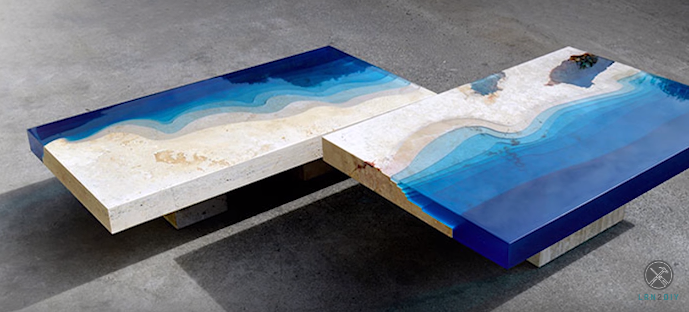
Because I spend so much time at my desk, I wanted to create a unique and beautiful desktop that I could place atop a motorized base. I started researching and discovered these gorgeous desk by a French designer in the Caribbean. He uses local stone, some serious machinery and a boat-load of epoxy. There’s a catch, however – his tables sell for anywhere from $12,000 – $60,000 each! A bit out of my budget, but I still love his work and wanted to try something that was original using wood.
How I Got the Idea
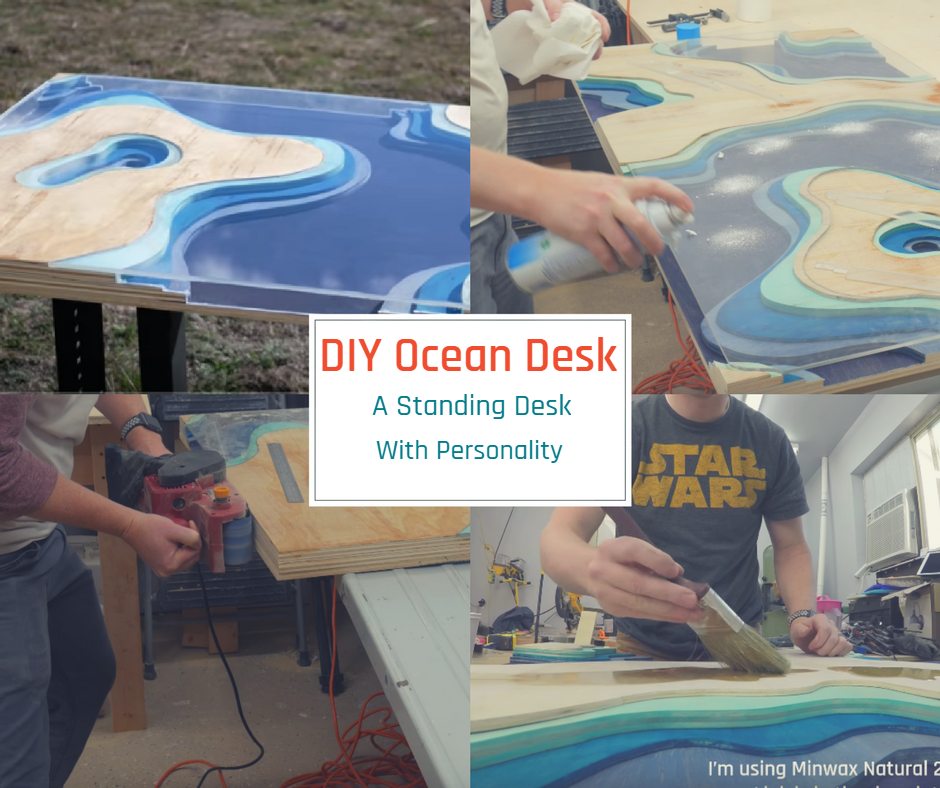
It was actually my son who gave me the idea. He suggested I take multiple layers of plywood and just layer them on top of each other to get that layered look. So that’s what I did.

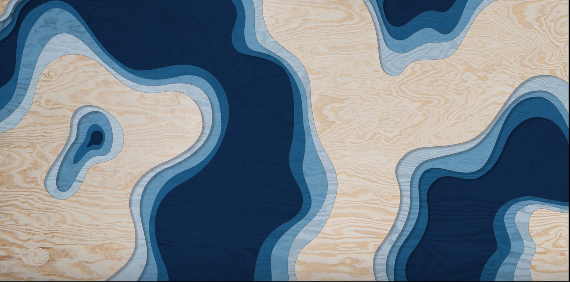
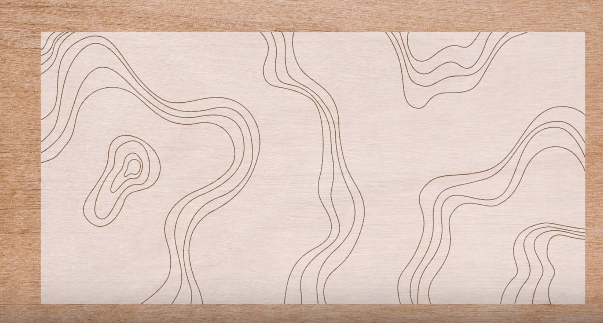
I started by sketching a design on paper, then I took that into Photoshop. where I adding up the layers one at a time until I eventually came out with a prototype. By this point I was pretty excited with the look of the desk, so I was ready to make this thing real.
How I Made the Desktop Prototype Happen
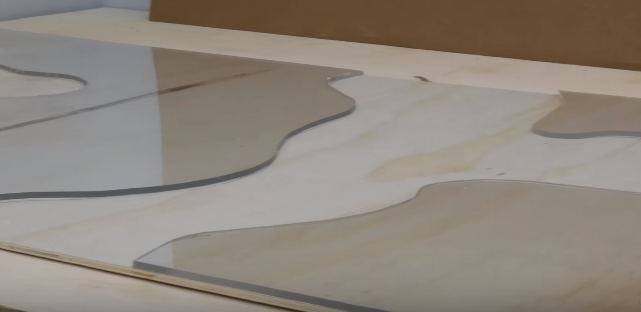
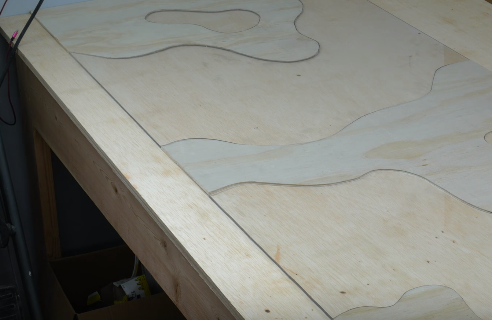
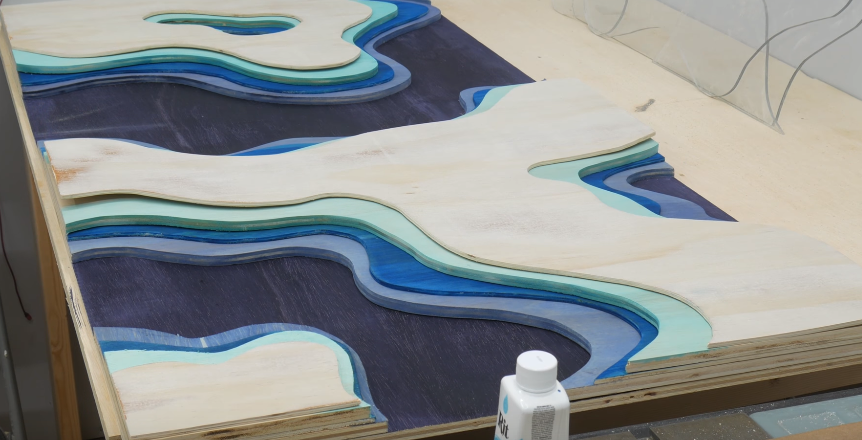
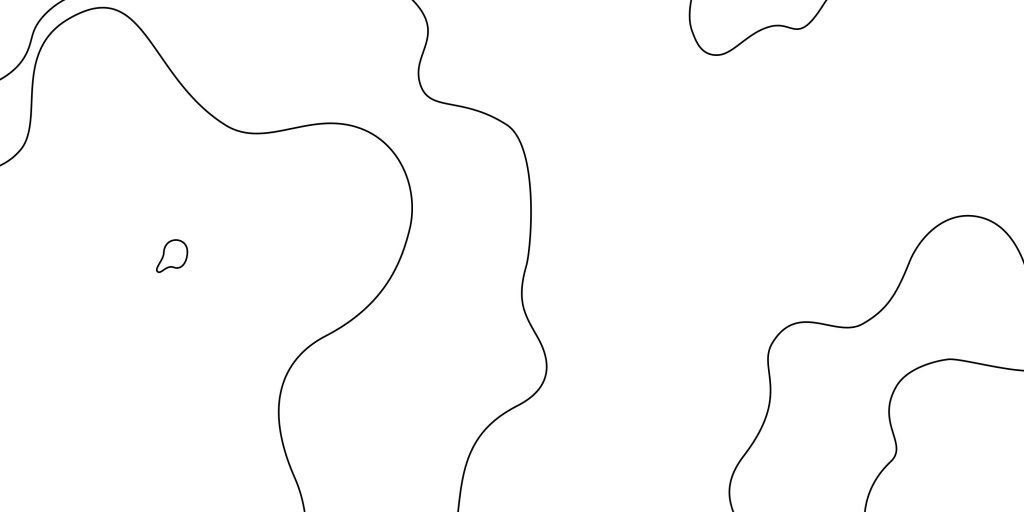
My idea was to take each of these pieces, cut them out of plywood with each section getting a little bit larger than the previous layer and then pile them all on top of each other like this. Looks like a topography map, right?
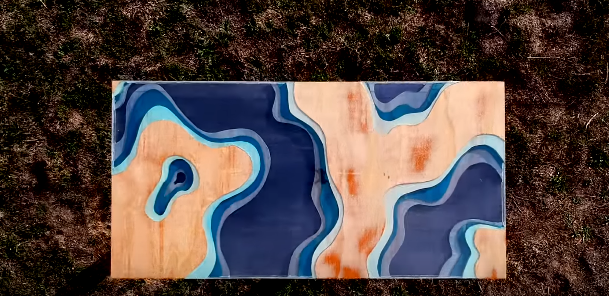
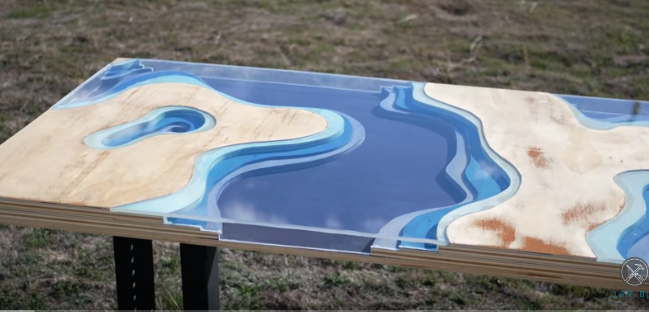
Once I had them all stacked, I would dye each of them and fit glass pieces flush with the top layer to make for a beautiful smooth table top. Ideally it would look like this:
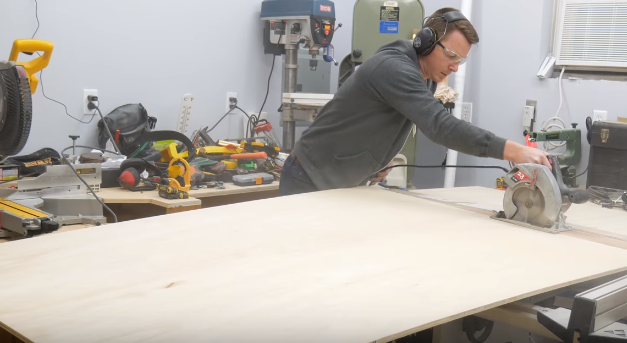
That was my vision. I started grabbing multiple sheets of plywood to get started with the process. I got some half inch and quarter inch plywood, and then I ripped each layer down into two separate pieces, with one being 2′ x 2′ 6″ and the other being 3′ x 2′ 6″. This gave me sufficient material to work with the shapes that I just created in my design and allowed me to maximize the 4′ x 8′ sheets of plywood.
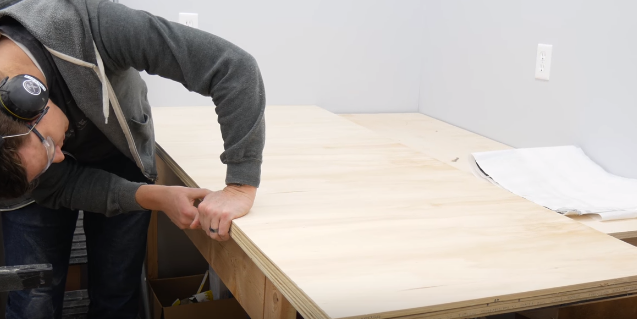
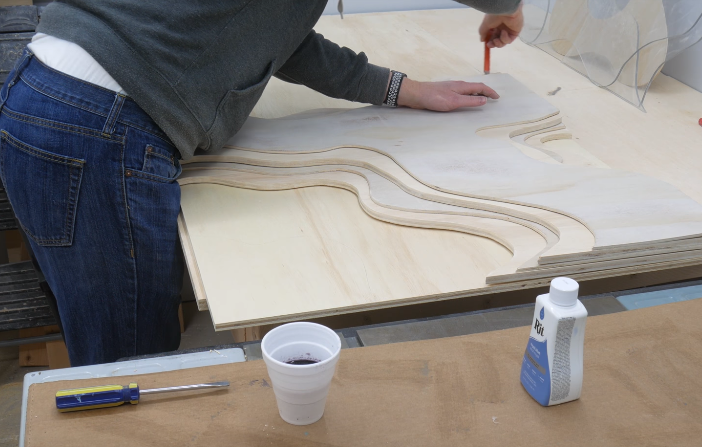
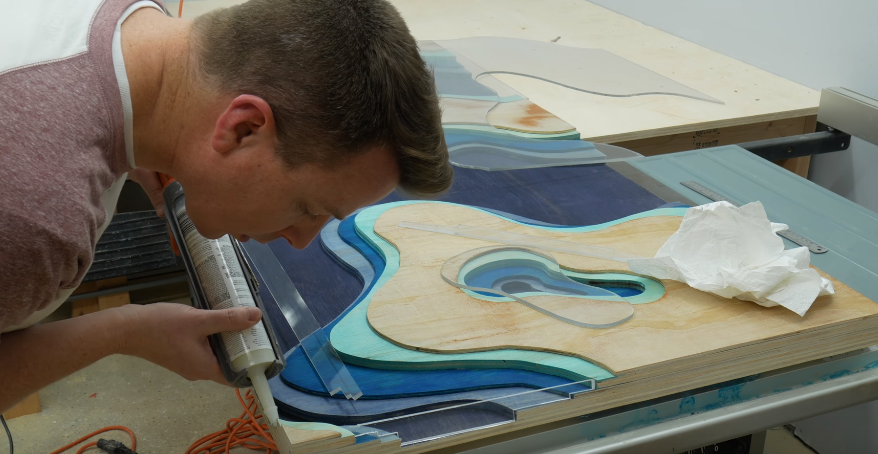
With that, I had a nice stack of wood to start with. I did multiple rounds to make sure that everything looked good. My next task was to transfer my design onto many sheets of plywood. I saw a technique online that looked like a great way to go. It involved projecting an image of the lines onto the wood sheets using a projector. I happened to have a 
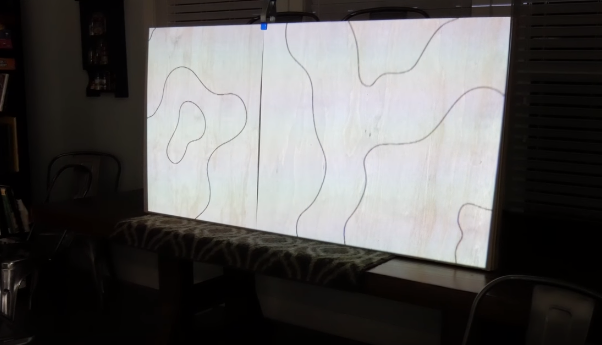
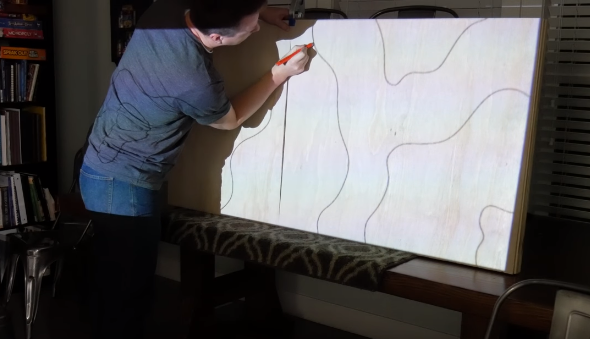
Now I realize that most people don’t have access to a projector for this so you have several options. One is to freehand it, which might be easier than you think. Another is to print out the papers and trace it from there. A third option, and many be the one that makes the most sense, is to cut out your acrylic or glass first, then use that top layer to decide what the next layer will look like. This means every layer will be unique and you won’t be following a pattern, which is cool.
Glass – Tried and Failed
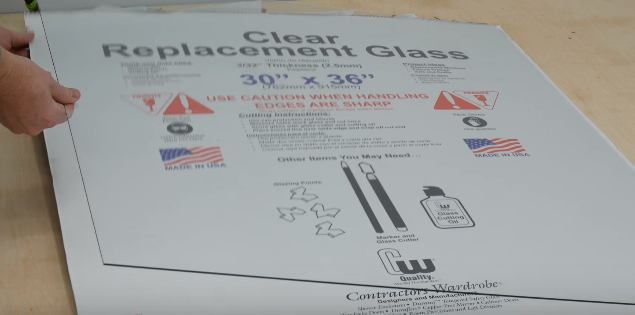
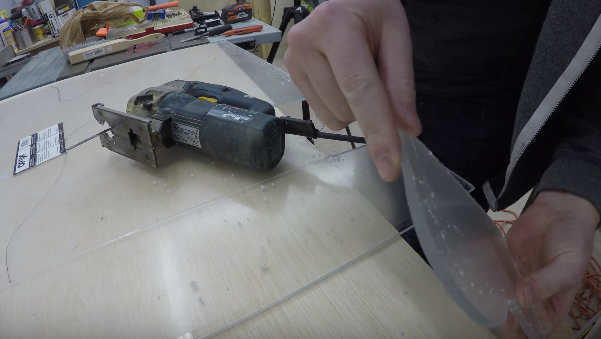
Because I wanted the glass to sit inside the top layer and be flush up against it, I started with a two and a half millimeter sheet of replacement glass. These are pretty big sheets of about two and a half by three feet. I decided to cut two sheets of these for each section. The two sections combined would give me an ideal thickness to match up with the top layer of 1/8″ plywood.
I traced everything using a Sharpie, and then I started making my cuts. At first, it actually went pretty well. I’ve done some cutting of glass before but mostly just straight lines, but since this project consisted of super curvy lines to work with, I was pretty nervous about it.
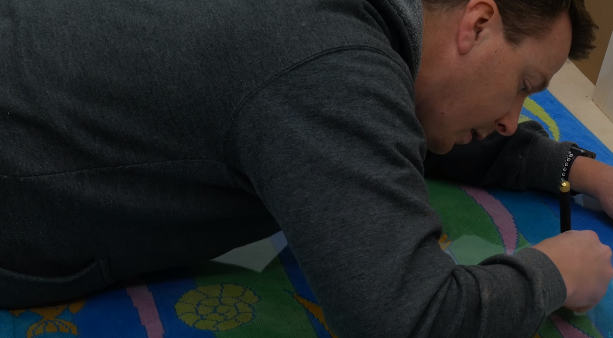
As I was working on these cuts, the first couple came out great, but then it went downhill from there.
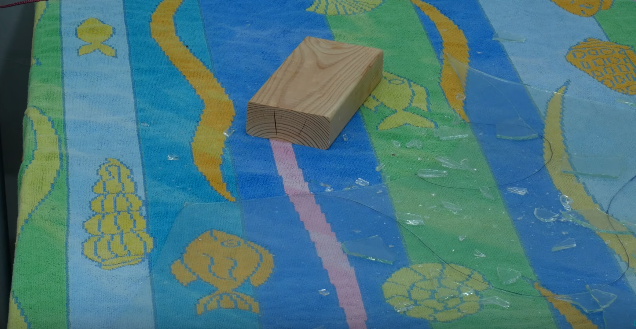
After several fails, I realized that this was not going to happen. I realized it was time to head to plan B. What I did was try something else which was proven to be a lot more approachable and going to be easier for anybody to try out.
Acrylic – So Much Easier to Work With
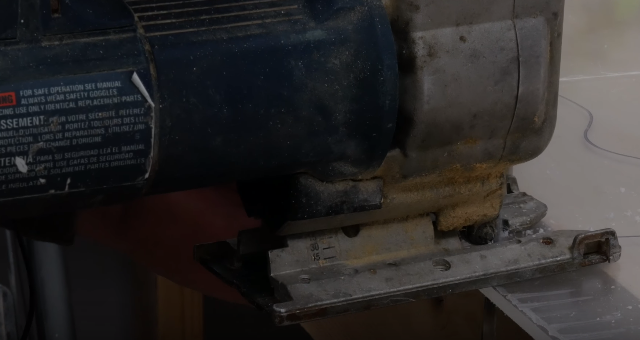
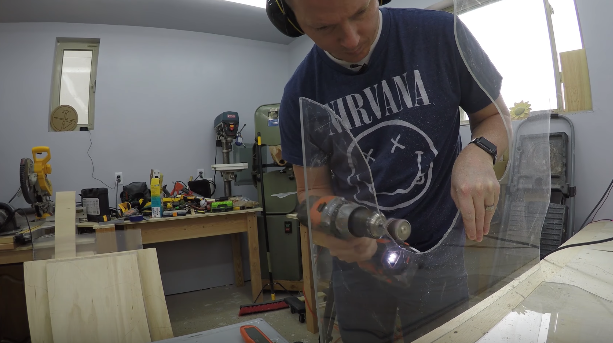
Acrylic is pretty cool for a couple of reasons. The number one reason is you can use your regular woodworking tools for cutting and shaping. Really, the only two tools I needed to work with this was a jigsaw and a plastic cutting knif. So, the pieces I’ve got here are 0.22 inches thick, which is just shy of a quarter inch.
Acrylic is sturdy. With that, since I planned to put it into my multi-layered ocean scene, I already knew first hand that it was going to work out pretty well.
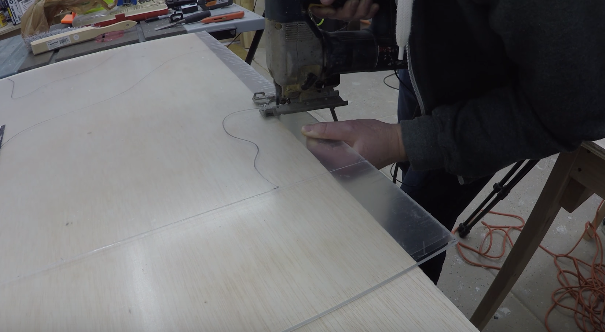
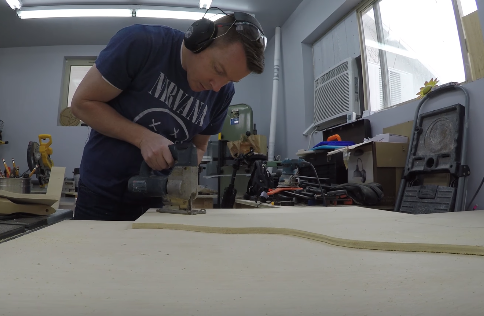
Now, just like with the glass, I had to start out tracing the shapes of the lines on to the acrylic itself. Once I was finished with that, I used a jigsaw with a 12 TPI Bosch blade. The key here is to move slowly. If you run too fast with the blade, what’s going to happen is it’s going to gum up and melt behind the blade, and then it seals itself back together, so it doesn’t even actually break off. Because of that, cutting slowly is key.
Cutting nice and slow with a good place leaves you with a nice, clean cut. After you have your pieces cut out, you need to clean up the edges. You can clean the edges up with some sandpaper by using a drum sander, or just a small drum attachment on a drill, or even doing it by hand. I didn’t include this in the video but using a kerosene or butane torch is a great way to clean up the edges quickly.
Since the acrylic is going to be butted up against a layer of wood, it doesn’t have to look perfect, but I wanted it to look clean crisp. Make sure to remove any rough spots since this can prevent it from sitting flushly on the tabletop.
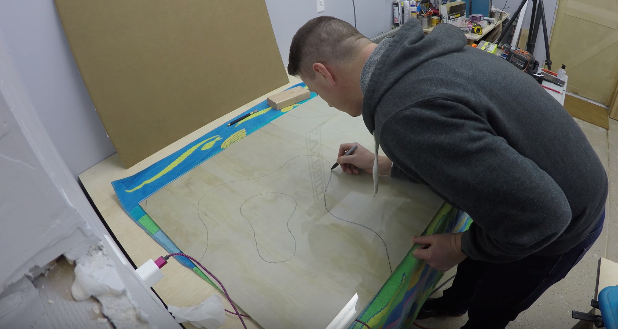
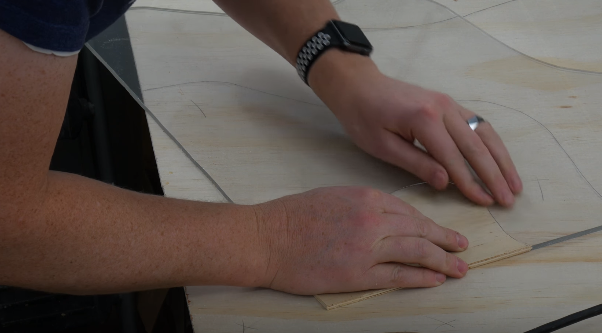
Next we’re going to erase the lines from the top layer of plywood and trace the acrylic cut onto the plywood – this will give you exact lines to match your acrylic up with the .

With the new lines drawn, next we cut our first layer very slowly and carefully to get a great fit between the acrylic and plywood.
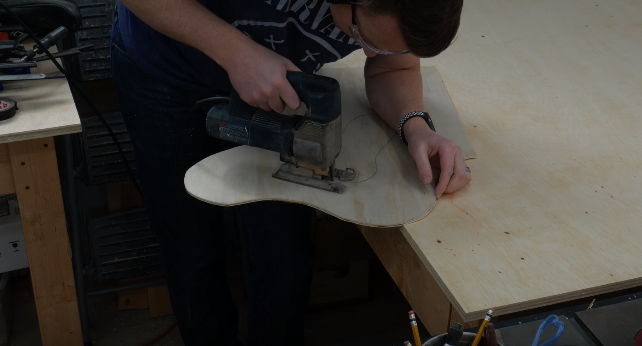
It’s a pretty exciting moment when you see all of the pieces fitting together so perfectly. Very gratifying stuff.
After knocking out the top layer, I began to work on the second, third, and fourth layers. I just followed the lines I created from my projection and cut them all out until they were ready to stack on top of one another. I then proceeded to the next step – dyeing them.
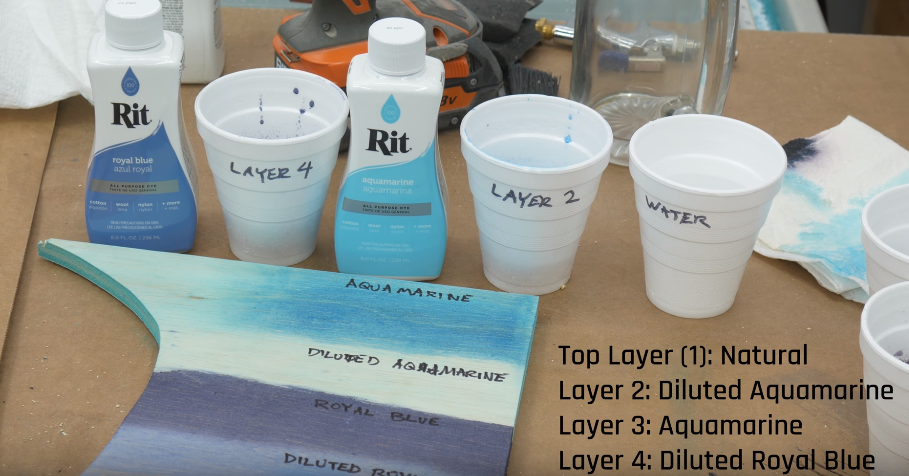
I used RIT all-purpose dye, and it was fantastic. I highly recommend this dye because I tried out powder-based dyes and even dyeing the acrylic but nothing worked as well as the RIT dye on each layer. To obtain the different shades of dye, I just used a combination of the straight-up dye itself and some water, making sure to keep each dye separate.
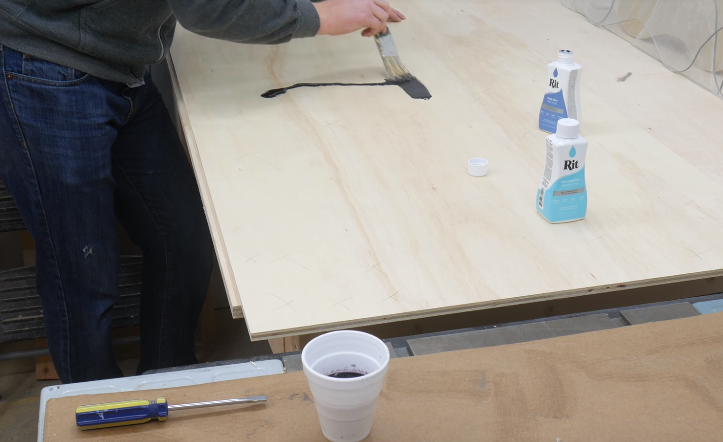
I used the colors aquamarine and royal blue. I lightly traced each layer so that I knew how much I had to cover.
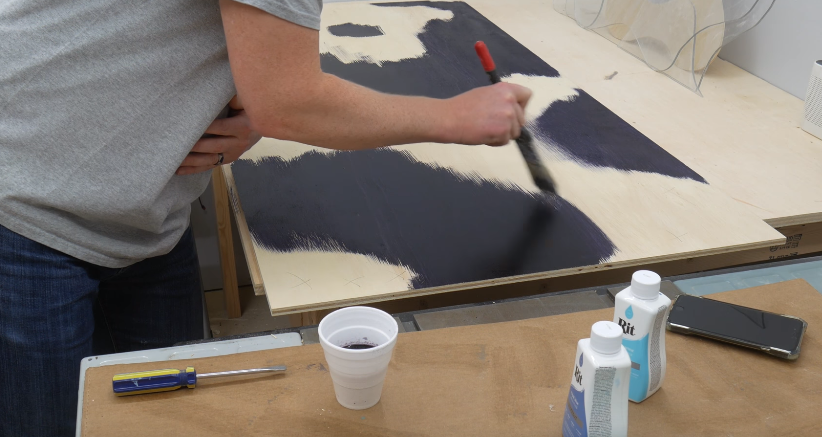
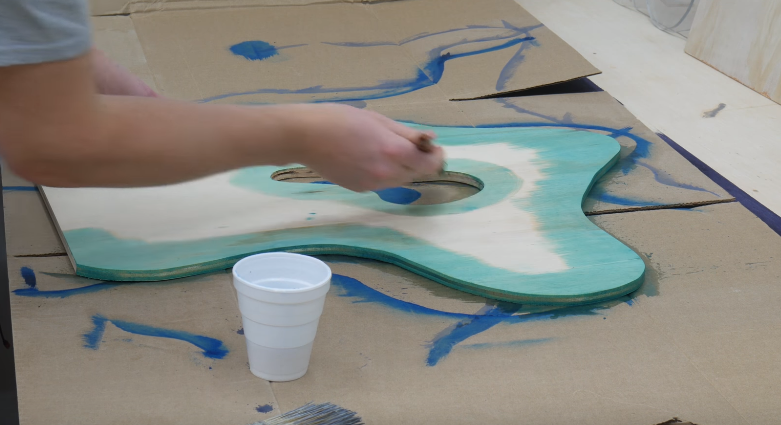
Be sure to remove all the debris and dust from the different layers and then start with a reasonably decent brush and work your way through the dye on each of the layers.
Here are some of the aspects that you need to remember when you’re dyeing the different layers.Make sure to dye the edges, the actual plies that are showing through on the end grain. Since these are very visible, you’ll want to make sure they look just as good as everything else. Also, I suggest that you leave the outer portion alone. You’ll most likely be sanding that off anyway, so I recommend that you only do the inner layers and not the outside square of the table.
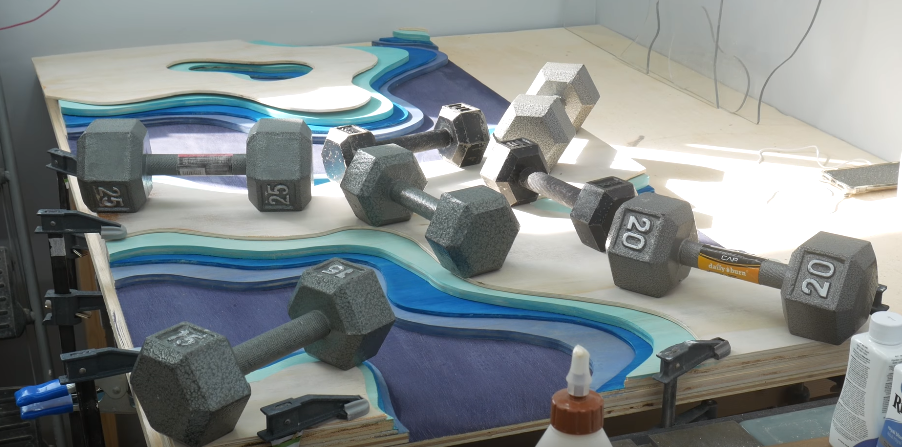
I have to say – I loved how it was turning out at this point. We were ready to glue it up. It’s important that you don’t glue the bottom layer – just the other layers. This will make sense in just a minute.
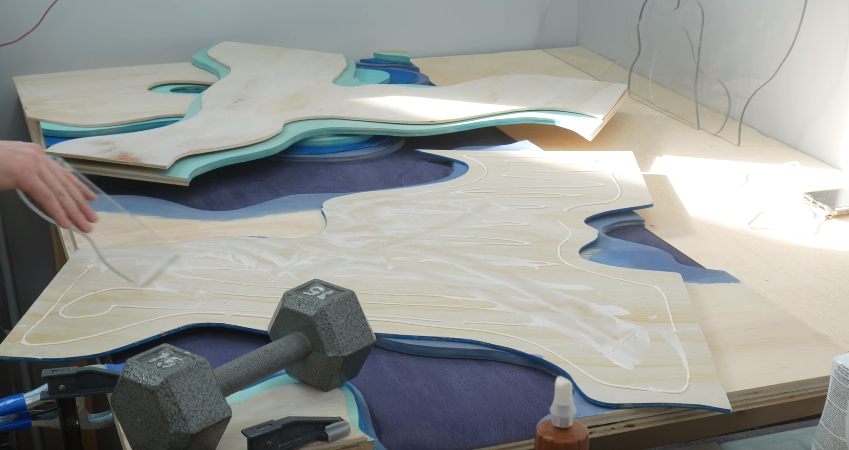
I glued the four top layers to each other and used weights and clamps to hold them down and let them dry.
With those top few layers glued together, I turned everything upside down because I wanted to build the desktop from the bottom up. The reason I did this is to make sure the acrylic and the top layer all fit nice and snug together. The key is to get that surface layer super snug and then use inch and a quarter screws to attache that bottom layer. Be sure to predrill everything and be very careful on which areas you drill, selecting only areas with 4-layers, not the 1 or 2 layer sections.
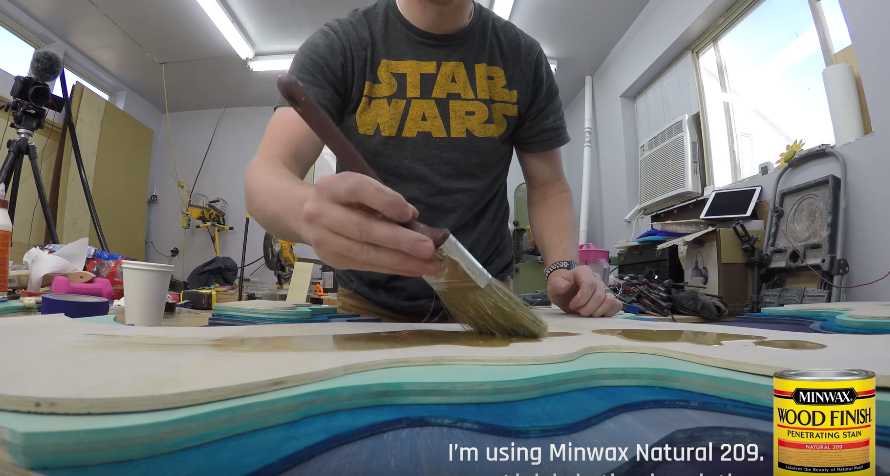
I used a Minwax Natural 209 finish and a heavy coat on the top layer while finishing all of the other layers at the same time. After the first layer dried, I applied a second coat.
The only pieces I still needed were the side pieces of acrylic. I used some scrap pieces of wood and traced the sides. I traced those lines onto the acrylic then used a metal yardstick as a straight edge and then used a plastic cutting knife. The idea is to score the acrylic about half way through and then you can snap it, and you’ll get a nice clean line.
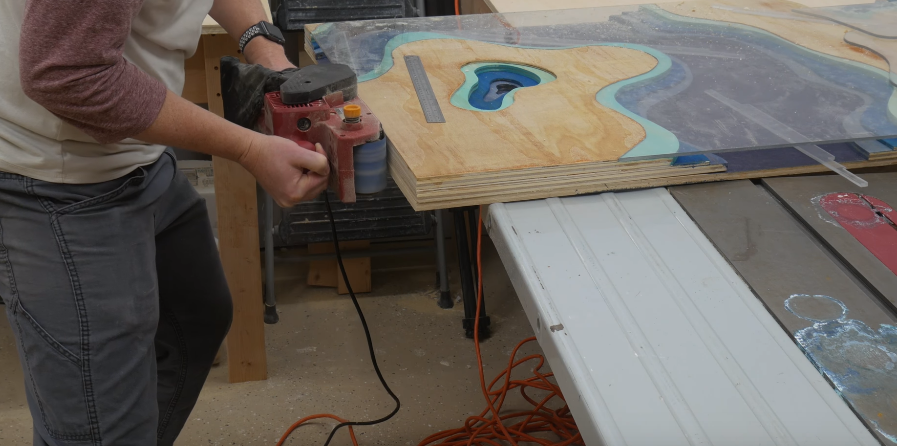
Chances are your outside edges aren’t perfectly aligned. The easiest fix is to use a belt sander to get everything nice and flush. This will smooth out all of the plywood layers and the acrylic as well. You can use a belt sander and/or an orbital sander to go through all the different grits and get that edge nice and smooth.
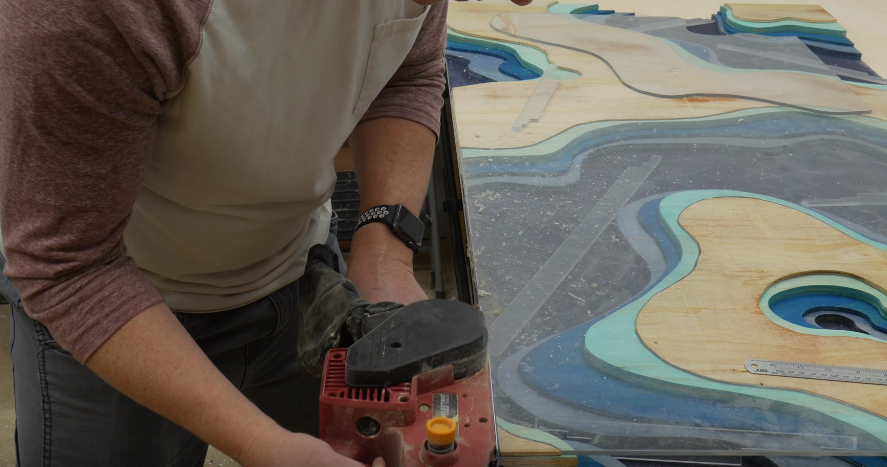
I ran from 60 grit up to 220. I then used my air compressor to blow all the dust and debris off everything. As soon as I got everything cleaned up.
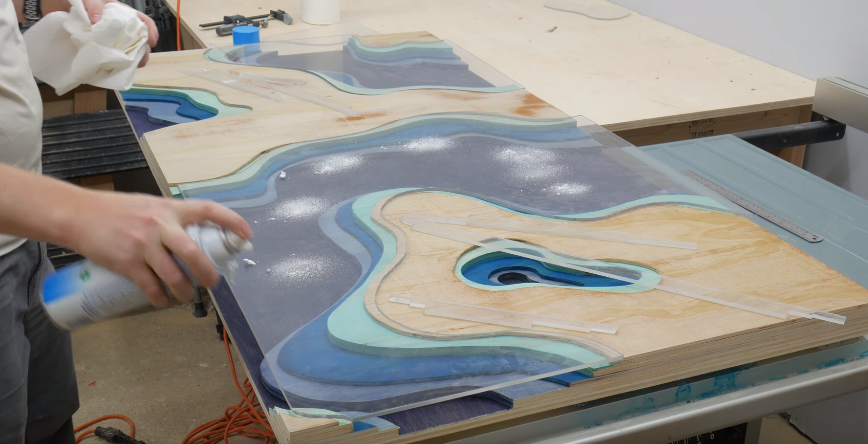
I used a glass cleaner to clean the acrylic thoroughly.
To assemble the acrylic, I used a 100% silicone sealant to glue the wood layers and the acrylic, and it worked really well. With the silicone, I’d recommend cutting the opening pretty small on the tip to have great control over how much you’re applying. I’d err on the side of too little silicone vs too much.
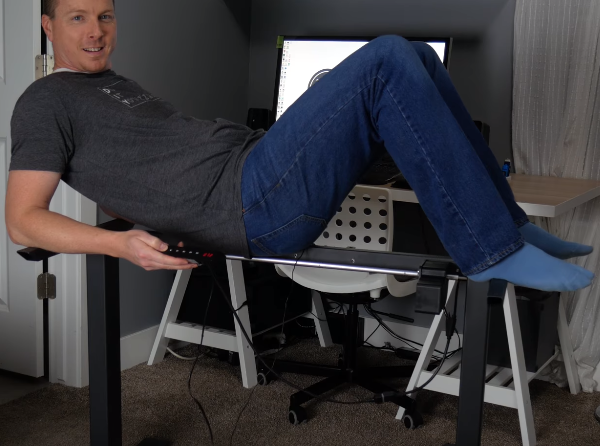
Now for the base, I partnered up with AnthroDesk, who sponsored my video. Anthrodesk makes awesome standing desks and desk accessories and they’re really all about helping people be more healthy while working and playing. They make an awesome motorized standing desk base, which makes it really easy to move your desk from a standing desk to a sitting desk and vice versa, super easily. I even stress tested this to see if it could lift me up and it did so without any issue.
The desk base cost about $300. It’s got four different memory settings. The best part is that you can adjust it anywhere in between and have it memorize where the owner sits.
This project was a real labor of love. It actually took me several months. I learned a ton along the way and I’m super happy with the results.
You can download the layer images below or, if you prefer, download all four images at once as a .zip file. Each layer measures a total of 2′ 6″ x 5′ and the bottom layer (layer 5) is a solid 1/2″ thick uncut sheet – the full 2′ 6″ x 5′.


A huge thank you to our sponsor, Anthrodesk, for making this video possible. Check out their U.S. Website (http://www.anthrodesk.com) or their Canadian Website (http://www.anthrodesk.ca) for all of your sit to stand needs.
Products used in this build:
(these are Amazon affiliate links that cost you the same but help support my videos):
- Anthrodesk Motorized Base: https://amzn.to/2He9i6P
- Anthrodesk ErgoSlant Mat: https://amzn.to/2qcDCGZ
- Anthrodesk CPU Holder: https://amzn.to/2GGLYNO
- Mini Smart Projector: https://amzn.to/2Iyqeo4
- $49 Projector with 4-star rating: https://amzn.to/2IuRJyP
- 30″ x 36″ x 1/4″ Acrylic: https://amzn.to/2GH8sP1 (be sure to check your local hardware store first)
- Bosch 12-tooth Jigsaw Blades: https://amzn.to/2qbEmfu
- Bosch JS260 Jigsaw ($79): https://amzn.to/2EtuwL6
- Bosch JS572EK Jigsaw (the Rolls Royce of Jigsaws): https://amzn.to/2IxreZr
- Ridgid Brushless Cordless Driver Combo (I LOVE these drills): http://amzn.to/2huVIA5
- Drum Sander Attachment: https://amzn.to/2GECpmP
- RIT Aquamarine Dye: https://amzn.to/2IAXYRN
- RIT Royal Blue Dye: https://amzn.to/2EpXzir
- Minwax Natural 209 Finish: https://amzn.to/2qbFEHm
- Plexiglass Cutting Knife: https://amzn.to/2IAYcID
- Sprayway Glass Cleaner (the good stuff): https://amzn.to/2qdhSL1
- Lexel Sealant (to glue the acrylic): https://amzn.to/2uNoUvo
So, what do you think about this project? Do you plan on trying it yourself? Do you have a better idea? Whatever it is you have in your mind, don’t forget to let me know in the comment section.
1 thought on “DIY Ocean Desk – A Standing Desk with Personality”