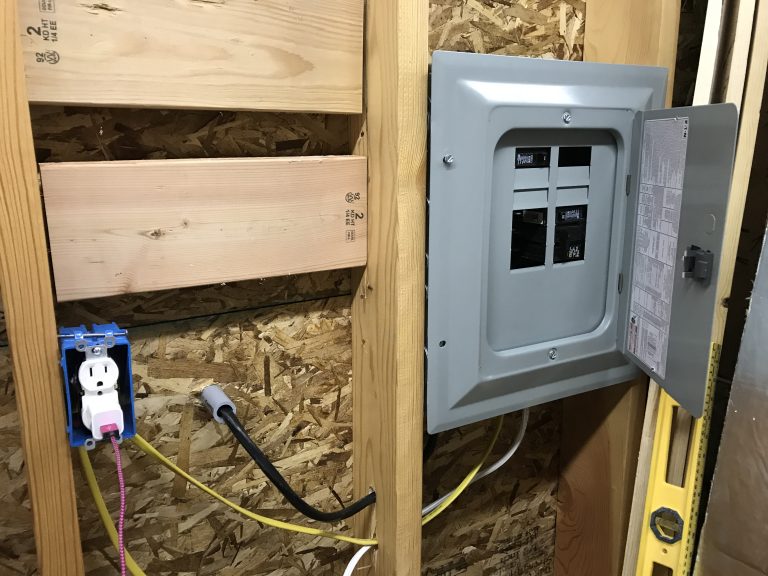
If you’ve been following my other posts about this wood shop, you’ve seen the framing and then the siding, trim and roofing and broken rib come along over the last little while. By that point I only had two big projects left to do outside the shop: running electricity to the shop and building the front doors. I’ve started on the front doors and have come a long way but at this point in the year, it’s starting to get colder and darker so I figured I’d better hold off on the doors (I have temporary doors in place – they’re super ghetto but they do the job) and focus on getting power and lighting into the shop so I could hook up the heating/AC unit and stop running 100ft extension cords from the house for power. This will allow me to build the doors inside the shop and put them up as soon as they’re ready; hopefully in the next few weeks or so. I haven’t yet finished wiring the inside of the shop but I have started, and the shop now has its own power. Here’s how that all went down.
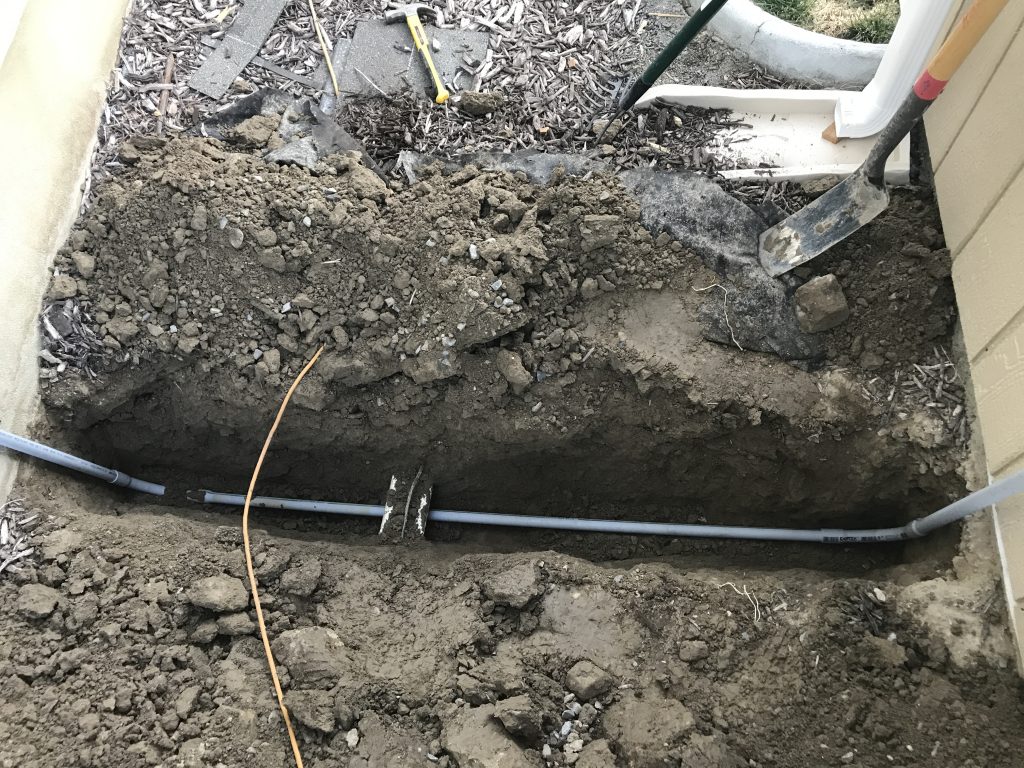
I have a neighbor a few houses up who is a very kind and talented electrician. He coached me all the way through since this was my first time running electrical from a main into a new electrical panel. I did all of the electrical work on our basement and in the basement of our last house, so I’m relatively comfortable with it, but had never done it from the outside source like this. I learned a lot about Rigid pipe vs EMT, amperage ratings, gauges and code involving running longer lines through the attic and underground. The above picture is the PVC conduit that I put 18″ underground for the 6′ from the house to the shop. Feeding it underneath the sprinkler pipes and sprinkler control wiring without damaging those was fun. Come to think of it, I haven’t actually checked to make sure the signal for the sprinklers is still working. I guess we’ll find out in the spring since I’m entirely too lazy to worry about it right now.
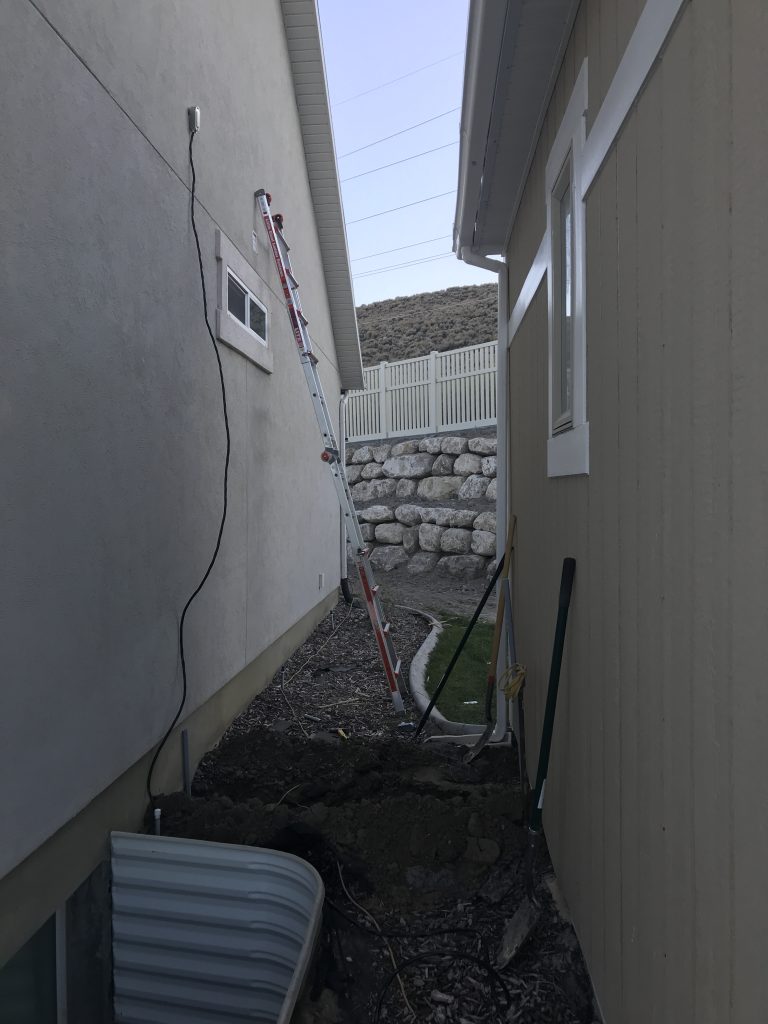
On the top left you can see the 8 gauge Romex coming out of an LB box from the attic, then going to the underground conduit, then it will go back up the side of the shop and in. Don’t worry, I didn’t leave it like this. Just the other night I finished up running the EMT and sealed everything off. It looks all legit n’ stuff now.
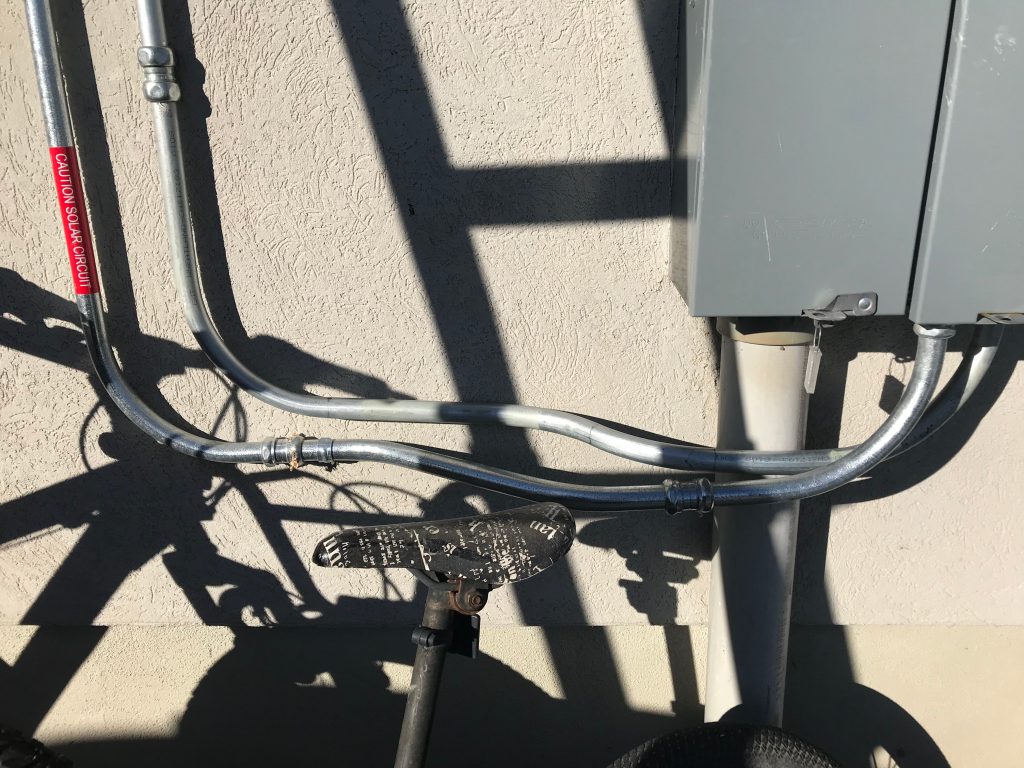
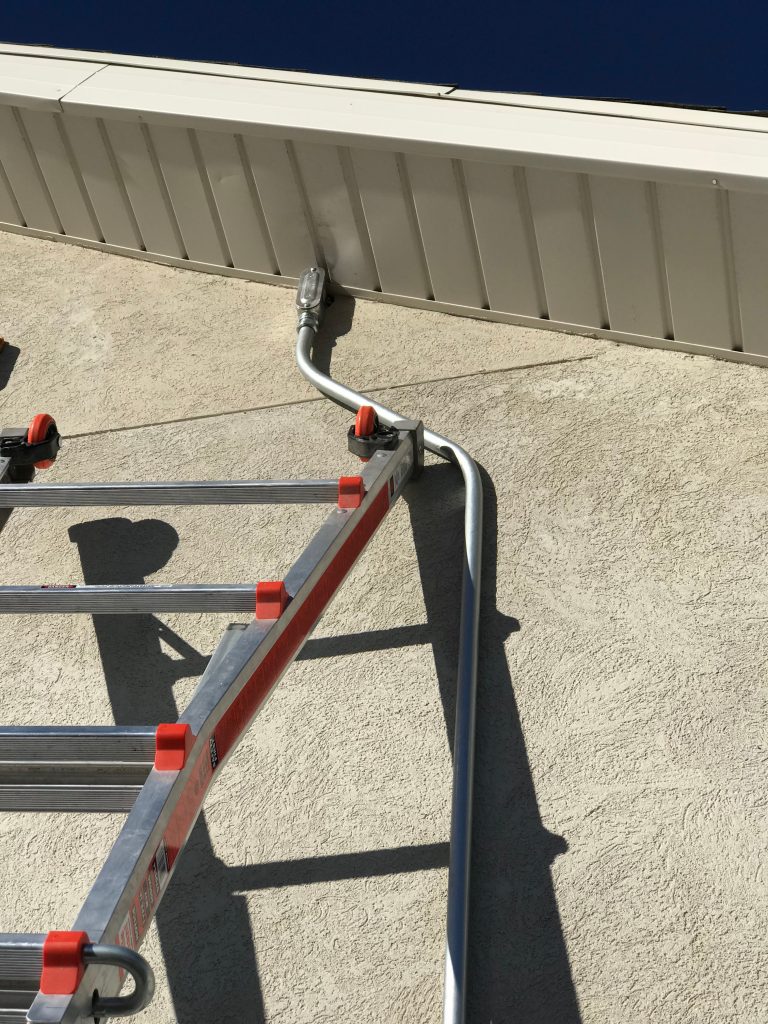
The electrician, Travis, made the bends in the EMT that you see in the back of the above photo. Check out the craftsmanship here. He bent a 90° one way, then a short flange the other way, then straightened it out, then put another 90° to connect it to the panel, all in one piece of EMT. Very impressive. You can see the piece in front, which houses the wiring for our solar panel, was likely done by a less experienced electrician. He opted to do a 90°, then cut it and start a new piece, then did the flange and cut it into a new piece, then did another 90°. Makes me appreciate Travis’ work that much more.
I chose a pretty good time of year for this part of the project because I had to spend a fair amount of time in the attic running the 8 gauge Romex from one side of the house to the other. Despite needing a jacket on outside, it was still pretty hot up in the attic and I was sweating. It still went well and I feel like I have a much better understanding of everything up there now – the trusses, the soffits, the conduits, the framing, the insulation – it’s all familiar because of the work I’ve done on the shop and other projects.
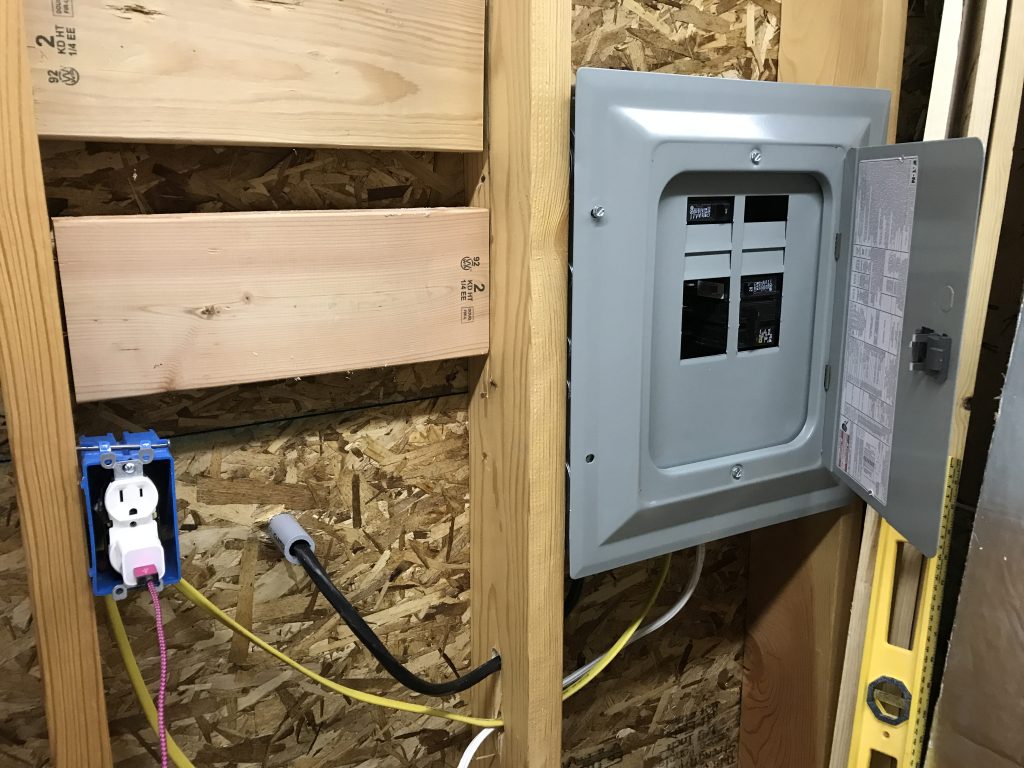
Two nights ago I finished all of the conduit for the electrical into the shop (all the exterior work) and then last night, Ava (my youngest) and I spent a few hours out in the shop hooking up the circuit breaker panel with the goal of getting the first outlet installed as well as one light. I taught Ava how to open the sheathing, strip the ends of the wires and bend the hooks in the exposed ends. She said we were killing the wires when we cut them open so I explained that we were actually bringing them to life. She then called the act of removing the sheathing “zombifying” and the act of stripping the ends “twist and pull” using the wire strippers. She’s ready to wire a house! Anders, our oldest, came out after a while and he helped me install the 8′ fluorescent fixture. It’s got 4 bulbs and runs a high kelvin daylight color, which I love. I’m really not a fan of the traditional yellow-ish “warm” color of light. I’m all about the daylight.
The main connection at the source is a 60 amp breaker that feeds the shop. From there, I put a 30 amp breaker in for the 220v heating/AC unit, then I’ll do a handful of 20 amp breakers for the lights and outlets. My shop is a small 15′ x 15′ building so I won’t really ever have four people running machinery simultaneously or anything. Mostly just me and maybe sometimes one more person, so I think the 60 amp max should be plenty.
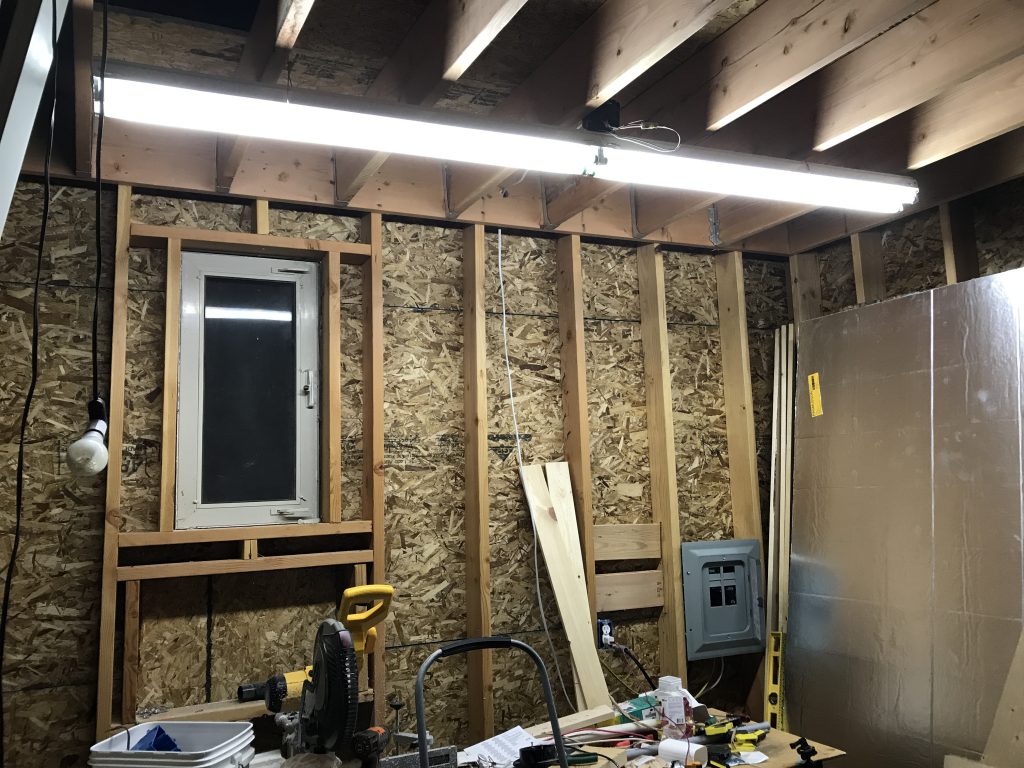
Needless to say, hooking this light up made a huge difference inside the shop. I’ll have to remove it when I’m ready to sheetrock but it’s so nice to have in the mean time. I skipped the light switch since I wasn’t ready to do all that just yet so I have to turn the light on using the circuit breaker. Classy, eh?
An Exciting Moment…
The moment when you’ve got everything hooked up and you go out to the main, flip it on (and your shop doesn’t burn down) and then you go into the shop and flip the breaker on in there (and your shop doesn’t burn down) and the lights come on and the outlet is live, it’s… pretty amazing. I know there are folks who do this every day but for a DIYer like myself, who spends several hours and lots of research making sure it’s been done right, to see it come on for the first time is pretty amazing. Kinda feels like this:

And then you feel a bit like this:

So that’s what I’ve been up to in the shop. I think I’ll run a few more outlets, then finish the doors and install them, then finish off the lights and remaining outlets. I actually bought a fingerprint reading deadbolt for the shop so that I don’t have to carry keys around. That’s gonna be pretty rad. Stay tuned for more posts!
Much love,
DIY Nils

