

Holy Schneikes! It’s been months since I blogged about the shop and it’s come a long way since my last post. Since finishing the framing, I’ve worked on the next steps, which are many:
- Wrapping the structure in OSB
- Roofing: Applying OSB Sheathing to the roof, then tar paper, drip edge and shingles
- Wrapping the structure in moisture-resistant house wrap
- Installing all of the windows
- Putting up the LP SmartSide Panel Siding
- Installing trim around windows, doors and panel joints
- Installing soffits and fascia
- Installing gutters
Wow, now that I write that all down it seems like a ton, and it has been a lot of work but it goes fairly quickly when you’re in the thick of it. It’s really taking shape at this point and it’s starting to look like a real structure (I keep thinking of Pinocchio in Shrek saying “I’m a real boy!”). I’ve never done most of this before but, like most any construction project around the house and yard, if you take it one step at a time and do some homework it’s really not too bad. I’ve made some poor decisions along the way, broken a rib and really learned all kinds of great little tips that I hope to share with others on my YouTube channel. Fortunately, none of my blunders were serious enough to really set me back much. I walk away from this with a slight lean to one side (thanks, rib!) and several lessons learned. But enough about all that, let’s see the progress!
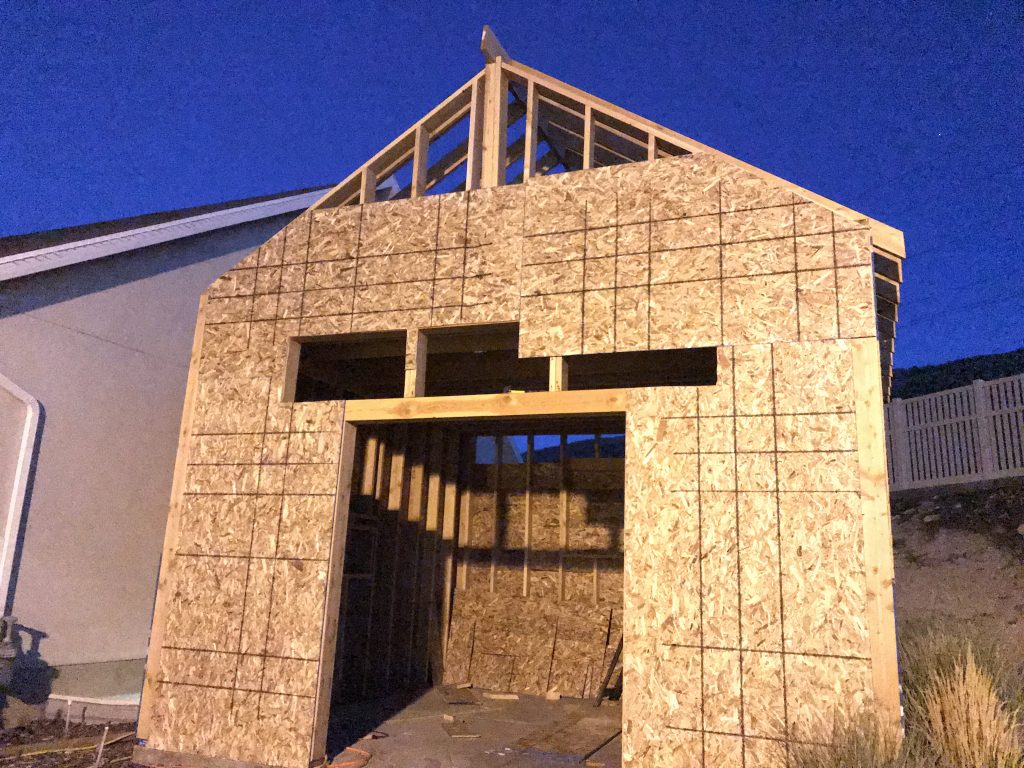
This is what the shop looked like as I finished almost all of the framing and then started wrapping the building in 7/16″ OSB. This reminds me of putting sheetrock up inside a home – you go from open framed walls to closed off “I can start to see what this thing is going to look like” walls. It’s pretty exciting.
It was right around this time that I was putting the loft flooring in. I used 3/4″ OSB for that and it was heavy stuff but made the floor pretty sturdy. I decided in my infinite wisdom to cut every flooring piece to size and then lay them all out and tack them all down once they were all in place. It was a good concept except for the fact that it meant I’d be walking on unsecured pieces of OSB 9 feet (3 meters) off the ground.
As I walked up there, one of the pieces of flooring came loose and gave way under me. It crashed to the concrete floor below and I went down like a sack of bricks, but fortunately I was caught by my leg and my rib, so I didn’t fall all the way through, which could have been really bad. I basically landed on my lower right rib and it snapped right away. I knew something was wrong but I thought maybe I’d be ok. After moaning like a little girl for a minute or two I tried to get up and it hurt a ton but I thought that maybe I had just smacked it pretty good but would be ok. I even got onto the ladder and made my way down and then into the house. I thought to myself “If I can go down a ladder and walk around, then I’m fine, right?” Wishful thinking. I sneezed as soon as I got in the house and it felt like somebody slapped a spike into my side. I knew it wasn’t just a bruise.
It was dinner time and then I had to pick Anders up from band practice and then drop his friend off. Driving with a freshly broken rib wasn’t great but it’s doable. My wife then took me to the instacare where I got x-rayed and saw the break. We were told that nowadays they don’t really do much for broken ribs – just some pain killer. If you’re wondering what a broken rib is like, here’s my experience:
Weeks 1-2 with Broken Rib
- Walking hurts
- Ibuprofen 24/7
- 3 Allergy pills/day to prevent sneezing (I normally sneeze a lot)
- You learn to completely suppress sneezes. It’s sort of an entire-hand-over-the-face-and-aggressively-swallowing kind of deal I went about two weeks without sneezing but had to block 5-10/day
- Coughing is almost as bad as sneezing and sometimes can’t be avoided. I advise against breaking a rib while sick.
- Laughing is the third most painful thing but not nearly as bad as coughing or sneezing
- No yawning, because it expands your lungs too much
- Sitting is ok mostly
- You realize all of the things that twist your torso and, as a result, really hurt. The worst offender is wiping your bum but other painful tasks include looking at the kids in the back seat while driving, stretching, scratching your bum (sensing a theme here?), lifting anything over about 8 lbs (a gallon of milk felt like an olympic event) and probably a dozen other things
- Sleeping sucks. You don’t rest well and your only option is to sleep flat on your back. No side sleeping, no belly sleeping. No es bueno.
- Exercise is out of the question. I’m not a big exerciser but it’s not even a possibility with a broken rib. Waaaay too much movement for that.
- Lots of explaining to people why you look like you just pooped your pants and are walking/sitting/standing funny
Weeks 3-6 with Broken Rib
- You hit a turning point somewhere in that second week (ideally) where your body heals itself quite a bit
- After several weeks you can sleep on your side and it’s amazing
- You stop walking like a gimp but still have to be careful with every movement
- You eventually get back to almost normal and, by the end of six weeks, feel pretty good
Weeks 7 & 8 with Broken Rib
- Broken rib? What broken rib. You really only notice it when there’s pressure right on it or if you get smacked there with something.
- Almost time resume basketball or other sports
- Running is ok at this point
- Time to update your blog and share your broken rib story

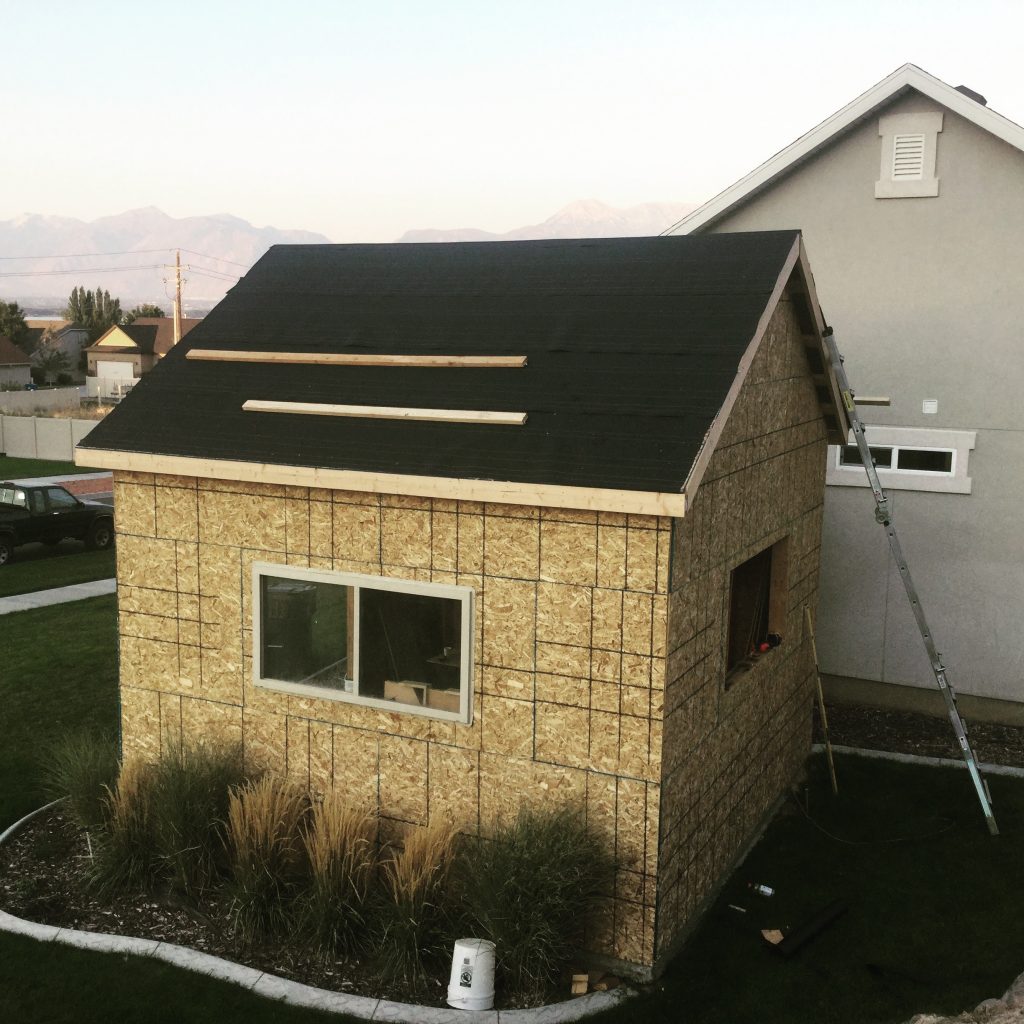
While my rib was healing, my good buddy, Scott, came over and, along with the help of Scott’s son, my Dad and another buddy, Ben, finished framing the roof, including the overhangs. He then finished up the loft floor that I was working on before “the incident” and laid out the OSB on the roof and put up the tar paper. This left the shop in a good state where it could handle some rain and such without me worrying about water damage, at least for a couple of weeks. That crew of guys that came over was a real life saver. They spent about 8 hours at my house helping with all of this so I’m forever grateful to them for that.
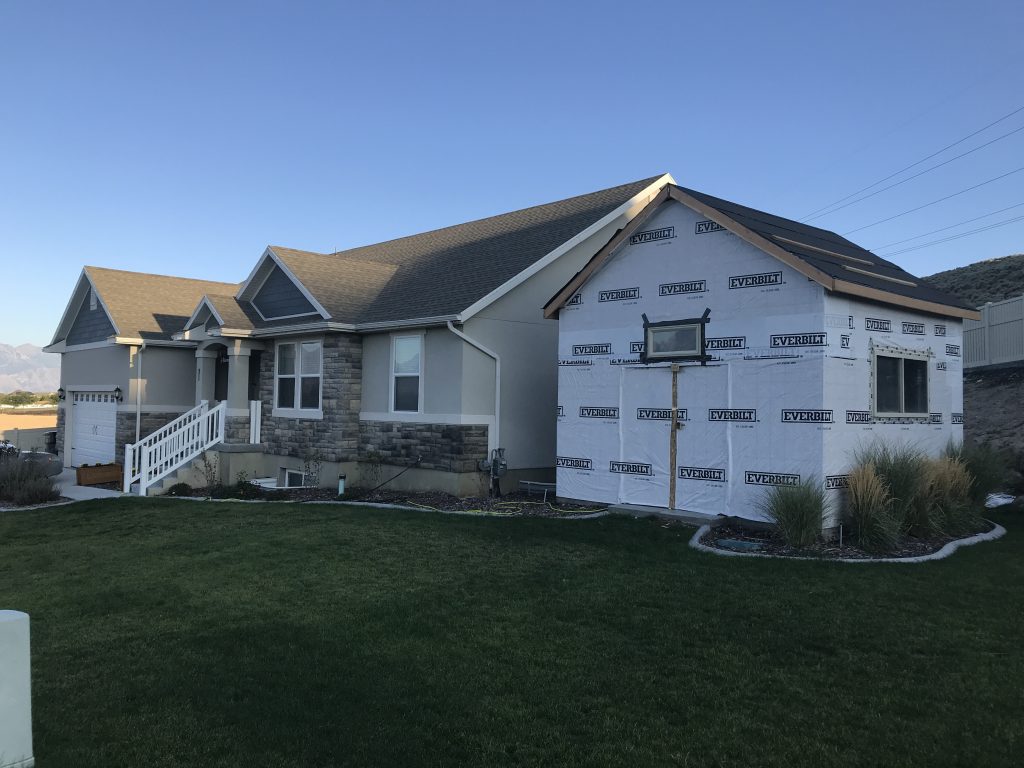
Sometime around there I was feeling good enough to do some work again, as long as it wasn’t anything too crazy. I bought some house wrap and wrapped the entire structure with it. I used a hammer tacker and got everything wrapped up real-nice-like. Originally I was going to use tar paper to wrap the shop but I determined that it would be more work and more money and I also discovered the 8 or 9 foot rolls of house wrap and they weren’t too expensive. I used less than one roll to wrap the shop.
At this point I wanted to start storing my tools in there so I didn’t have to make 250 trips back and forth from the garage. I decided to use a couple of sheets of 3/4″ OSB to make some temporary doors, then I rigged up some handles, got some hinges and put them up. I extended the house wrap onto the doors so it completely covers the hinged areas and it works out great. I’m building the doors inside the shop so these work really well as temporary doors.
As soon as it was wrapped I installed the windows, which involved a whole lot of sealing tape. There are three windows on the front (I had only installed one in the above picture), a large window (3′ x 5′) on the west side, another large one on the back and a smaller window on the east side, between the shop and the house.

Finally I got around to roofing. I spent a good chunk of a Saturday doing one side and then tackled the other side over the course of a couple of week nights. I started by installing drip edge along all sides and then used a starter strip (a lazy man’s way to get started) and then worked my way up. Roofing can be a bit scary depending on the pitch of your roof, but luckily I stayed safe. I happened to own a roofing nailer, which made things much easier.
This is me finishing up the second side. With the windows installed, the house wrap on and the roof in place, I was ready to work on siding, which is kind of like the icing on the cake.

Here’s how things are looking at the moment. I started the exterior by doing the siding, which went pretty smoothly. I’m using SmartSide 48 in. x 96 in. Strand Panel Siding, which worked out really well. It has a 5 yr/50 yr warranty from the manufacturer, which instills some level of confidence, and it’s pre-primed, so even though we likely won’t paint it this year, it still looks pretty sharp. It’s actually almost the exact color of the vinyl windows.
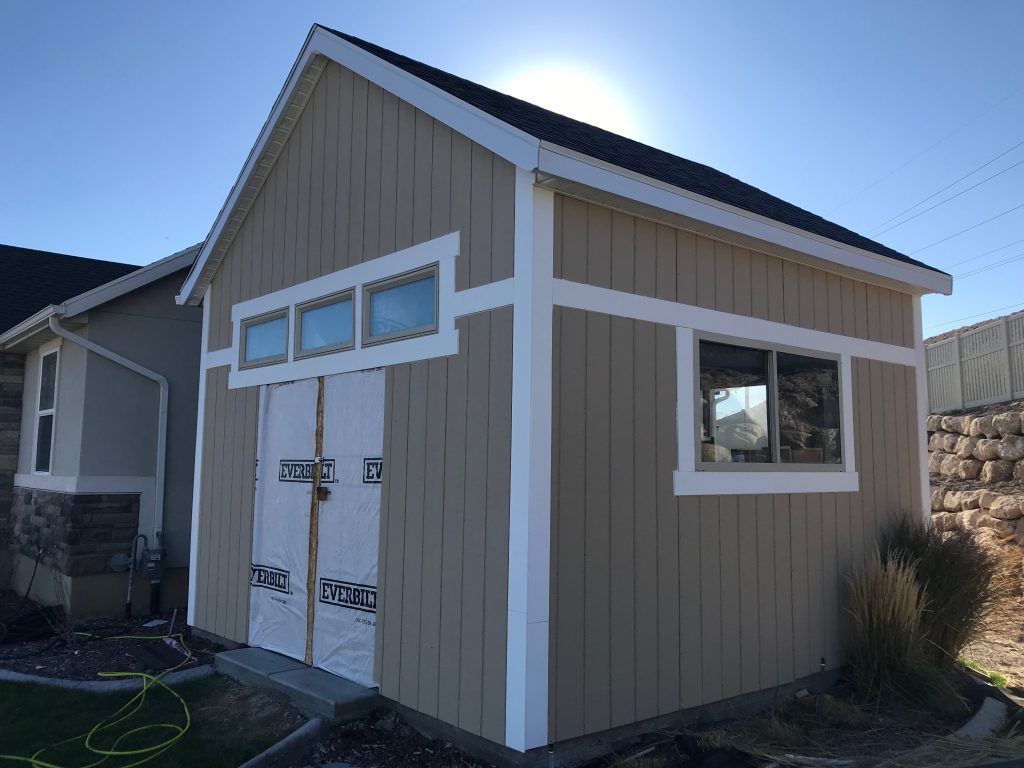
With the siding up, I installed the metal fascia and vinyl soffits. No maintenance! I installed the soffits using J channel and it worked out really well and was relatively easy. It made a huge difference aesthetically and I love how much it finishes up the roof area. After that I put on the trim and we opted to go with some fairly expensive 5 1/2″ wide PVC trim. It’s only 5/16″ thick but it has a wood grain and requires no maintenance. Sensing a theme here? It looks great and, again, really brings the whole thing together. I emulated the trim style of the house so that it ties in nicely – sort of a Craftsman look.
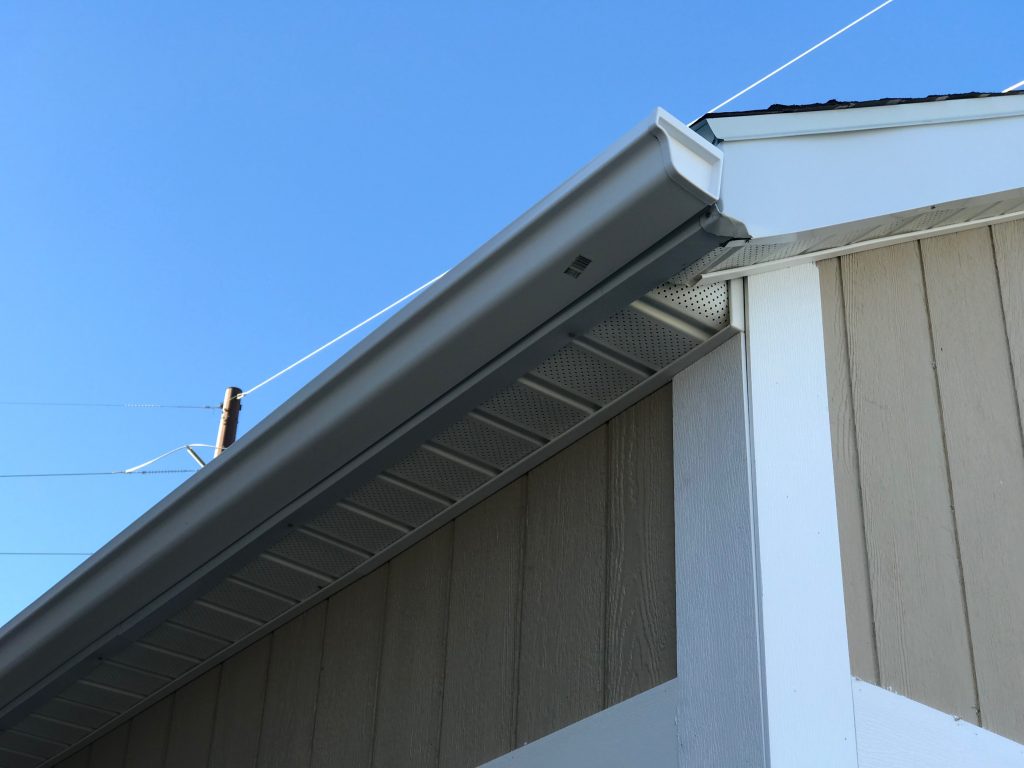
Lastly, I put up some gutters. I’ve only done one side so far but the other side has plants underneath so I think they’ll be fine for a little while. I used vinyl gutters, which were super easy to work with. It took me about 45 minutes to put up the gutters and the downspout for one side, which is about 16′ long.
That about wraps up the shop for now (see what I did there?). Things are looking really good and I feel just about ready to get started on the interior. Can’t wait to get electrical, heating, air conditioning, insulation, drywall, paint and then a whole lot of shelving work benches, no matter what the weather is outside.
Até logo,
DIY Nils